Arial is the default font in Google Slides, which means whenever you create a new slide, the Arial font will be chosen by default.
However, not everyone is a fan of the Arial font, and one might want to change the font or perhaps change the default font so that every new slide has it.
Google was aware of this situation and hence has provided a feature that allows you to set a default font.
However, do note that the new default font will only be applied to the current presentation. It does not have a have a global setting for all new presentations.
Here’s how to change the default font in Google Slides:
Step 1: Open your Google Slides presentation

The first step is to open your Google Slides presentation.
If you already have the slide open, you can skip this step.
And if you want to create a new slide, simply open a new tab, enter slide.new in the address bar and press enter.
Now, proceed to the next step.
Step 2: Go to Slide > Edit theme
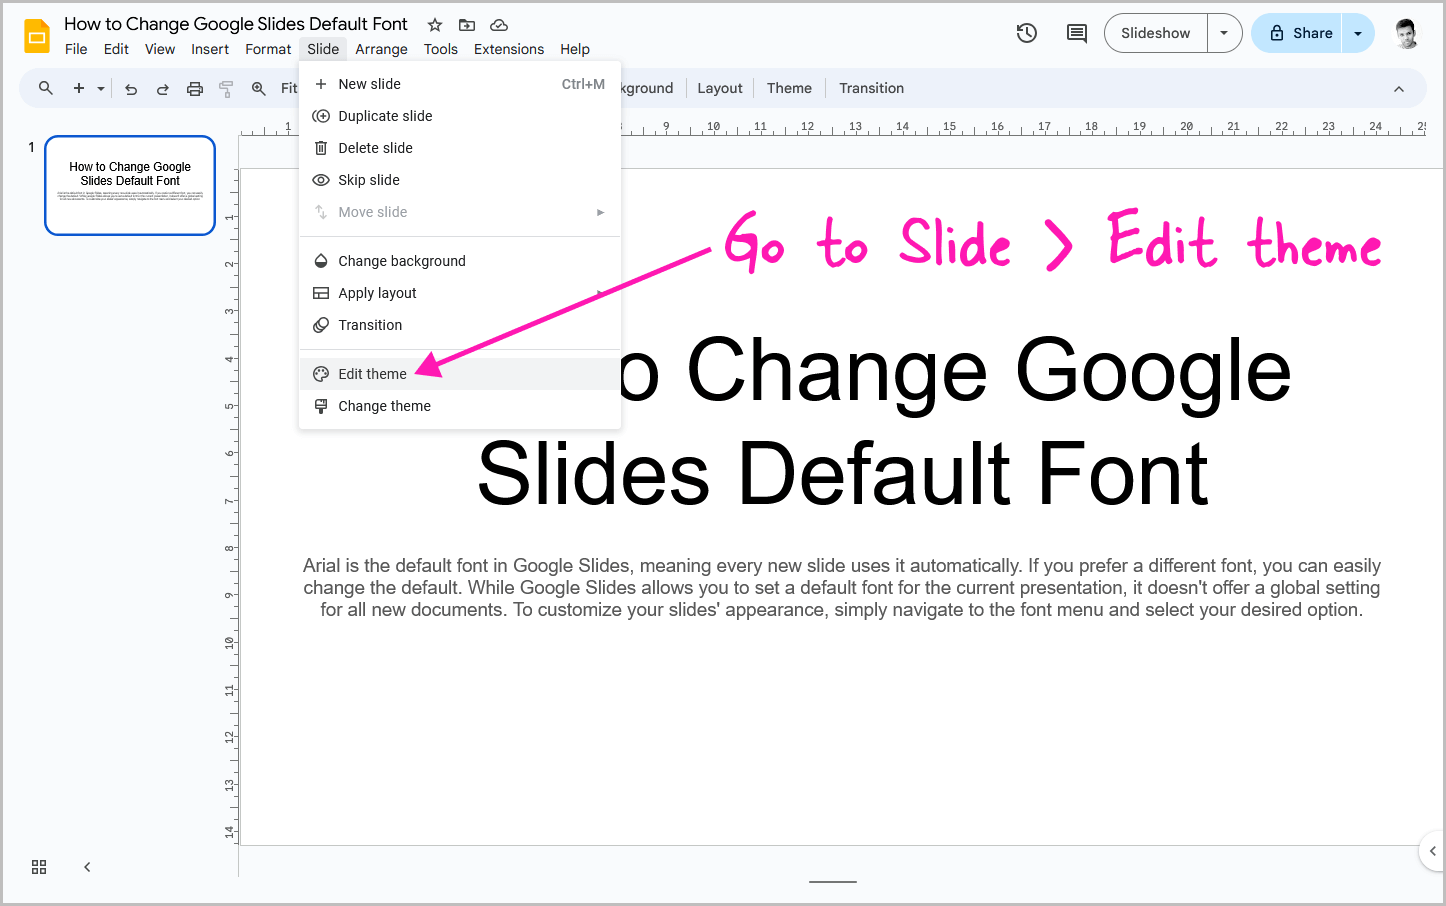
Now, click on the Slide option from the horizontal menu located at the top of the slide.
You will now see the Slide menu with a list of options.
Select the Edit theme option and proceed to the next step.
Step 3: Click the slide located under the title “Theme”
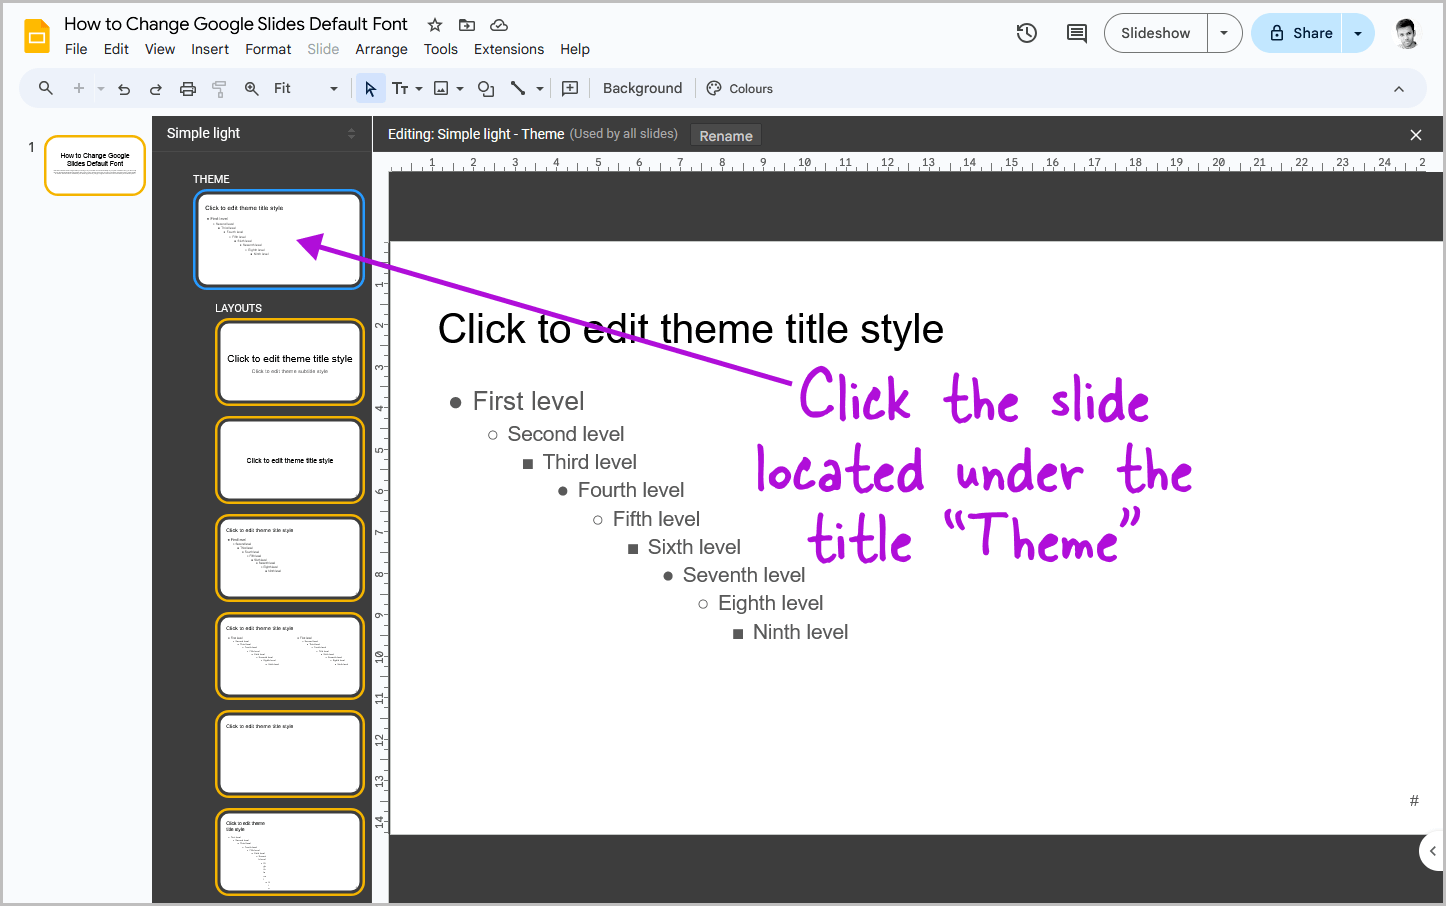
You will now see the current theme panel on the left side of the page.
Here, you will see the name of the current theme at the top.
Below that, you will see the Theme section, and below it, you will see the Layouts section.
Click the slide that is located under the title “Theme,” as shown in the screenshot above.
Step 4: Select the title placeholder
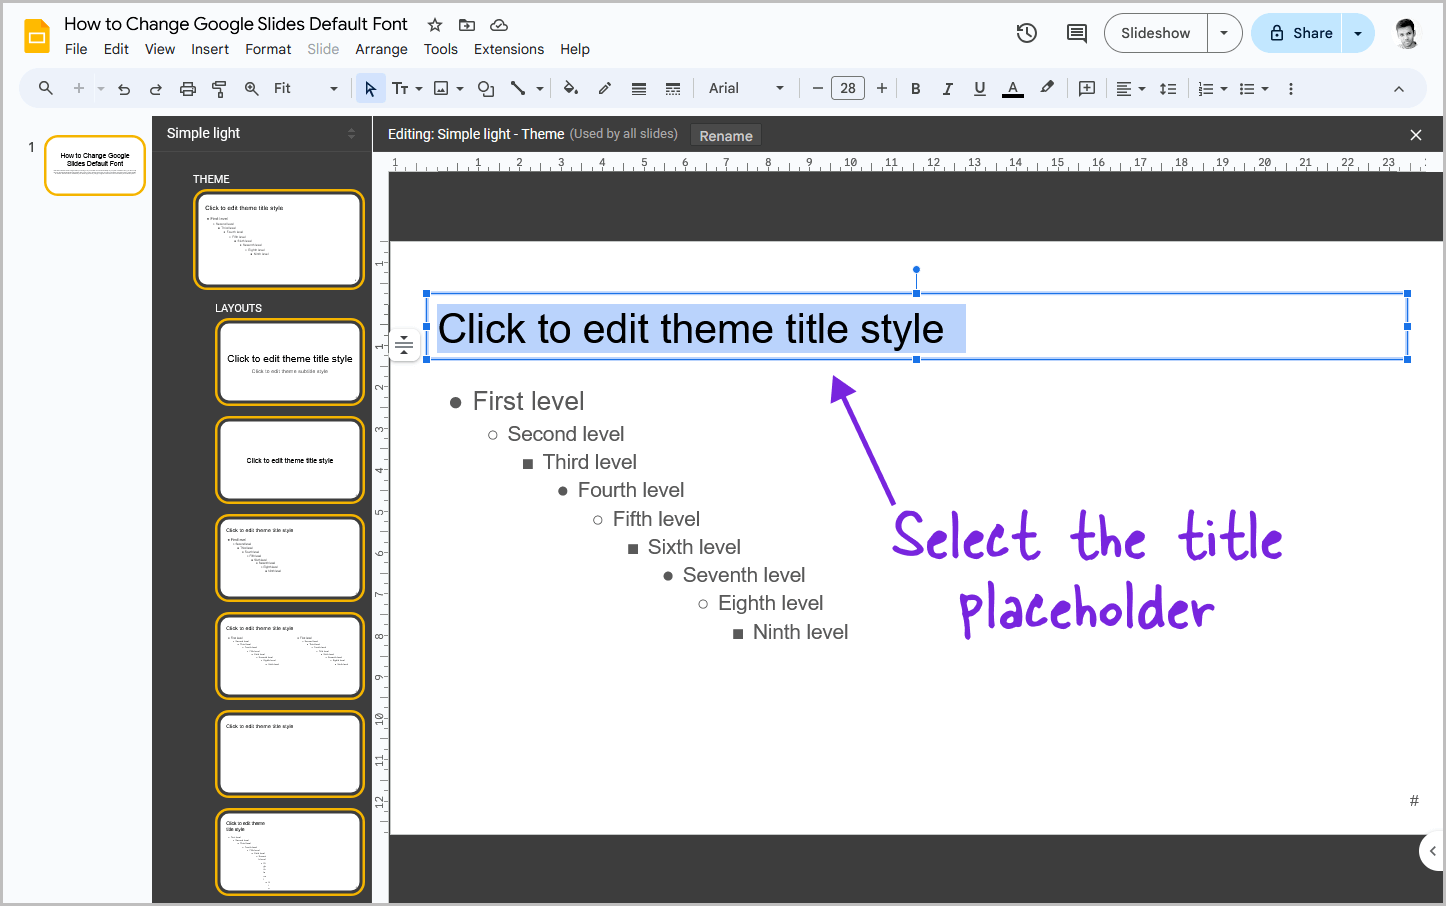
In this step we will be choosing the default font for the title. You cannot change the default font for both title and body at once.
So first, select the title placeholder in the slide. Simply click on the “Click to edit theme title style” text to select it.
Make sure the entire text is highlighted with a blue color.
Step 5: Go to the “Font” menu and choose a font
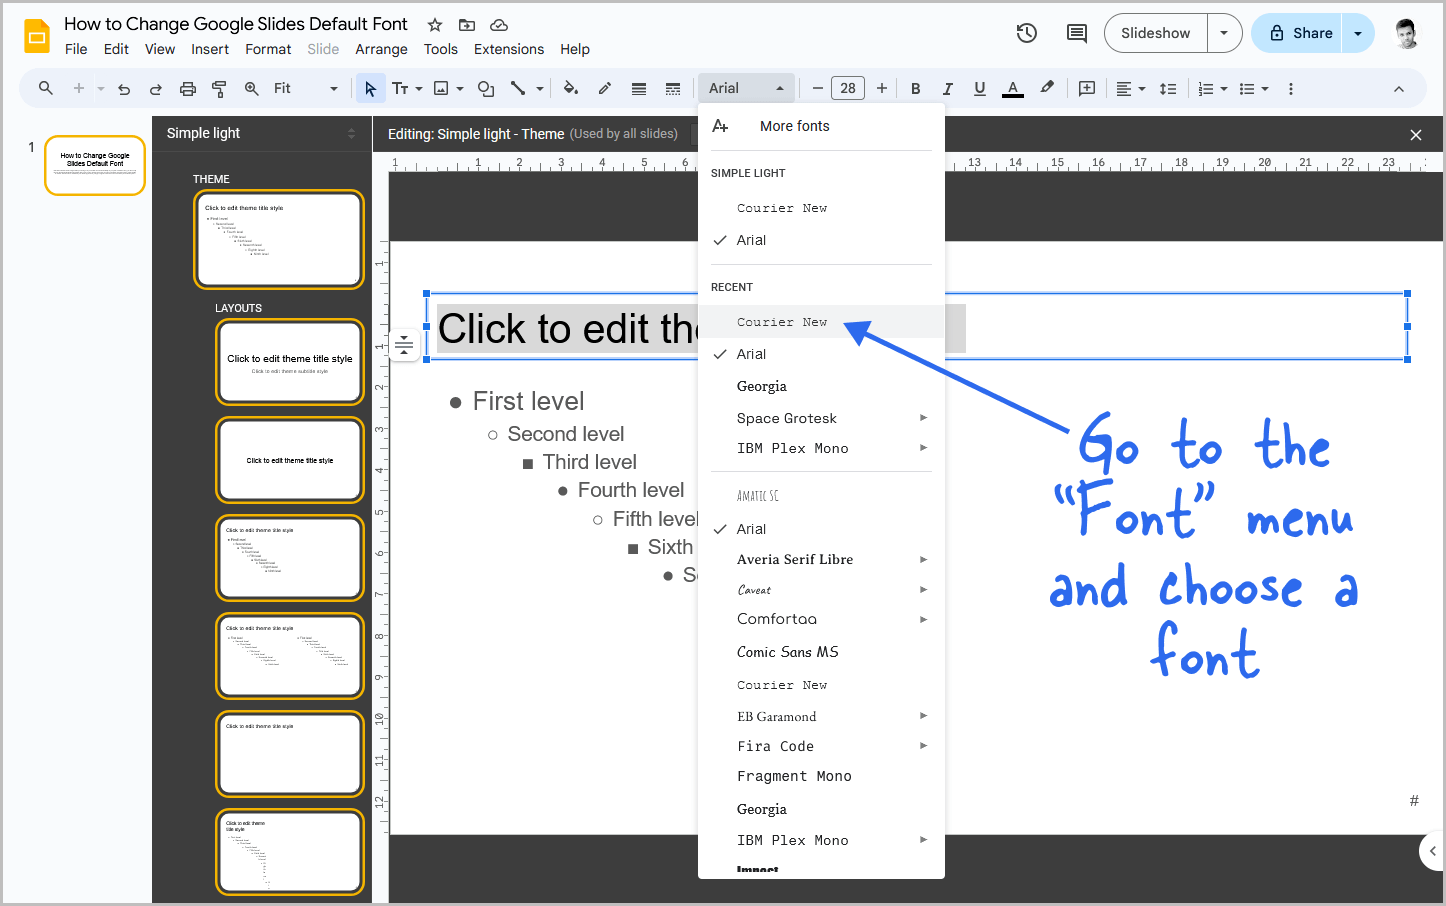
After selecting the title, click on the Font menu from the toolbar and choose your new default font.
You can even click on the “More fonts” option located on the top of the Font menu to access the complete library of fonts in Google Slides.
The title font style will be updated; you can now proceed to the next step.
Step 6: Select the body text placeholder

Now, click inside the body text placeholder and press Ctrl+A to select every text inside the placeholder.
Make sure all the text is highlighted with a blue color, as shown in the above screenshot.
Step 7: Again, go to the “Font” menu and choose a font
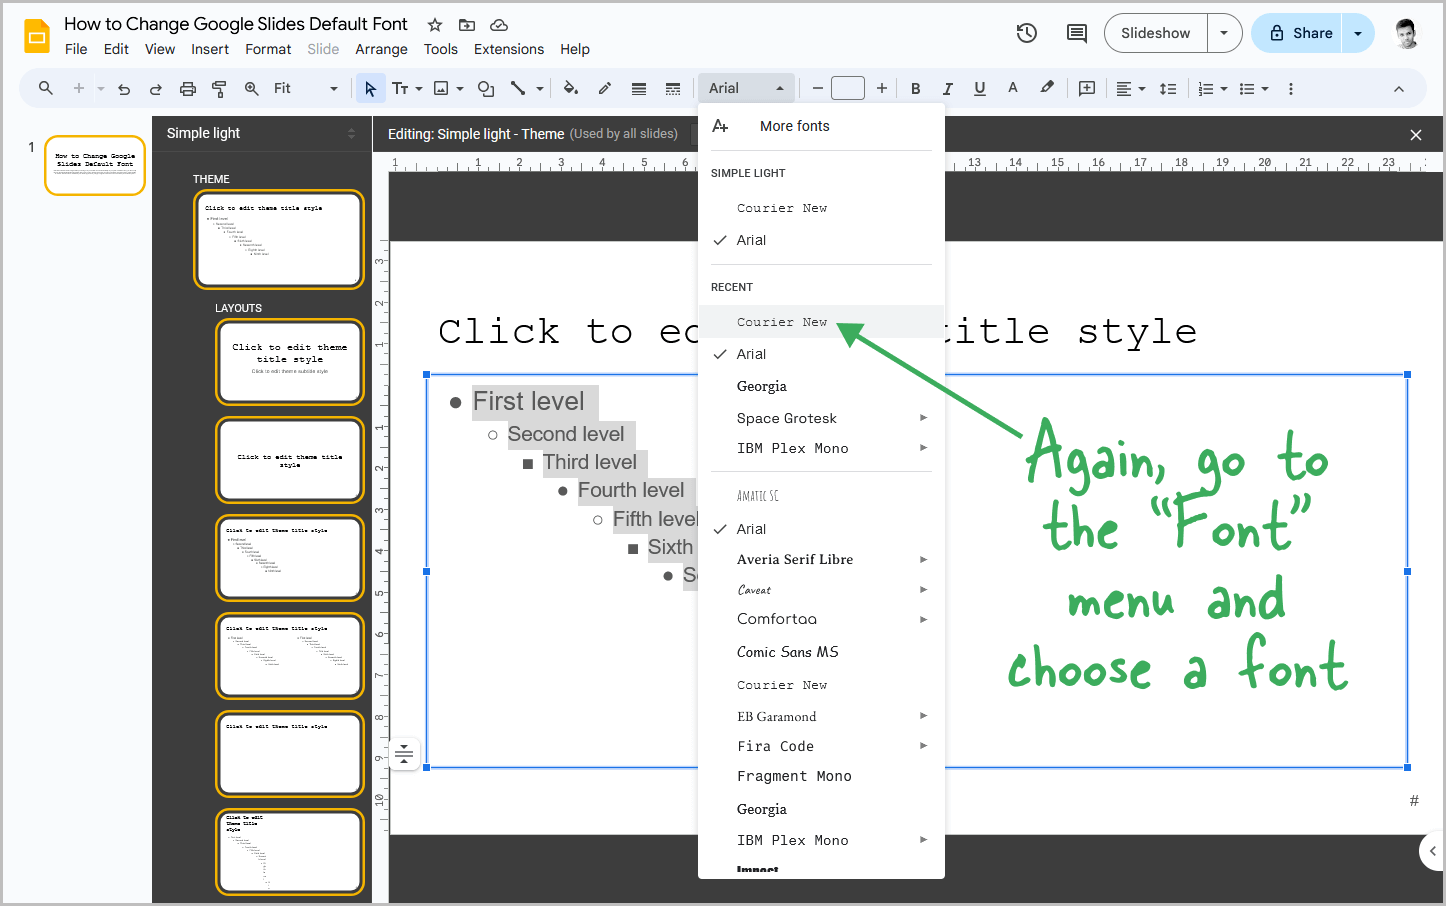
You can now choose a default font for the body. Simply click on the font menu, like you did in the fifth step, and then choose a default font.
You can proceed to the next step.
Step 8: Go back to your slide to review the changes

Now that we have changed the default font, it is time to review the changes.
Click on the slide on the slides panel to open your slide and close the “Theme” panel.
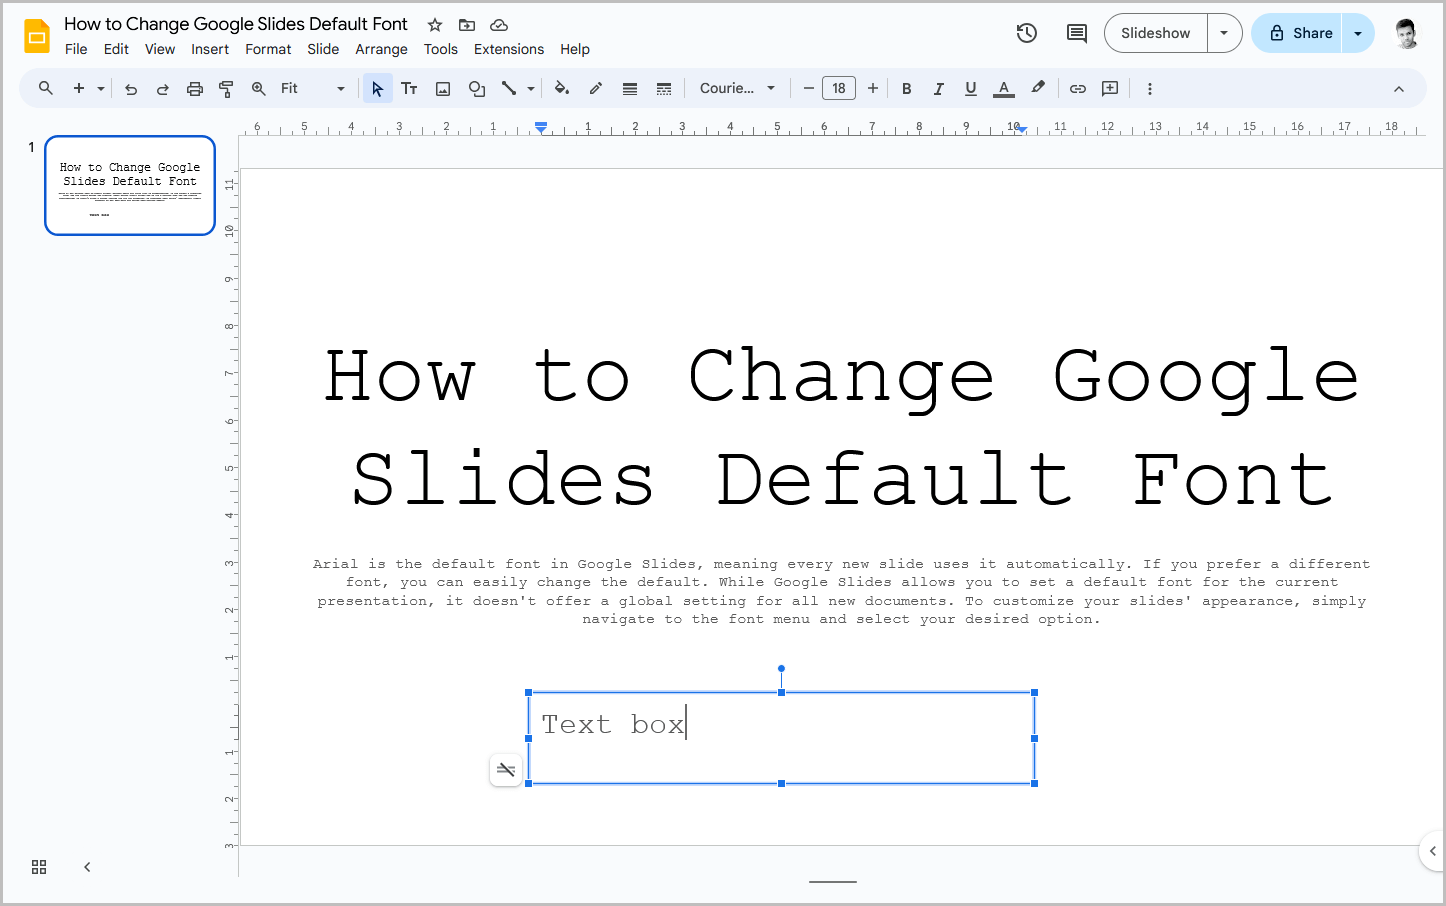
You should see the font in the slide has been updated to the new default font.
If you add a second slide, the new font will be applied by default. Similarly, any text box you insert will now use the new default font.
You can also follow these steps to change the font on all slides at once.


