I recently created a Google Sheets template and wanted to add a file into the cell.
It was a budget template, and it had an invoice column where I wanted to upload all my invoices in PDF format.
However, I couldn’t upload them directly to the sheet.
For a while, I used to convert PDFs to JPEG or PNG files using a free online tool and then would go to Insert > Image > Insert an image in the cell and then drag and drop the image file.
However, this process took a lot of time since I had hundreds of invoices. Also, I wanted to make sure the PDF file was downloaded when clicked on it.
Finally I found a simple solution for this using which you can upload any file (PDF, MP4, MP3, ZIP, etc.). In this tutorial, you will learn how to insert a file into Google Sheets.
To Insert a File into Google Sheets:
Step 1: Make a new folder in Google Drive and give it a relevant name
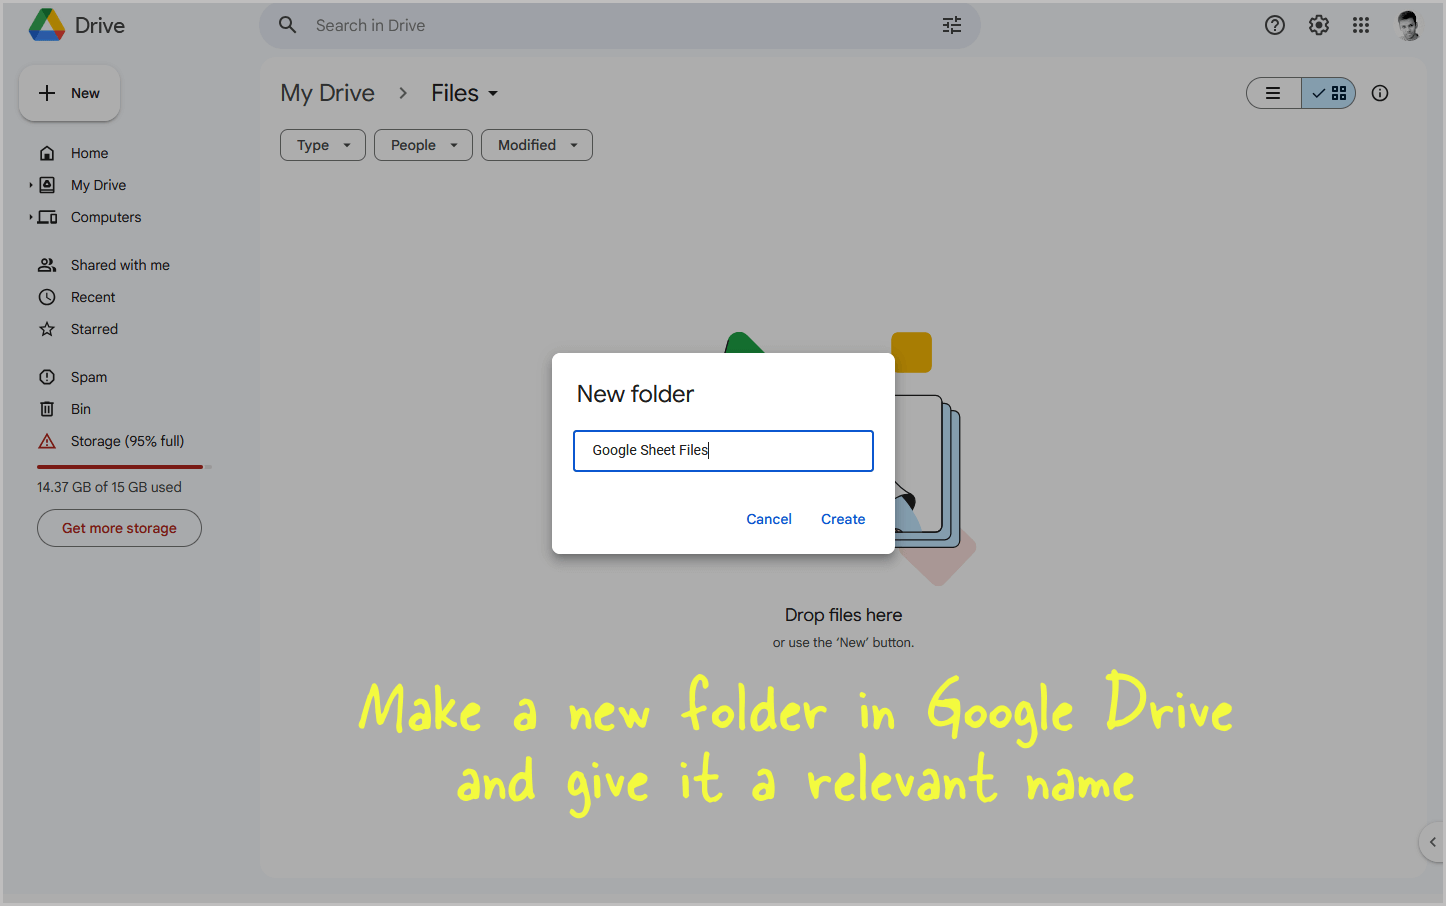
To begin, go to Google Drive.
Now, select the My Drive option from the left panel. Right-click and select New folder. Give this folder a relevant name.
You can now proceed to the next step.
Step 2: Add the file(s) to that folder
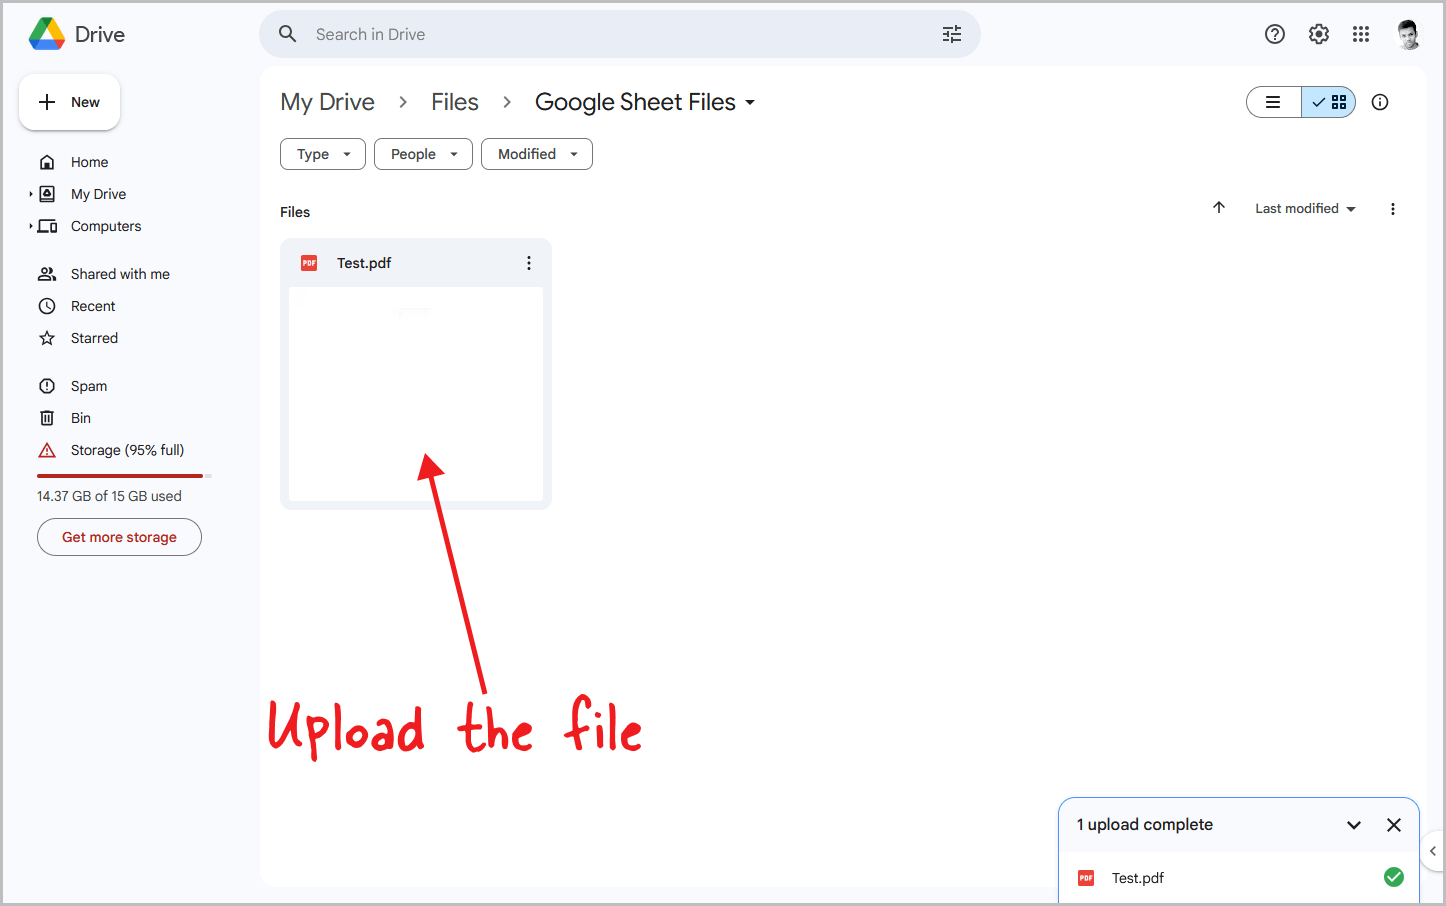
Next, drag and drop the file(s) you want to insert into Google Sheets into this newly created Google Drive folder.
Step 3: Right-click on the file you want to insert
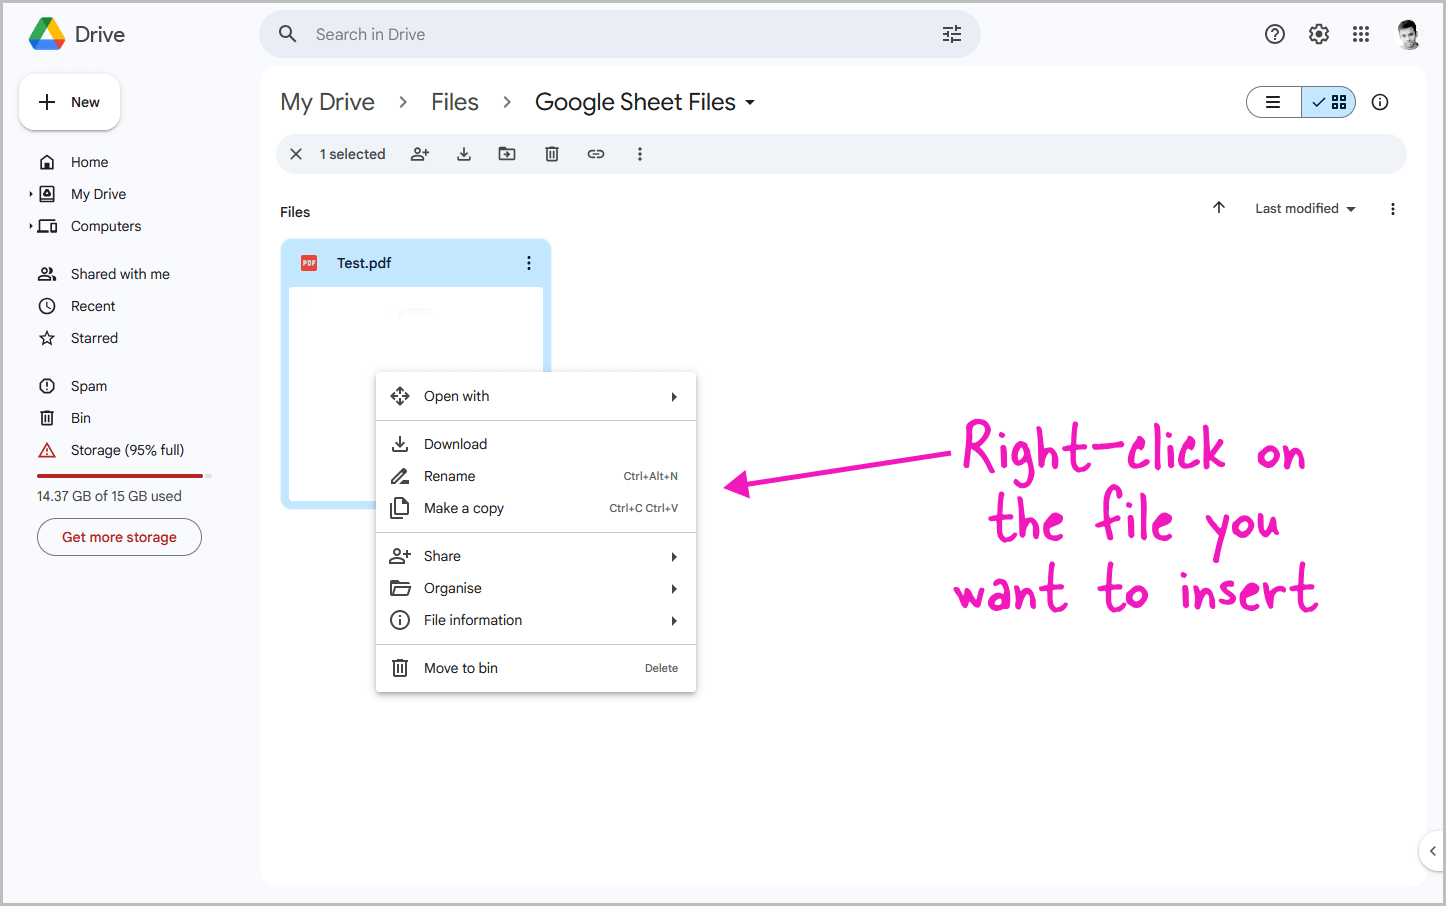
After the file is uploaded, right-click on it to view the file options.
Step 4: Go to Share > Share
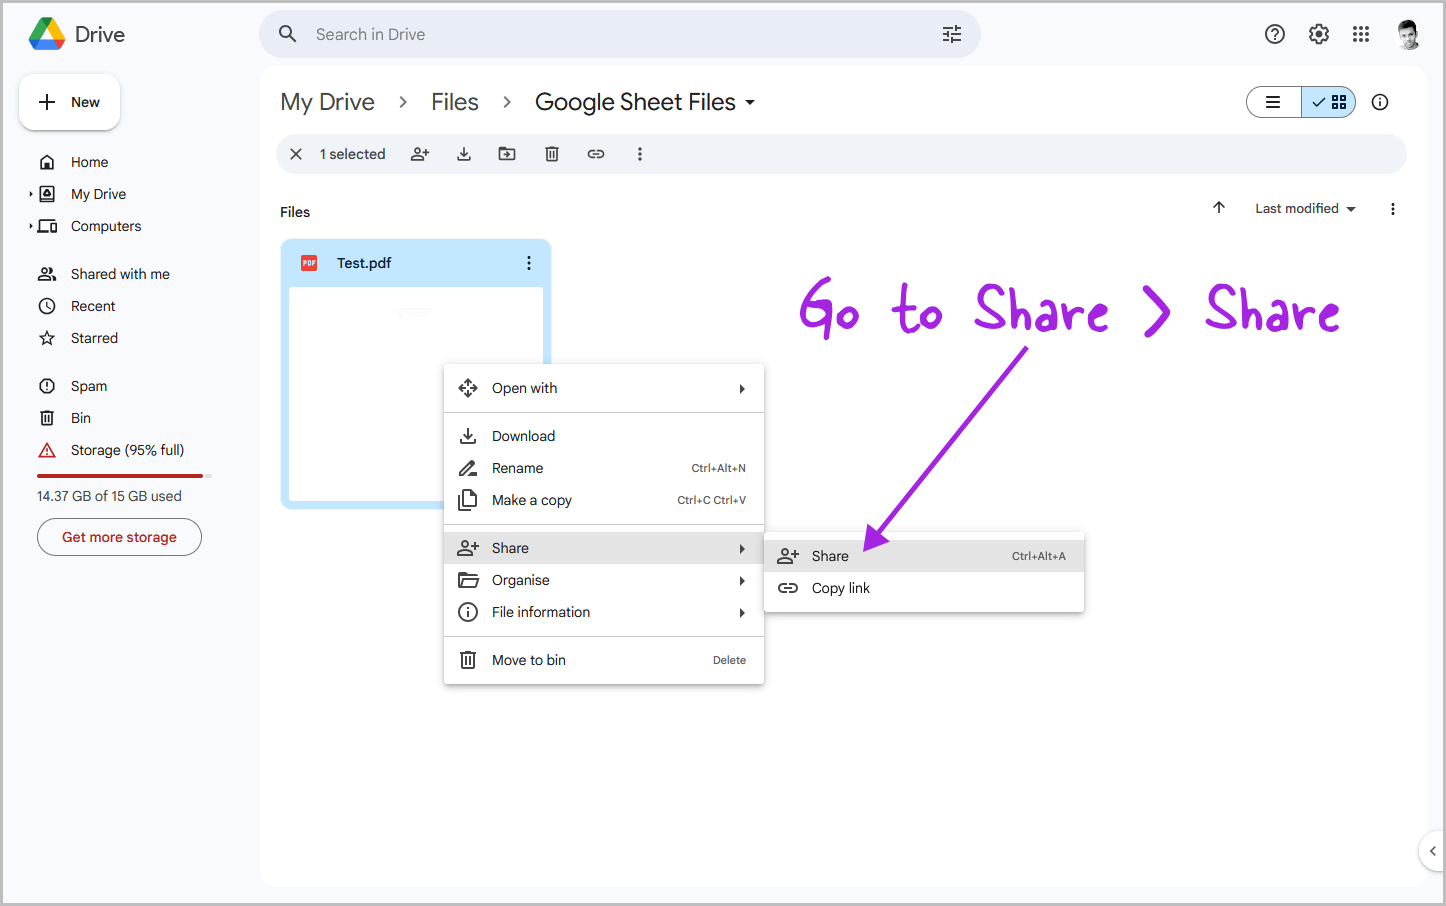
Click on the “Share” option from the menu. You’ll see two options: “Share” and “Copy link.”
Select the “Copy link” option and skip to Step 8 if this is a private sheet.
However, if you’re creating a public sheet or plan to share this spreadsheet with others, choose the “Share” option and continue to the next step.
Step 5: Under “General Access”, select “Anyone with the link”
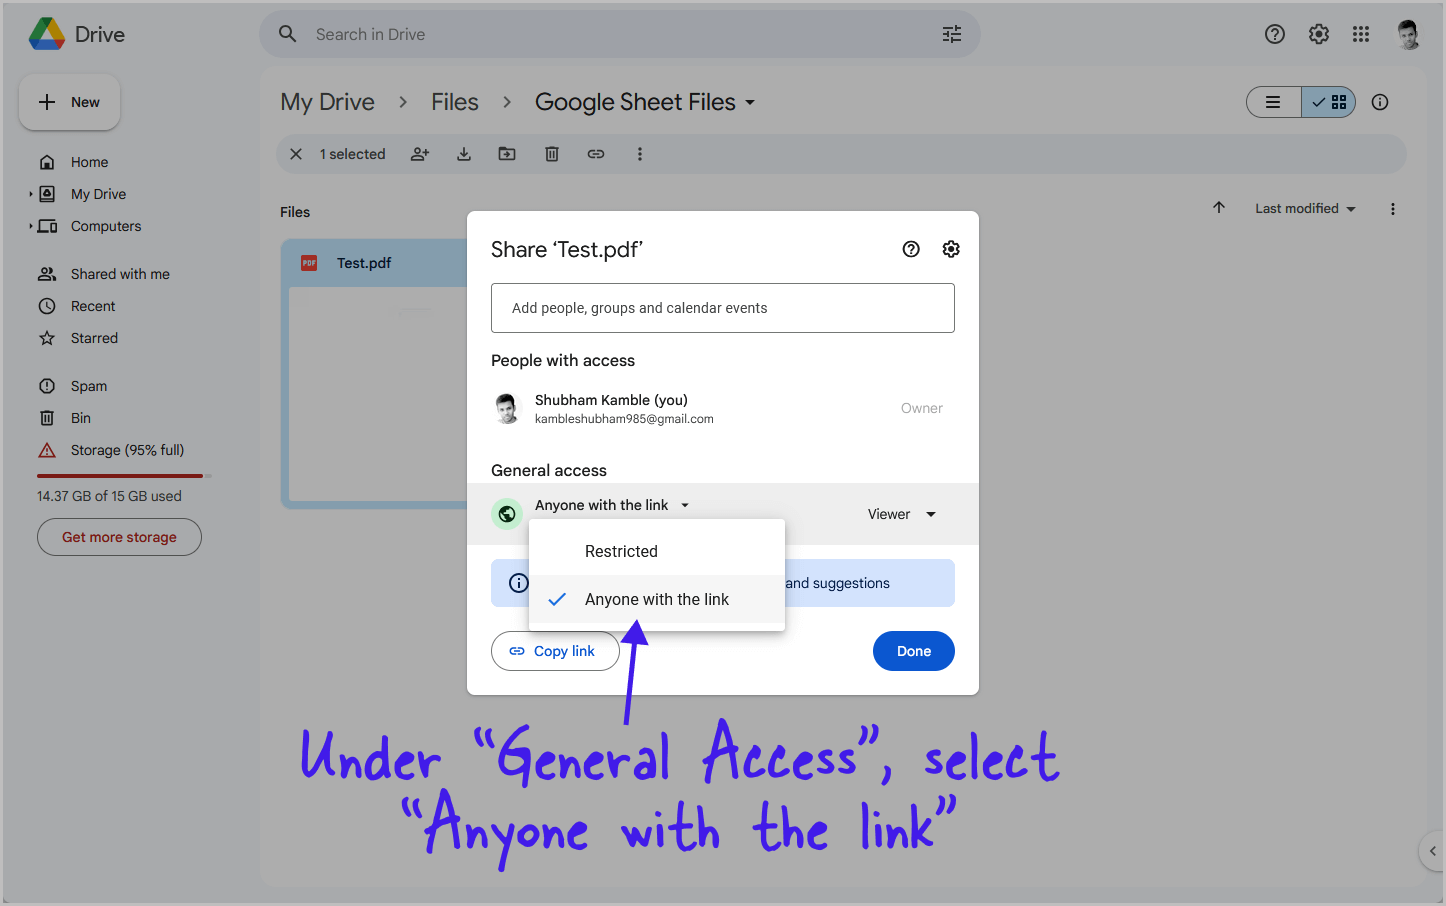
You will now see all the sharing options. Under “General Access”, click the “Restricted” option and select the “Anyone with the link” option from the drop-down menu.
You will now see a second drop-down menu, click on it and choose a role.
If you’re unsure which role to select, choose “Viewer” and proceed to the next step.
Step 6: Click “Copy link”
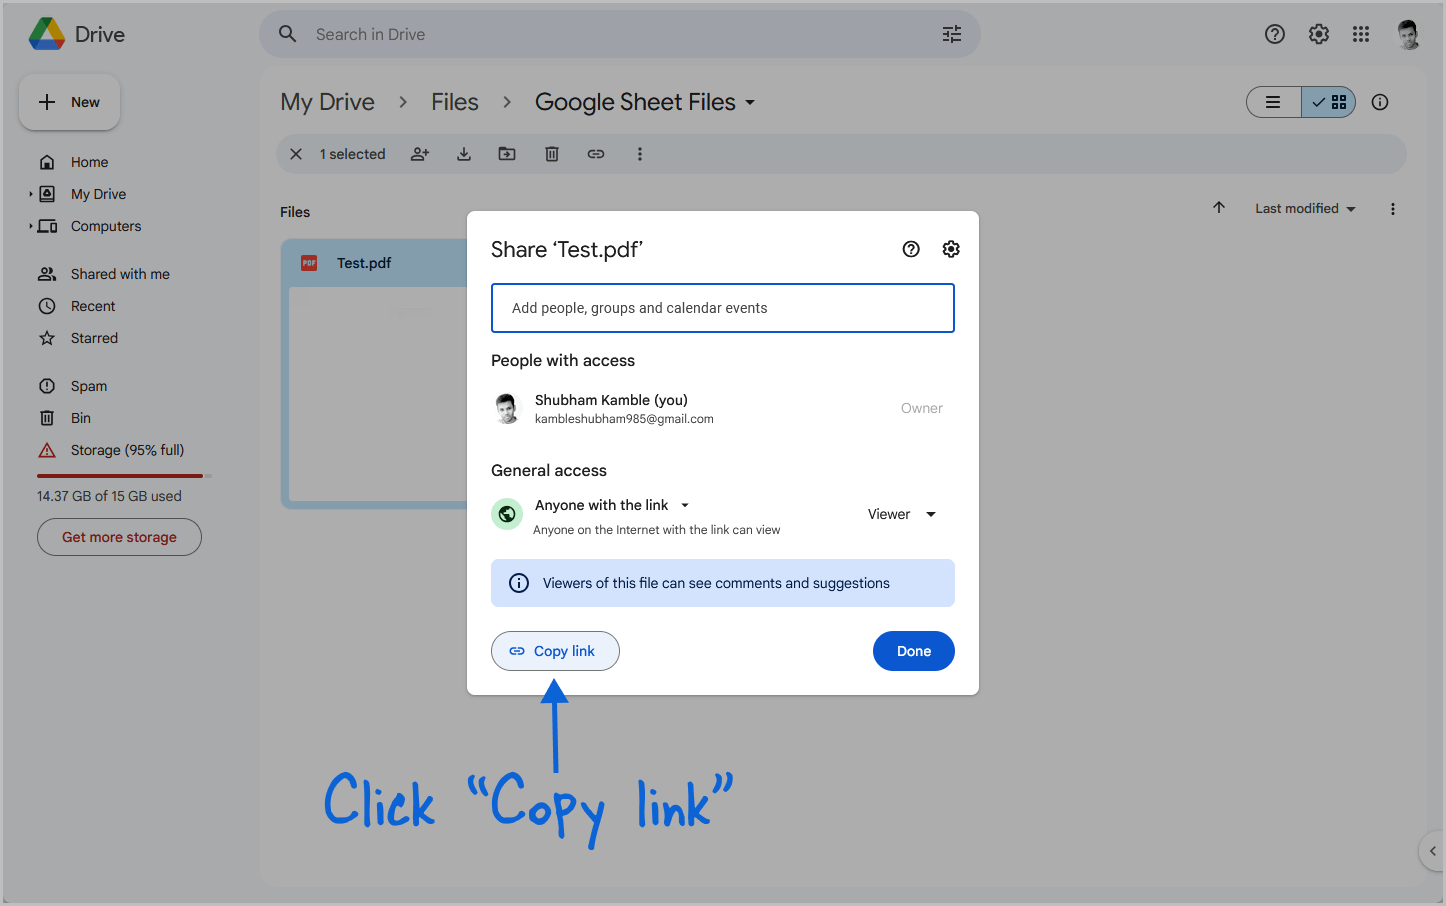
After you make the file public and change the role, simply click on the “Copy link” button to copy the file link to the clipboard.
Step 7: Use the free tool to create a direct download link (optional)
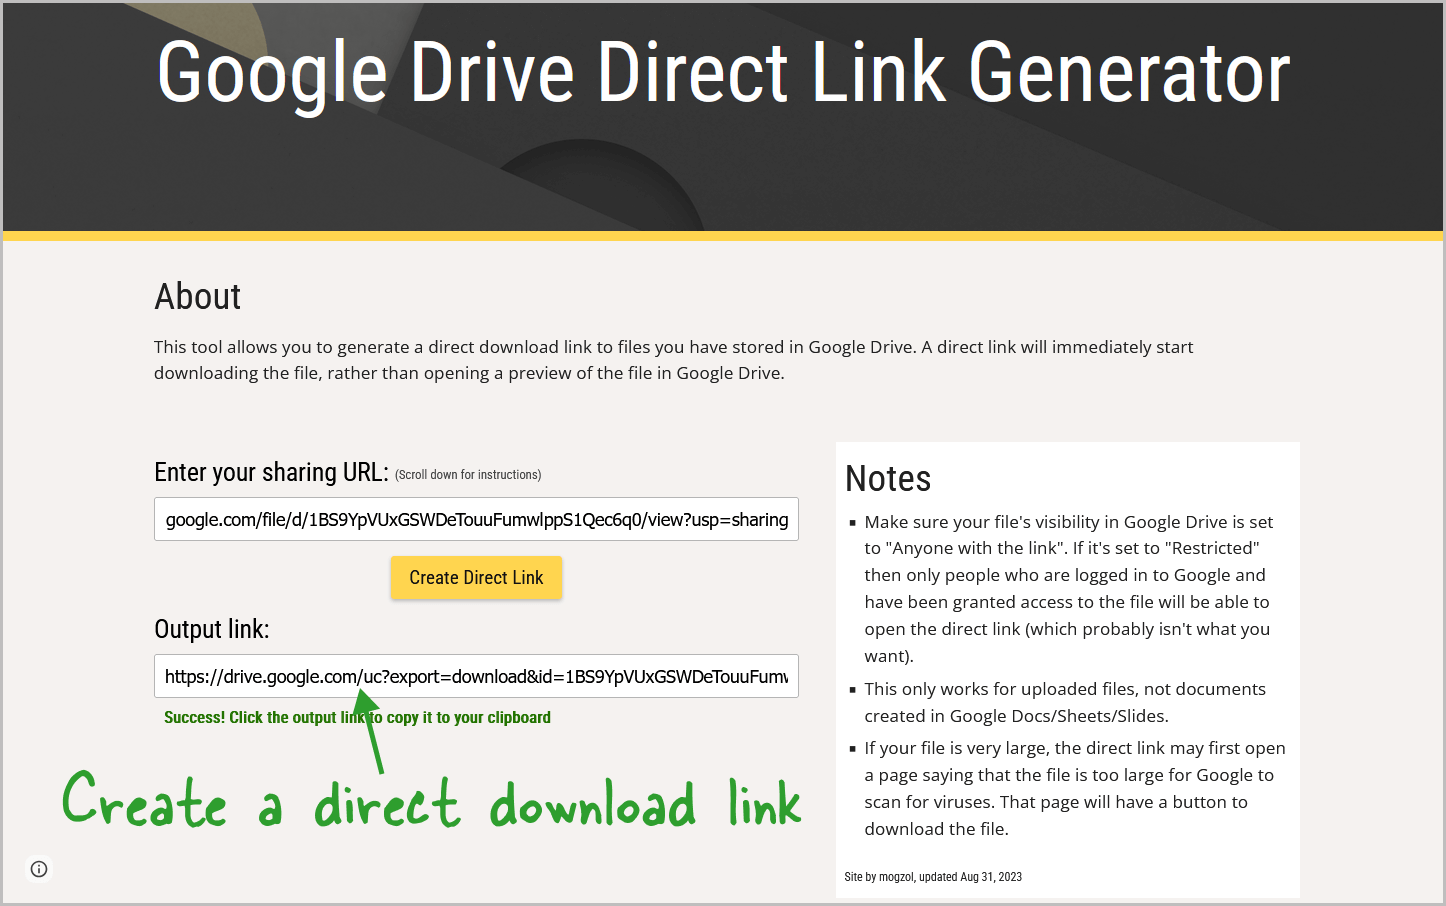
Since I wanted the file to be downloaded when the viewer clicks on the file in the spreadsheet, I used a tool for that.
You can access the free tool here: https://sites.google.com/site/gdocs2direct/
Simply paste the link from the previous step into the “Enter your sharing URL: ” box and then click “Create Direct Link”. Finally, copy the link from the “Output link:” box.
Step 8: Go to your spreadsheet and double-click inside the cell
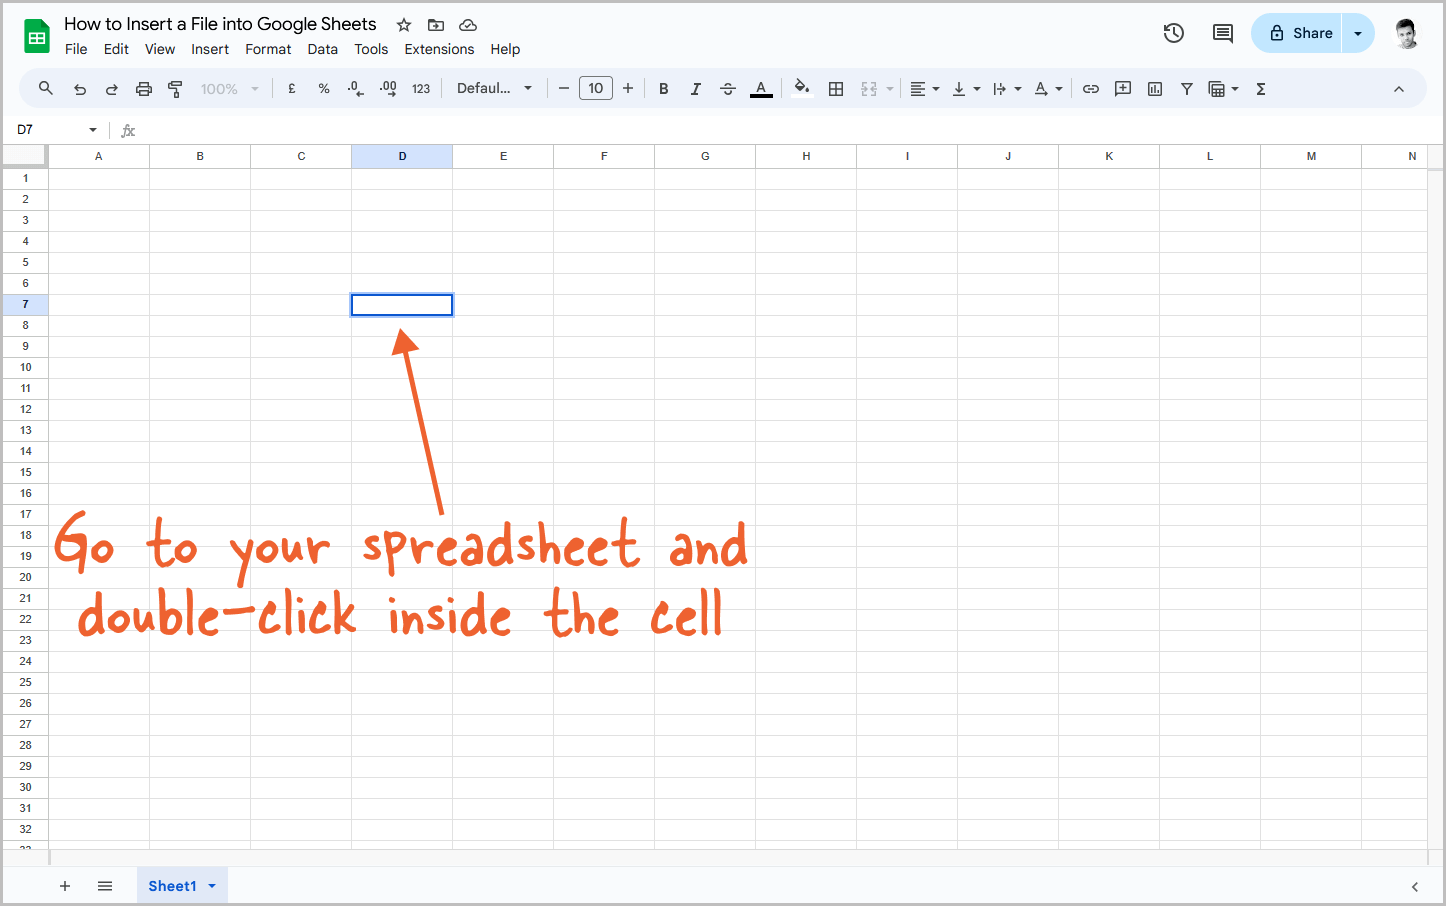
Now, go back to your spreadsheet and double-click inside the cell where you want to insert the file.
Step 9: Paste the link and press “Tab”
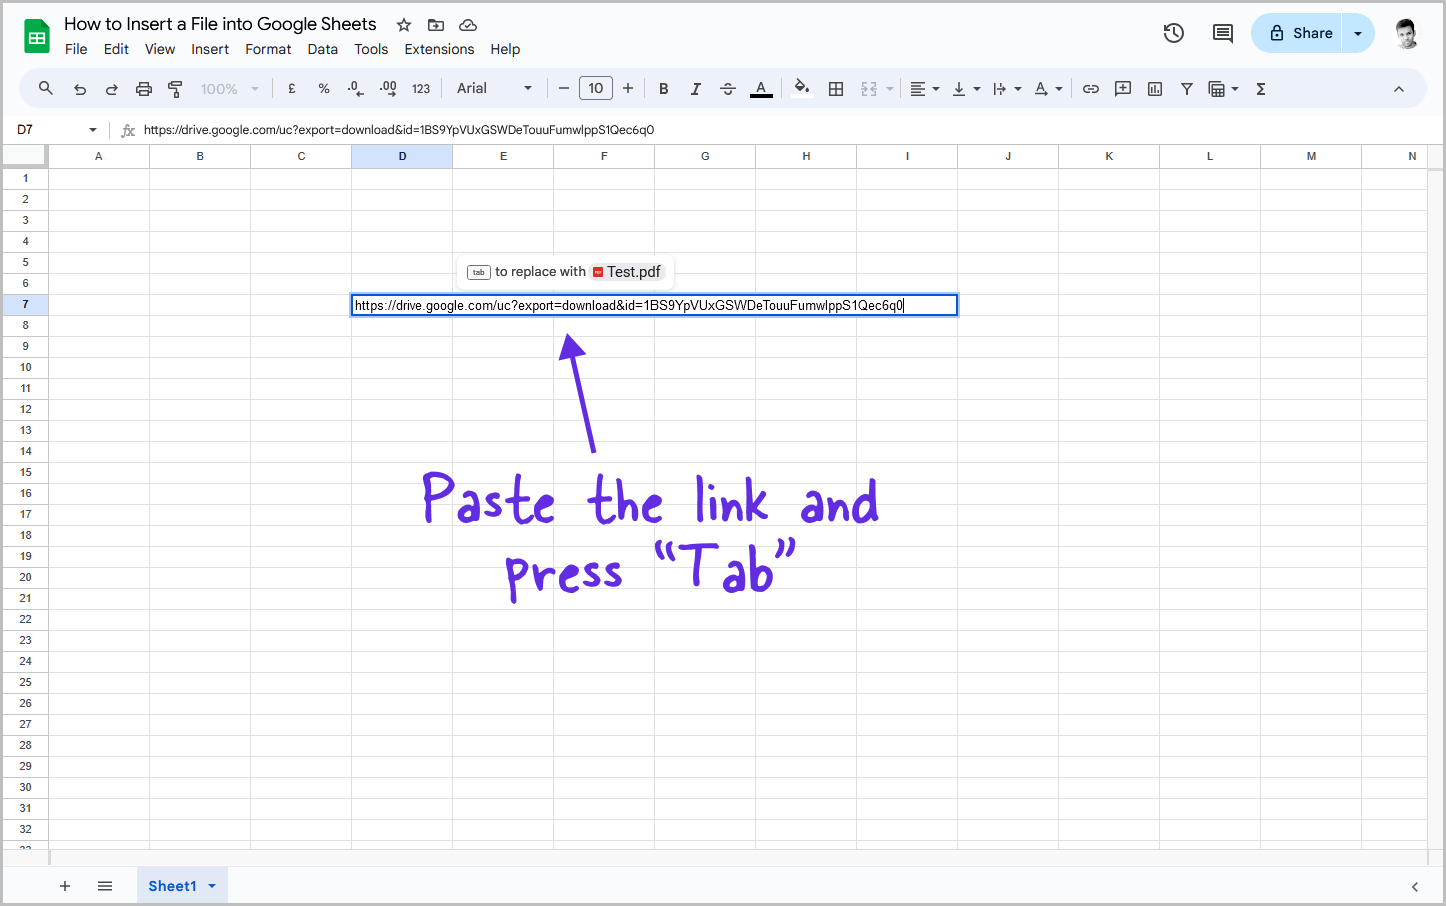
Finally, right-click inside the cell and select “Paste” to insert the file link.
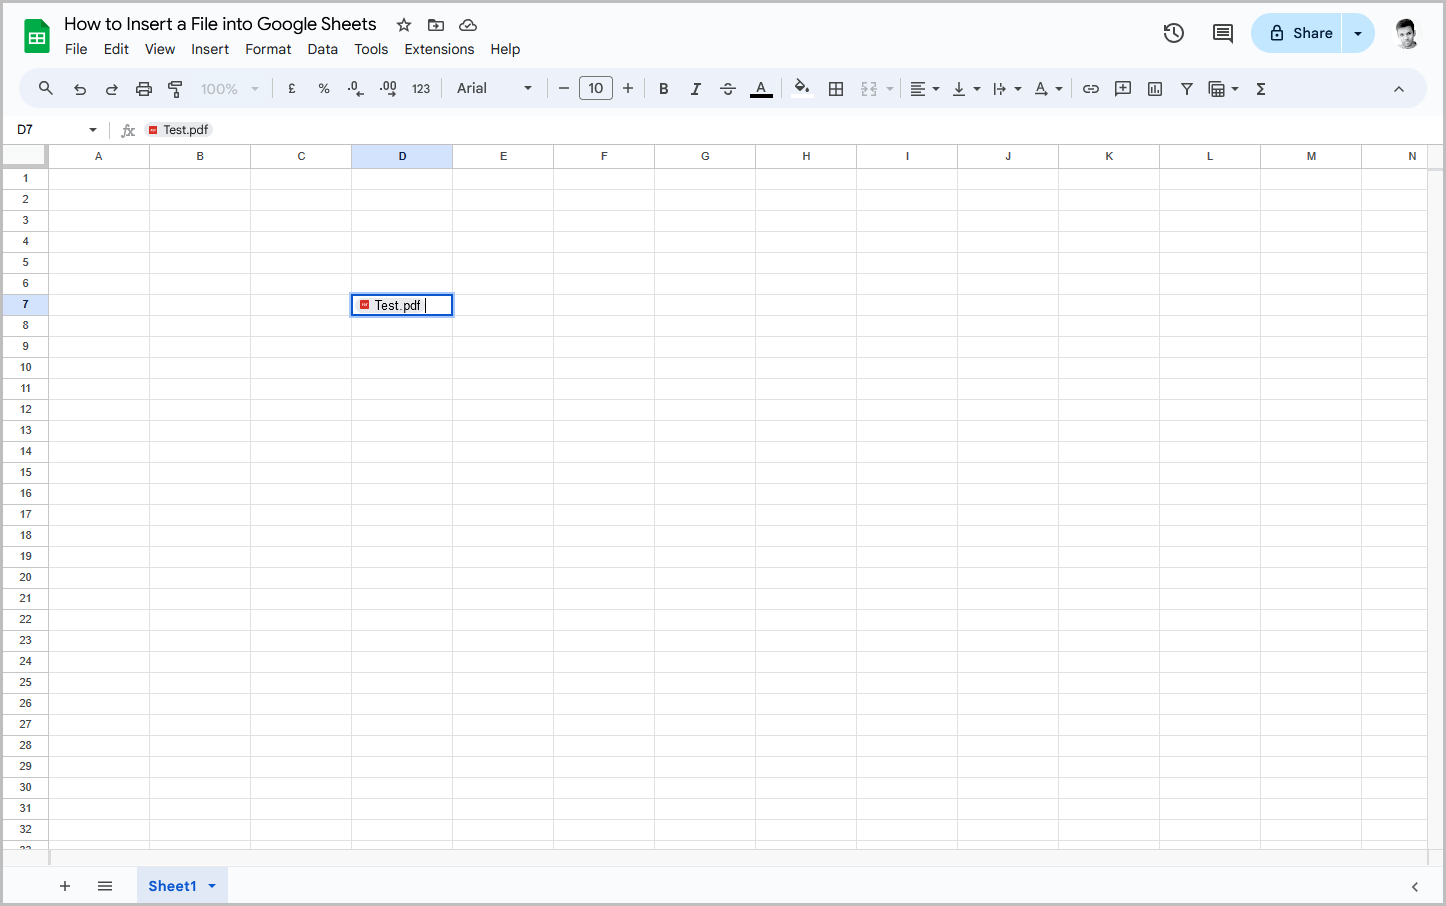
You can then press the “Tab” key on your keyboard. This will convert the link into a file-like format.


