When you double-click inside the footer section of a Google Docs document and enter text or an image, it automatically adds that footer to every page in the document.
This is a great feature because it saves time—otherwise, you would have to add the footer to each page manually.
But what if you don’t want the footer on the last page of your document?
If you try to remove the footer from the last page by double-clicking in the footer section and deleting the content, it will automatically delete the footer from all the other pages as well.
You can easily remove the footer from the last page in Google Docs by following the steps in this tutorial.
I have also attached screenshot for each step to make it easier to understand.
To Remove Footer from Last Page in Google Docs:
Step 1: Place the cursor on the last page
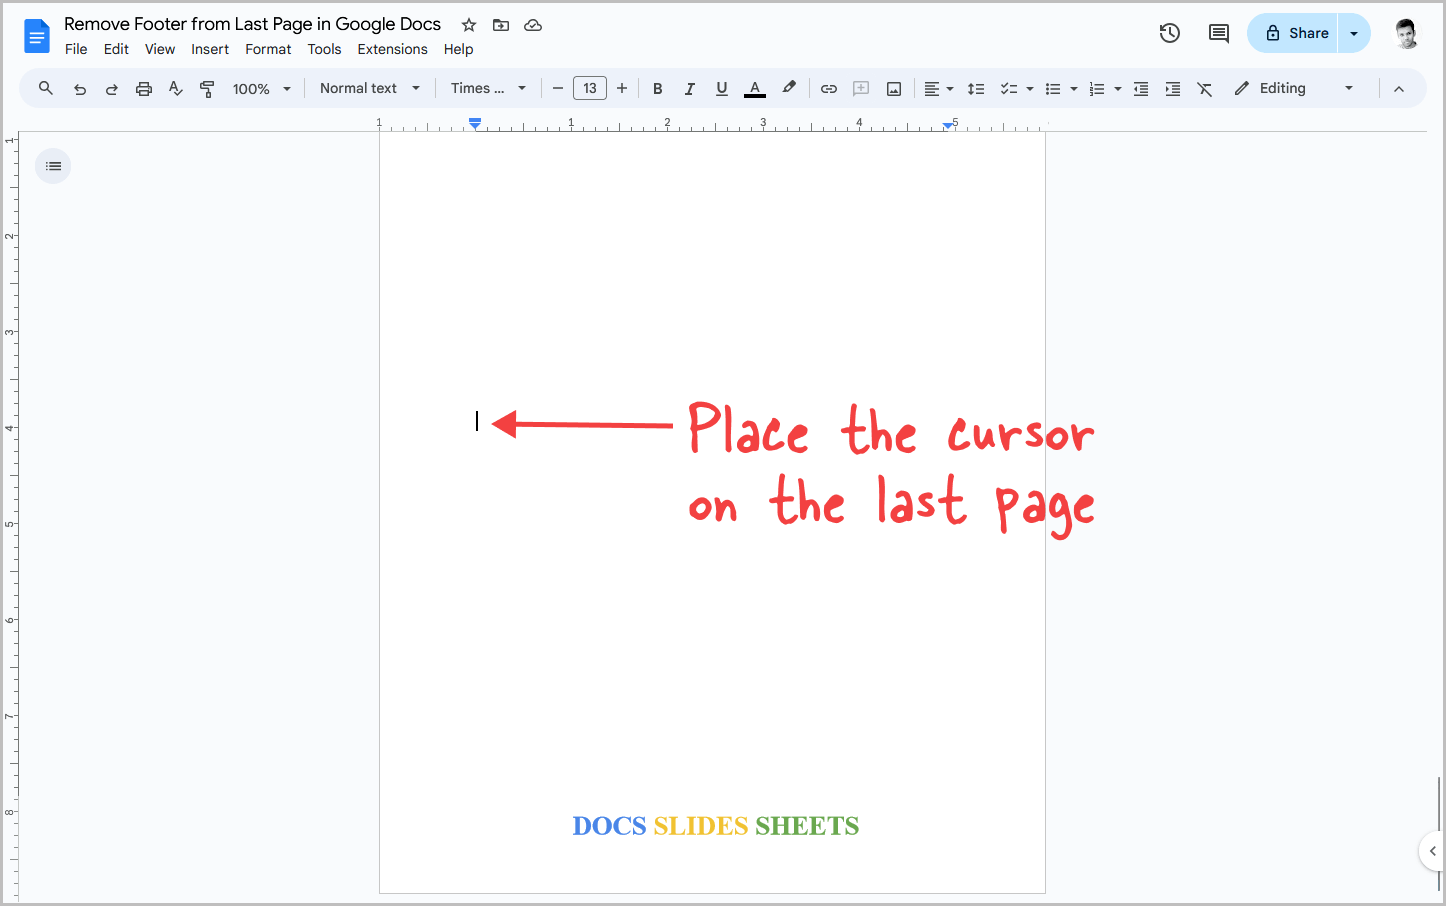
The first step is to open the document and scroll all the way to the last page.
Click at the end of the text on the last page, then press the Enter key to move to the next line.
Make sure this is the last page of the document.
Once the cursor is on the last page, proceed to the next step.
Step 2: Go to Insert > Break > Section break (next page)
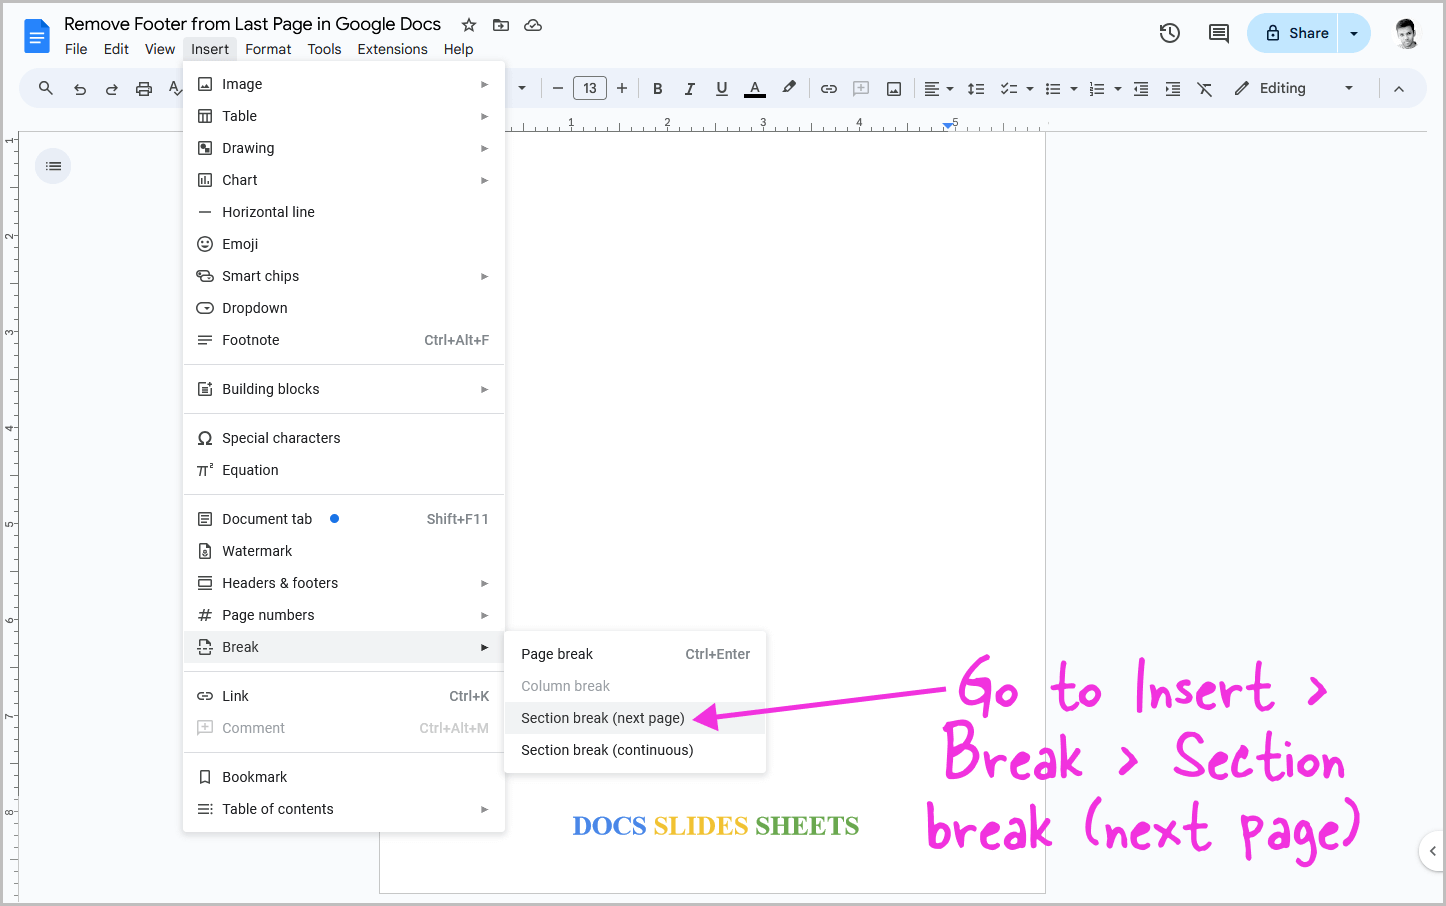
It is now time to add a section break on this line.
To do so, click on the “Insert” option from the top menu, hover over the “Break” option to view the break types, and then select the “Section break (next page)” option from the secondary menu.
This will add a section break, which essentially divides the document into two sections.
Step 3: Double-click inside the footer section of the last page
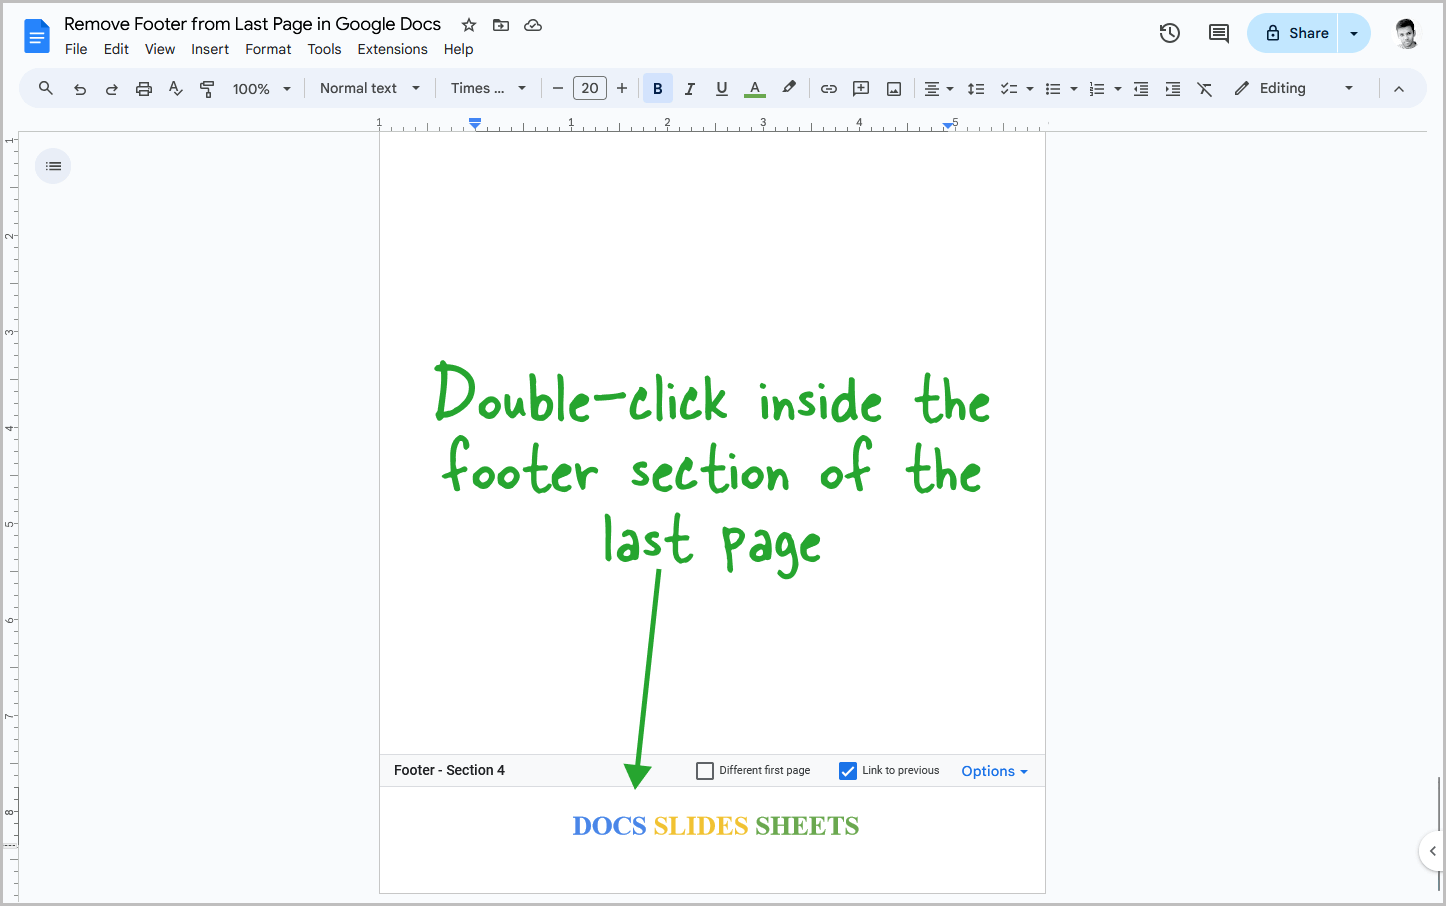
Now, double-click inside the footer section of the last page to activate it.
Once activated, proceed to the next step.
Step 4: Uncheck the “Link to previous” box
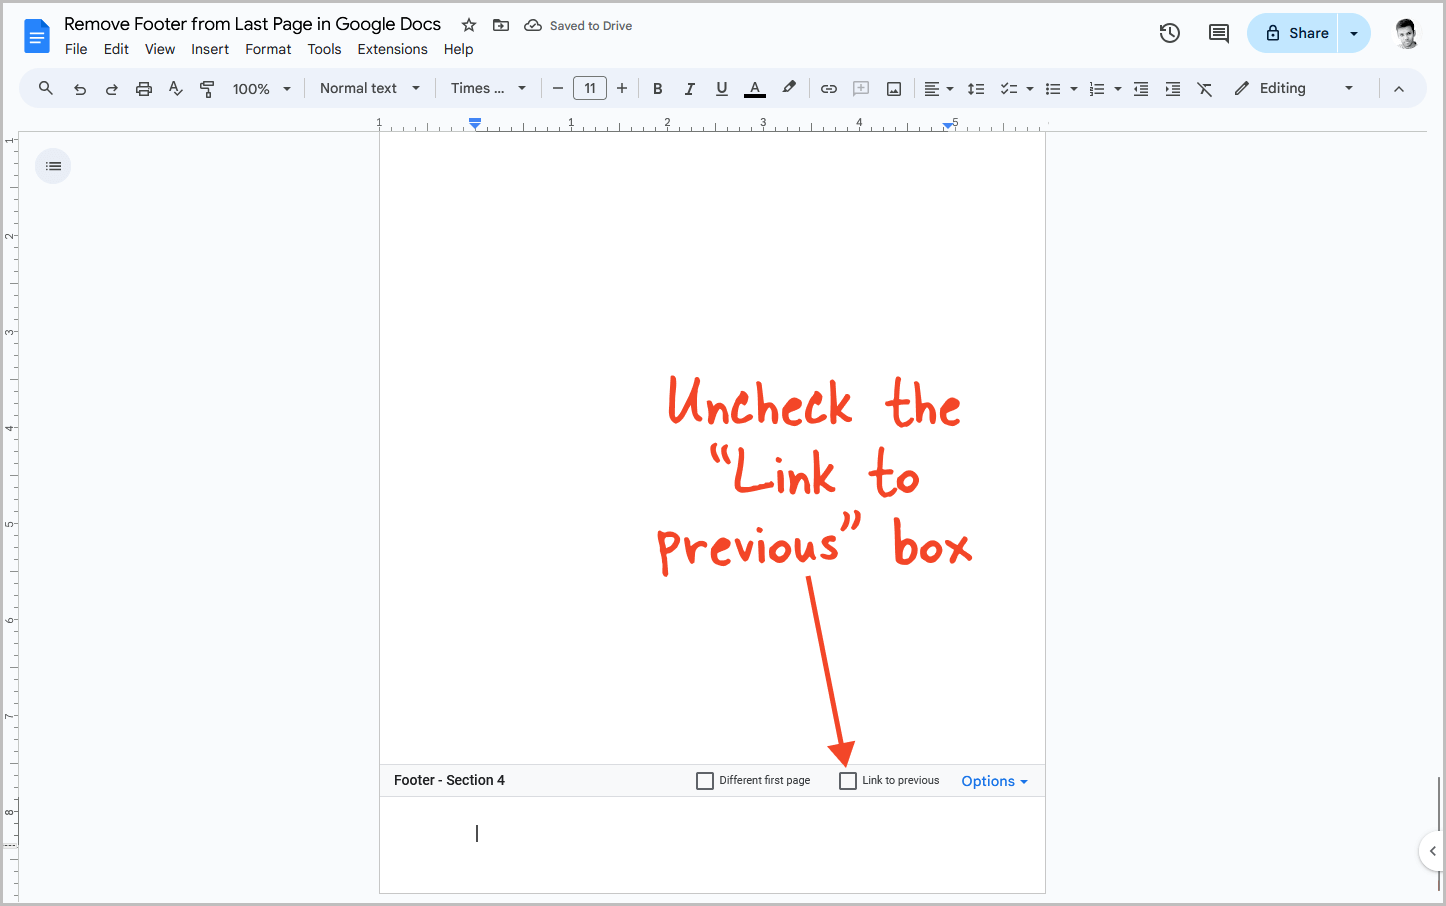
At the top of the footer section, you will see two checkboxes. The “Link to previous” box will be checked by default.
Click on the box to uncheck it.
You will now see that the footer on this page is removed while the footer on all the other pages remains intact.
Conclusion
While there is no direct way to remove the footer from the last page, you can use the four easy steps outlined in this article.
Here’s a recap of the steps:
How to Remove the Footer from the Last Page in Google Docs:
- Place the cursor on the last page.
- Go to Insert > Break > Section break (next page).
- Double-click inside the footer section of the last page.
- Uncheck the “Link to previous” box.
If you liked this tutorial, you might also enjoy this easy guide: How to Put a Header Only on the First Page in Google Docs

