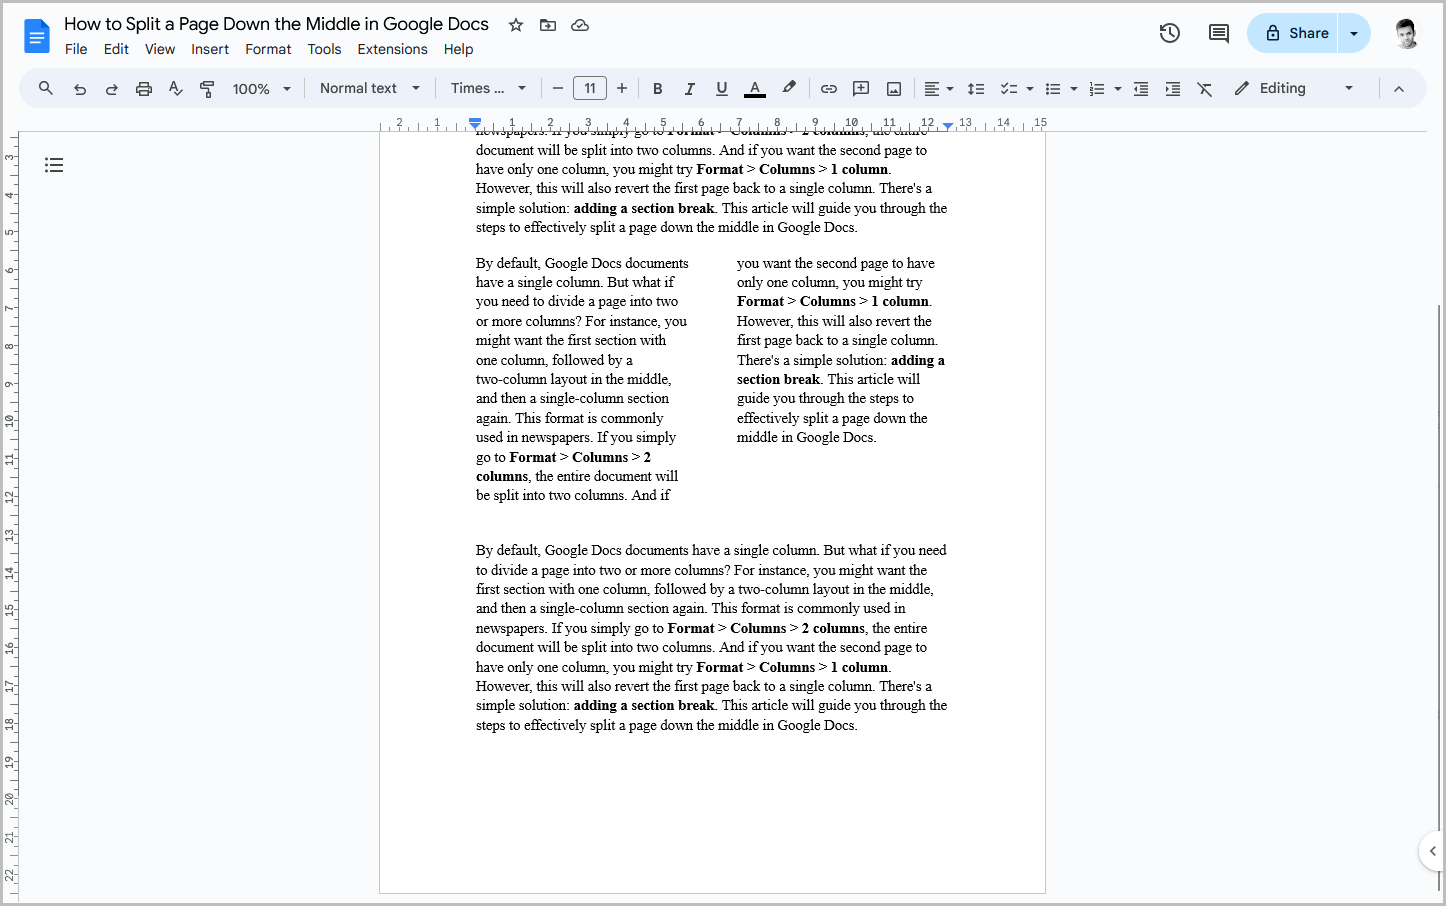
By default, every Google Docs document has one column. But what if you want to split the page into two or more columns?
For example, you might want the first section to have just one column, then, in the middle, two columns, and then the last section to have one column again.
This type of format is often used in newspapers.
If you go to Format > Columns > 2-columns, it will split the entire document into two columns. And lets say you want the second page to have just one column, you might go to Format > Columns > 1-column again.
This way the second page will have just one column, but guess what? The first page will be switched back to 1-column from 2-columns.
There is a super easy way to fix this; you just have to add one extra step. In this article, you will learn how to split a page down the middle in Google Docs.
To Split a Page Down the Middle in Google Docs:
Step 1: Open your document and type the text for the first section
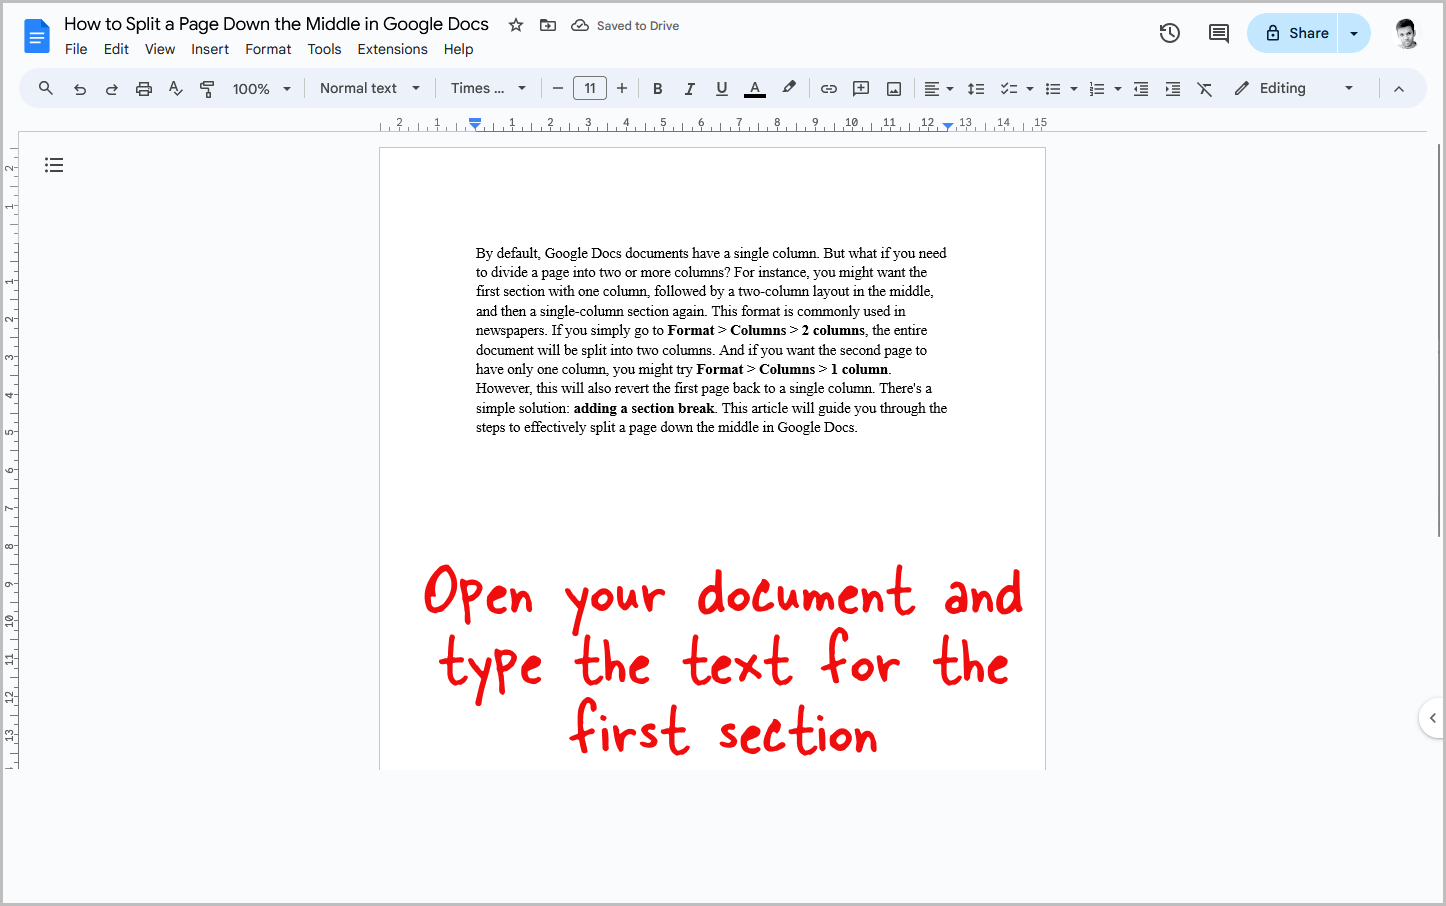
The first step is to open your document and now start typing the text for the first section.
In this tutorial, we will be dividing a page into three sections; the first will have one column, the second will have two columns, and the third will have again one column.
You can have a different pattern as well. Just remember to add the continuous section break before and after every section.
And then change the number of columns from the format menu. After entering the text for the first section, proceed to the next step.
Step 2: Go to Insert > Break > Section break (continuous)
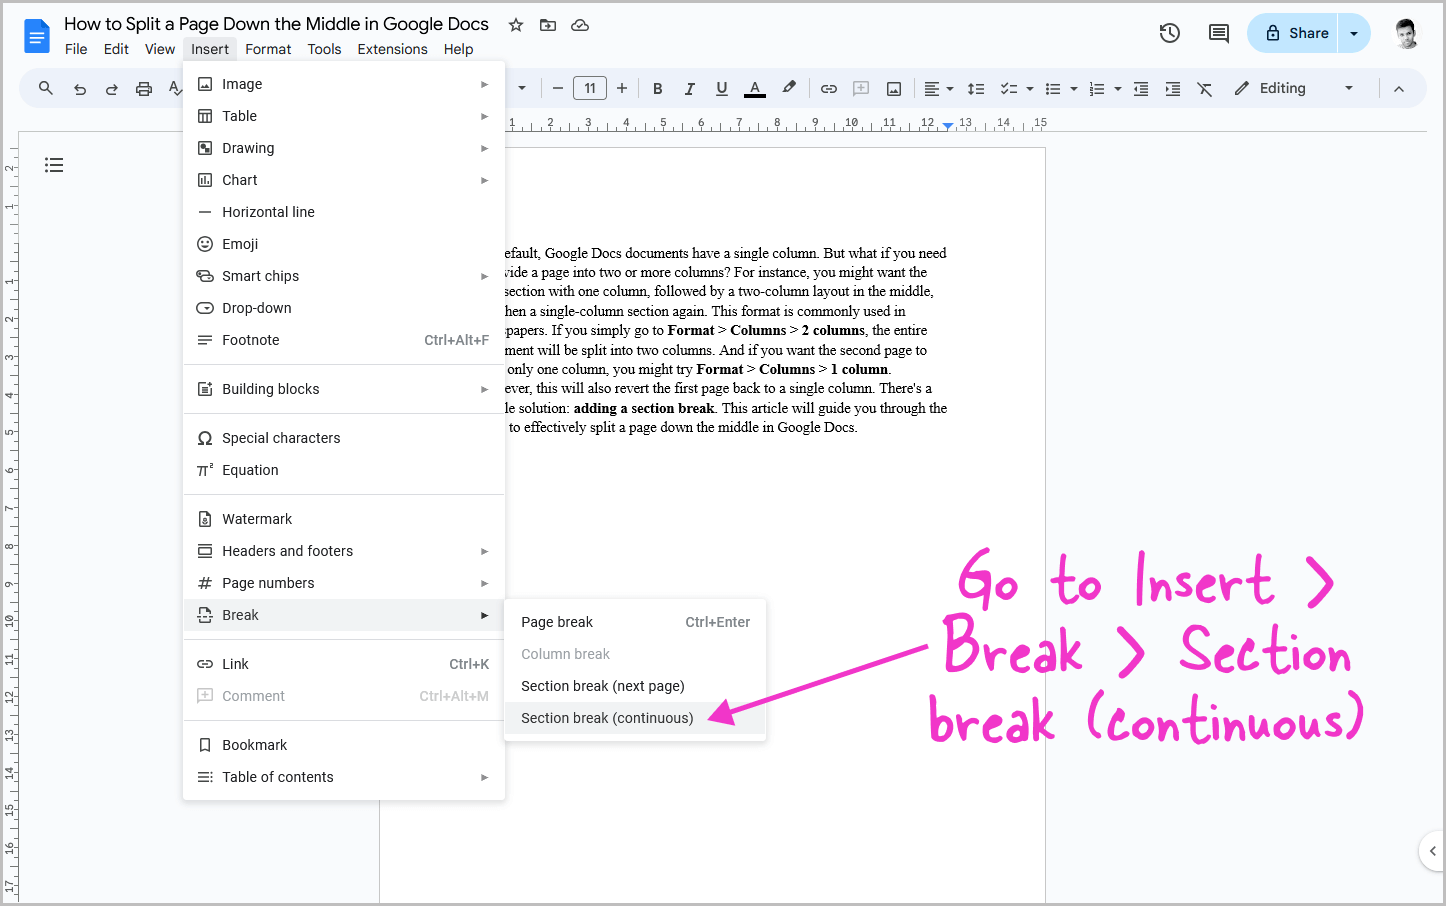
Now click on the “Insert” option from the top menu and then hover your cursor over the “Break” option and finally select the “Section break (continuous)” option from the secondary menu.
This will add a break after the first section, which won’t be visible.
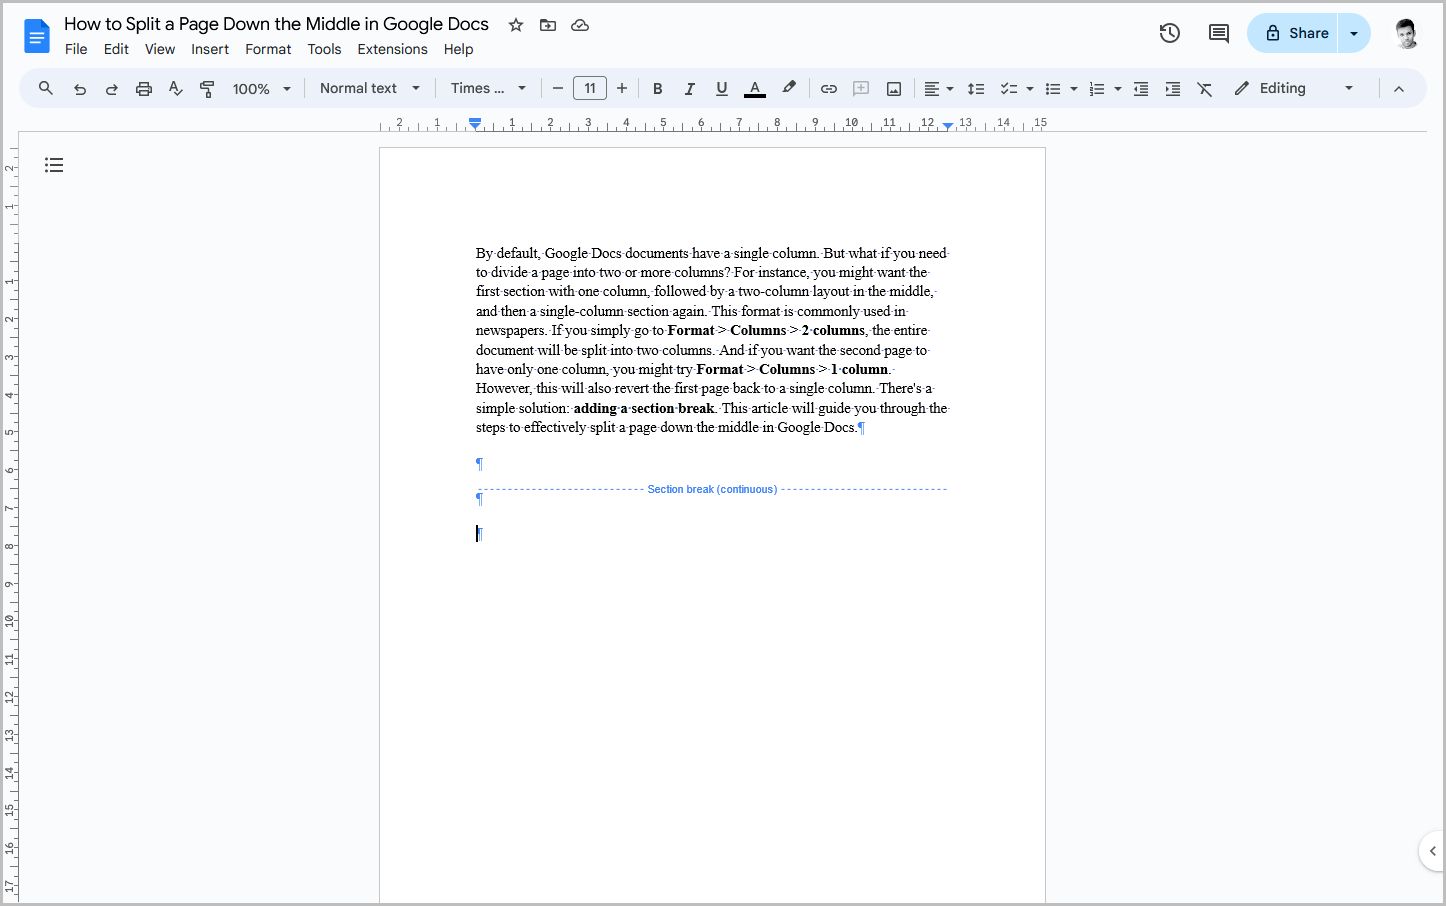
If you want to check whether the section break has been added or not, simply go to View > Show non-printing characters or press Ctrl+Shift+P.
Also read: How to Delete Version History in Google Docs
To hide the non-printing character, follow the same steps ( View > Show non-printing characters).
Step 3: Go to Format > Columns > Select “2 columns”
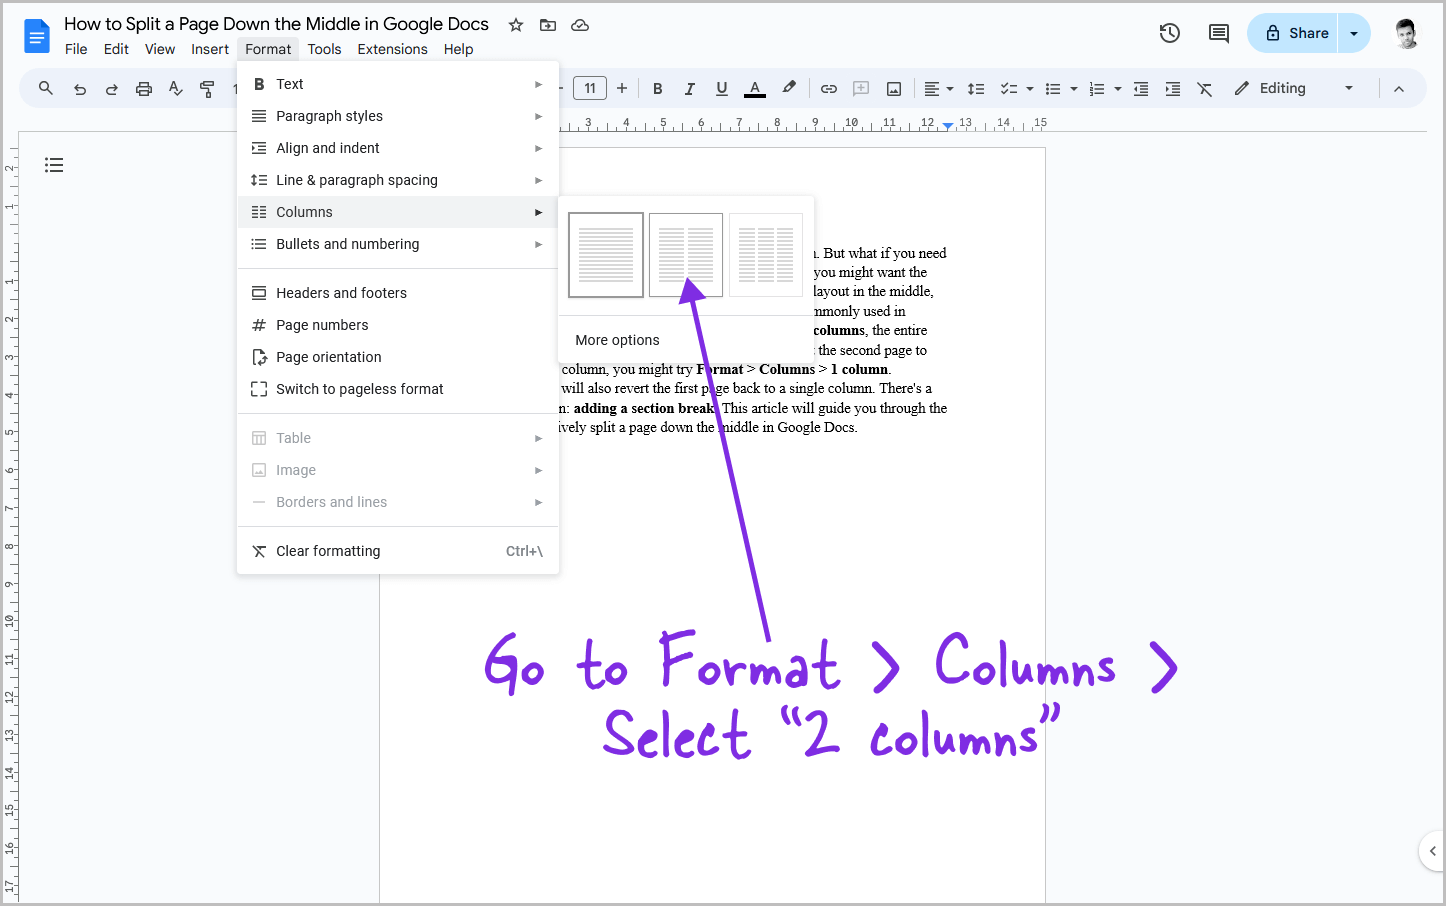
It is now time to add two columns in the second section of the page.
To begin, first press the enter key so there is some space between the first section and the second.
Now, click on the “Format” option from the top menu, hover over “Columns,” and then click on the “2-column” image.
If you want three columns, select the “3-column” image.
Step 4: Enter the text
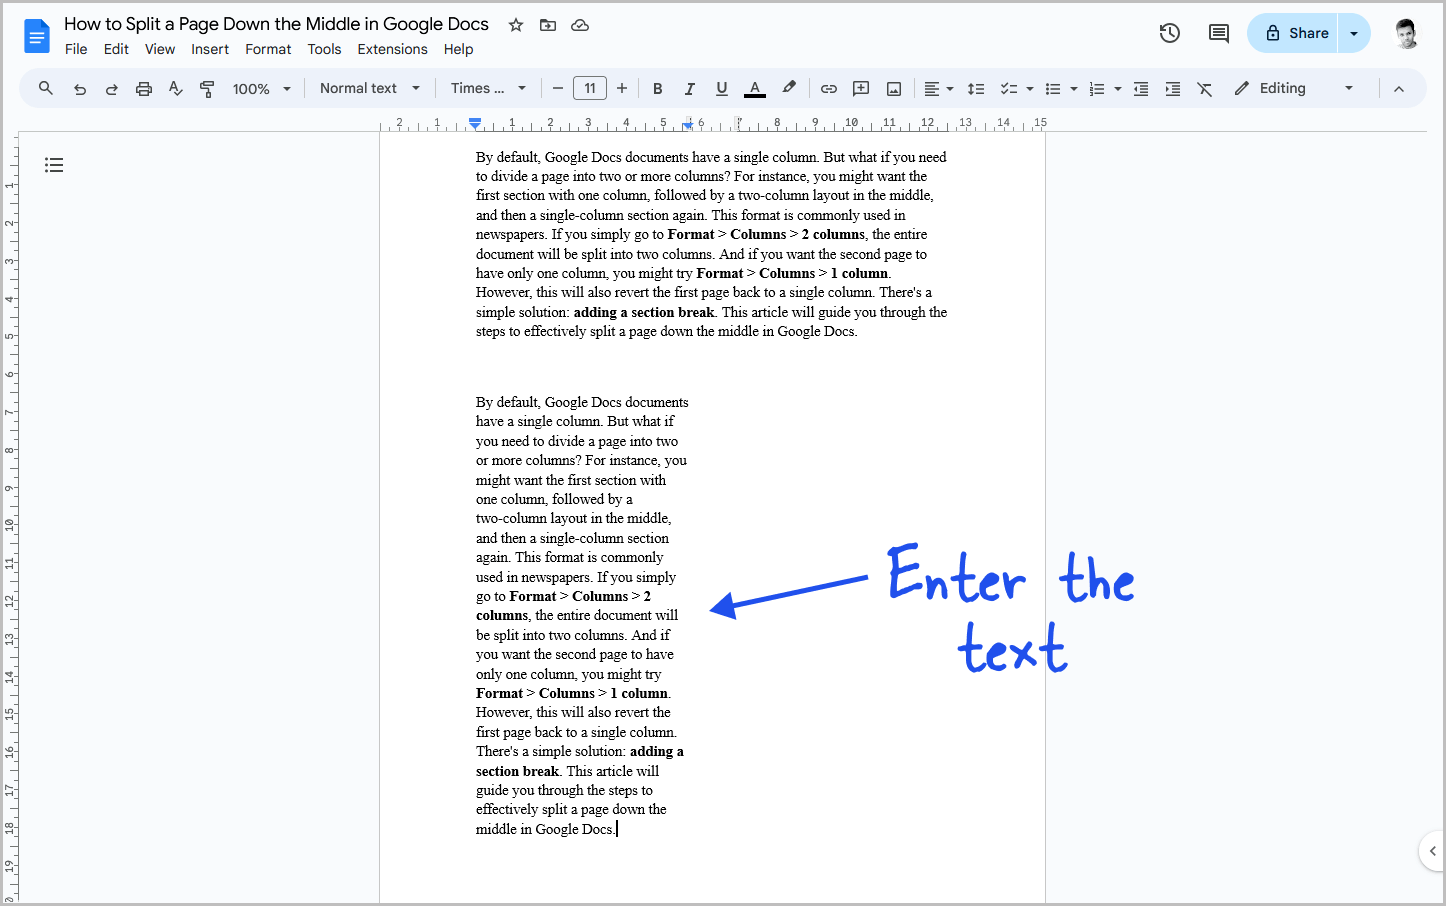
Now, enter your text.
Don’t worry if it initially fills only the first column.
Once you complete the next step, the column width will adjust automatically, ensuring the text flows evenly between both columns.
Step 5: Go to Insert > Break > Section break (continuous)
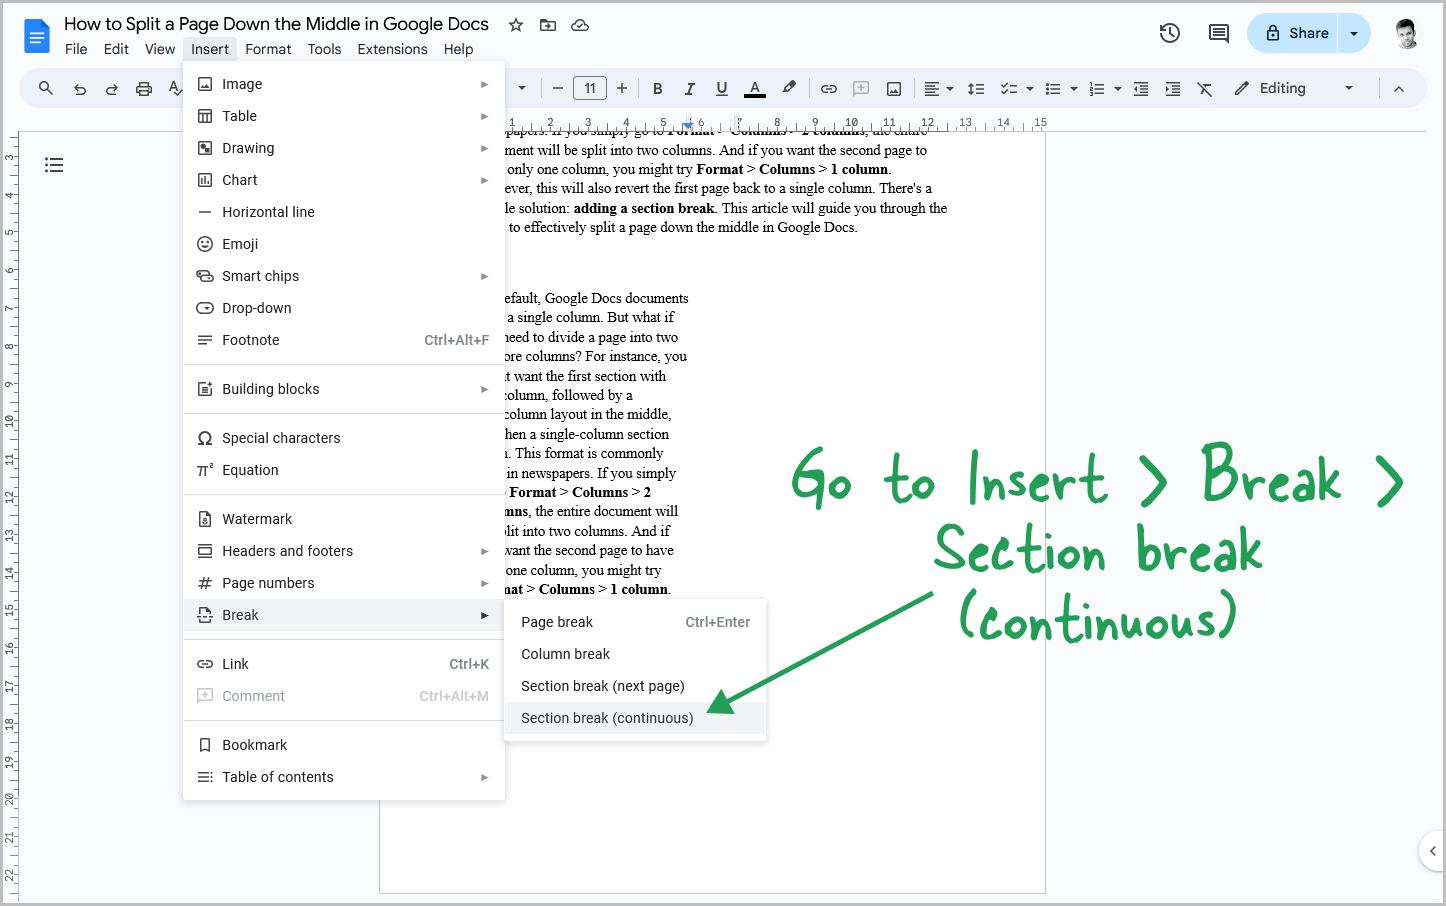
It is now time to end the section, so you will have to add another continuous section break. Simply go to Insert > Break > Section break (continuous).
Now, proceed to the next step.
Step 6: Go to Format > Columns > Select “1 column”
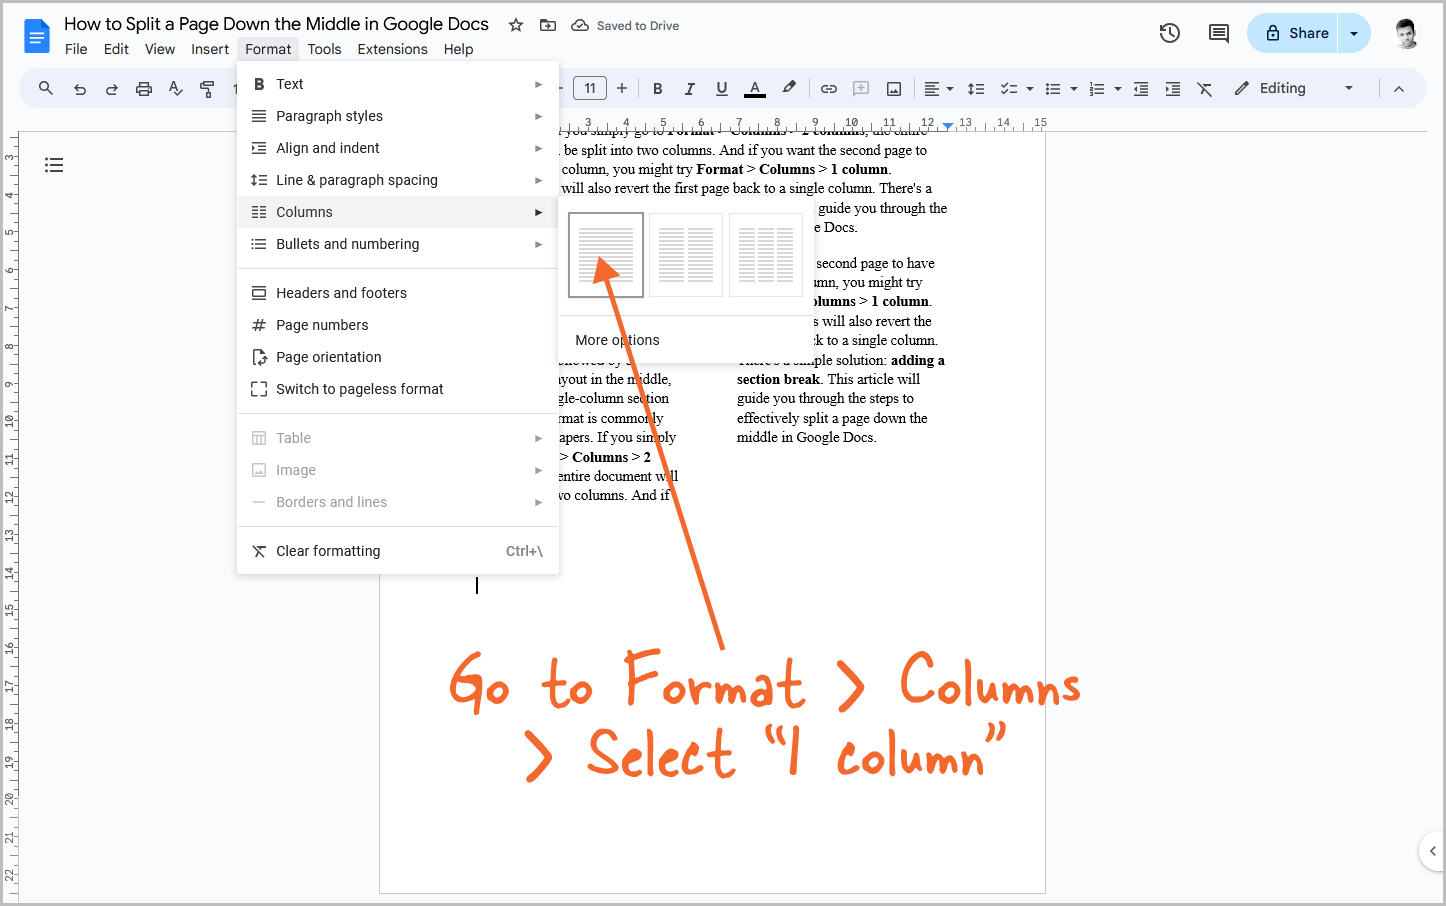
In this last section, I wanted the page to have just one column.
So I will click on the “Format” option from the top menu, choose “Columns,” and then select the 1-column image.
If you want, you can add three columns as well.
