To insert a horizontal line in Google Docs, you have to go to Insert > Horizontal line.
This is a great way to separate sections in a document.
However, if you want to edit this horizontal line—for example, make it thicker, change its color, or adjust the dash type—there is no built-in feature for that in Google Docs.
Many tutorials online suggest using the drawing tool to create the line, edit it, and then insert it into the document.
But the problem with that method is that it’s not quick, and editing can be tedious. Also, the horizontal line will appear blurred when printed.
In this article, I will show you the correct way to insert a horizontal line in Google Docs so that you can edit it easily and quickly.
Also read (opens in new tab):
How to Make Inch Measurements in Google Docs
How to Delete Version History in Google Docs
Top Handwriting Fonts on Google Docs
To Edit Horizontal Line in Google Docs:
Step 1: Go to Insert > Table > 1×1
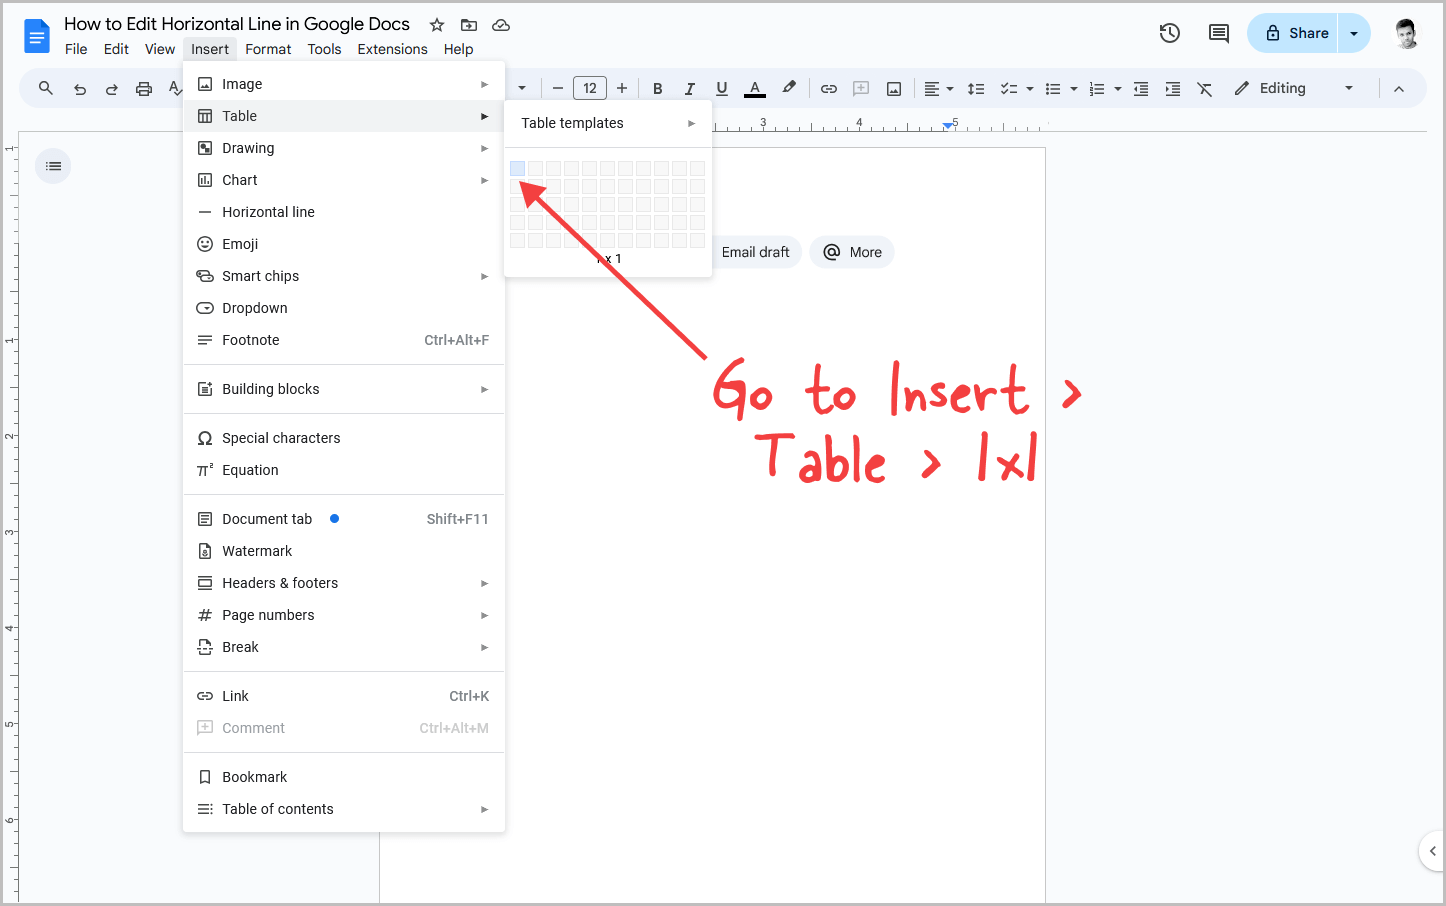
The first step is to place the cursor where you want the horizontal line, then click on the “Insert” option from the top menu and select a “1×1” table.
After inserting the table, proceed to the next step.
Step 2: Resize the table to adjust the length of the line
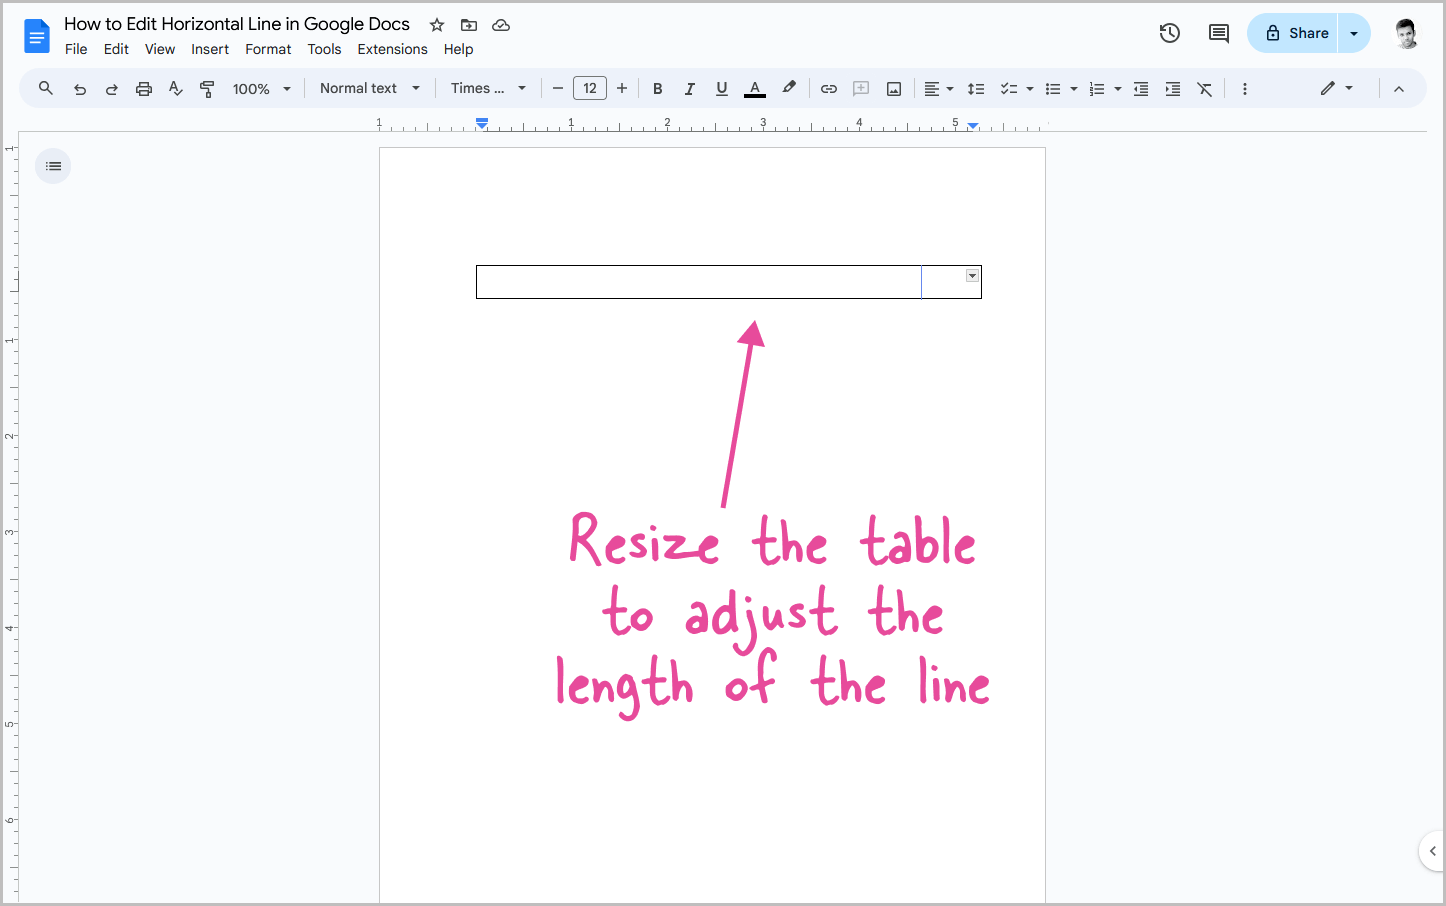
Now, click and drag the end of the table to adjust the length of the horizontal line.
If you’re unsure about the exact length, you can leave it as is and skip this step.
Step 3: Right-click inside the table and select “Table properties”
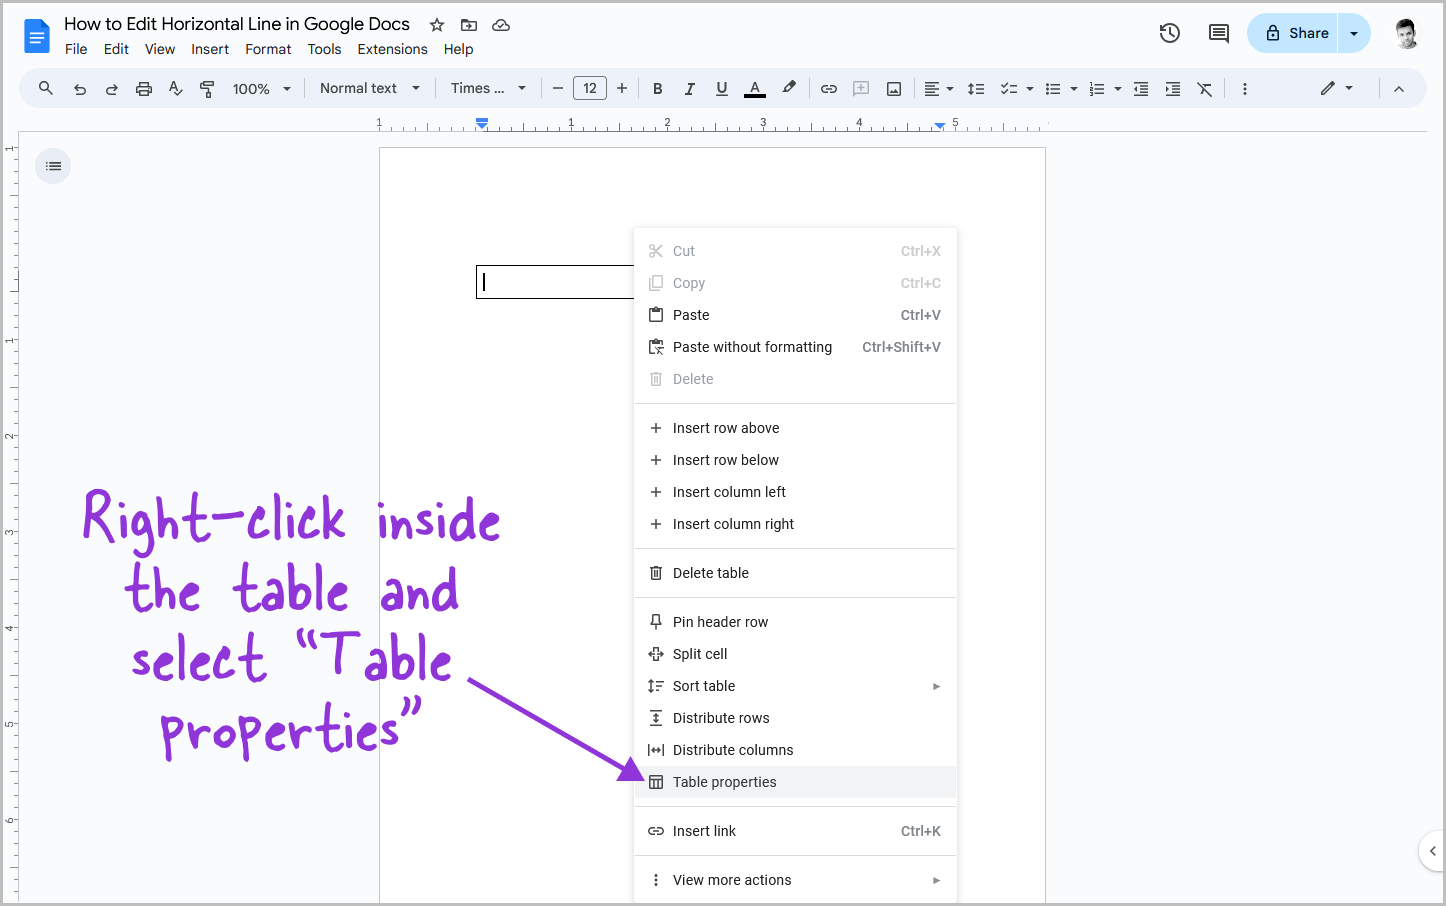
It is now time to edit the table. To begin, right-click inside the table and select “Table properties” from the context menu.
This will open the Table Properties panel on the right side of the document.
Proceed to the next step.
Step 4: Under “Table,” set the alignment to “Center”
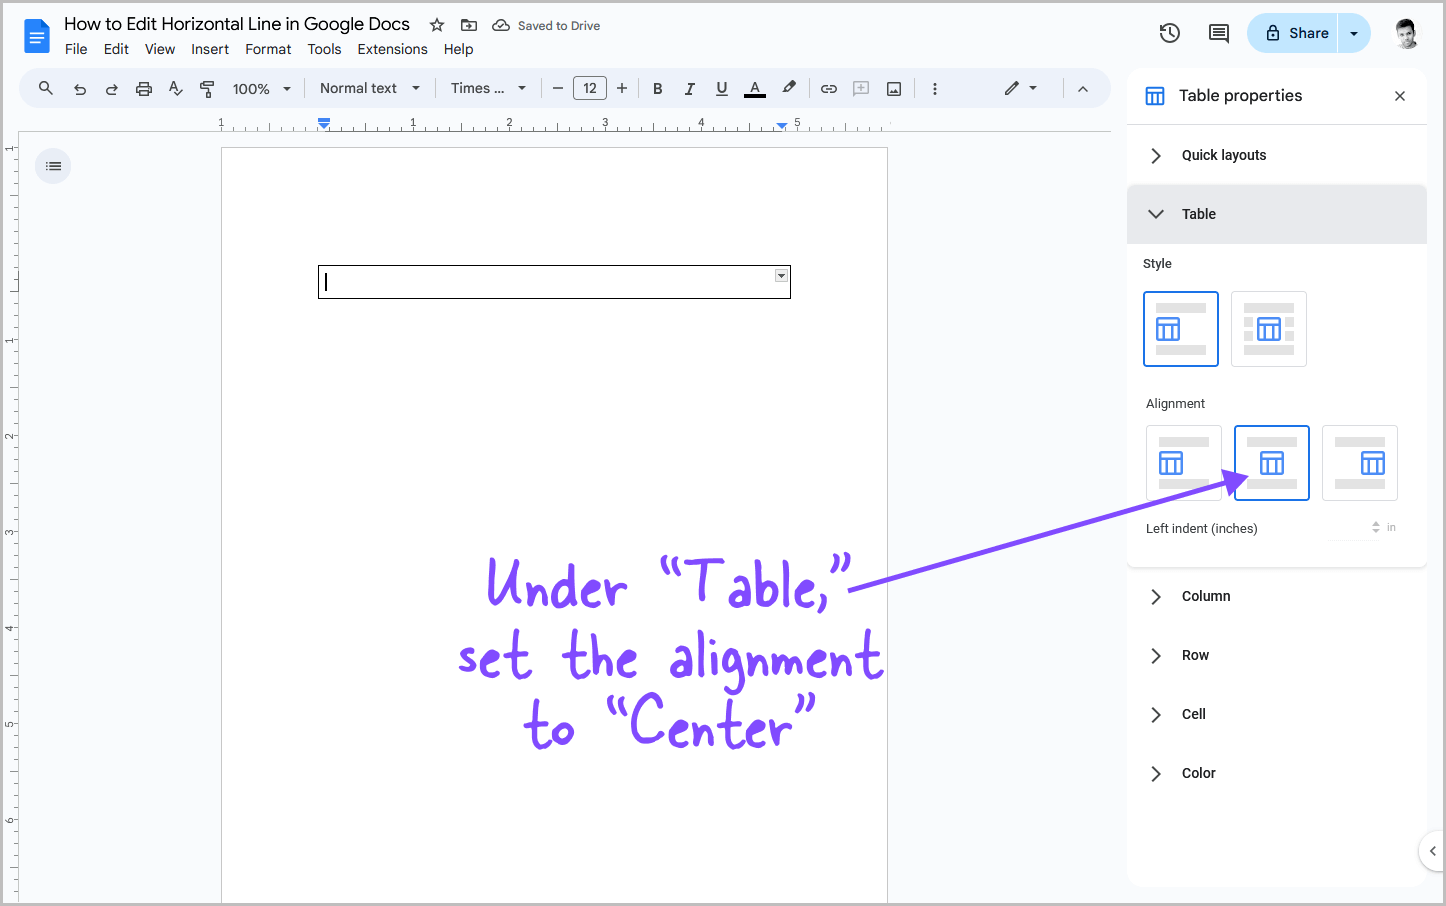
Click on the “Table” option to view all the settings.
In the “Alignment” section, select the “Center” align option to move the table to the center of the page.
Step 5: Under “Cell,” set cell padding to “0”
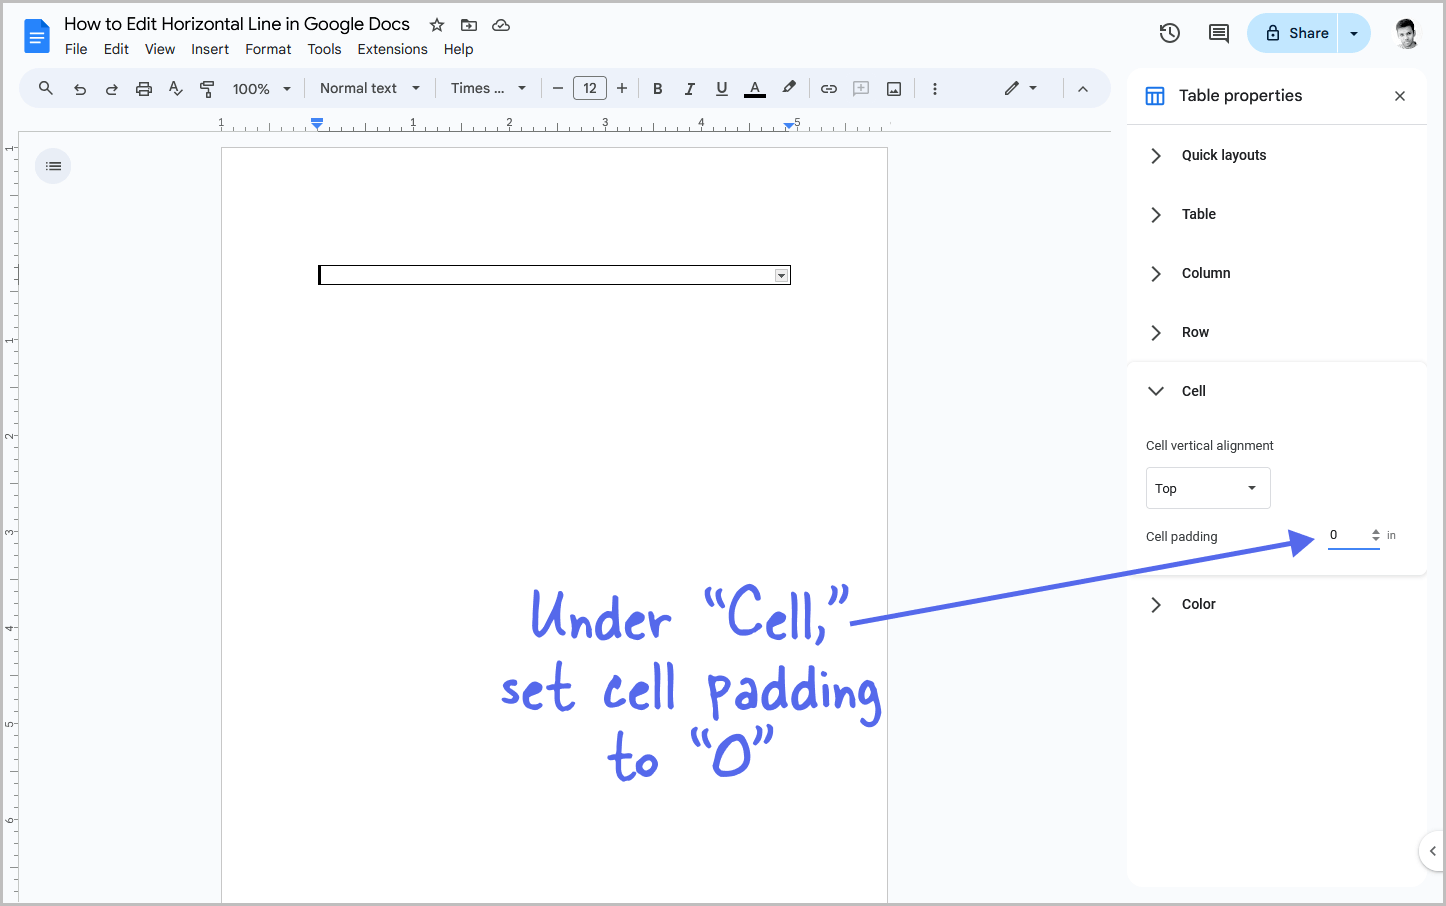
Click on the “Cell” settings from the panel. Inside the “Cell padding” box, enter “0” to set the padding to 0.
You won’t see any immediate change in the table, as it will only reflect after Step 8.
However, this step is important, so don’t skip it.
Step 6: Hold the Control key and click the left, right, and bottom borders to select them
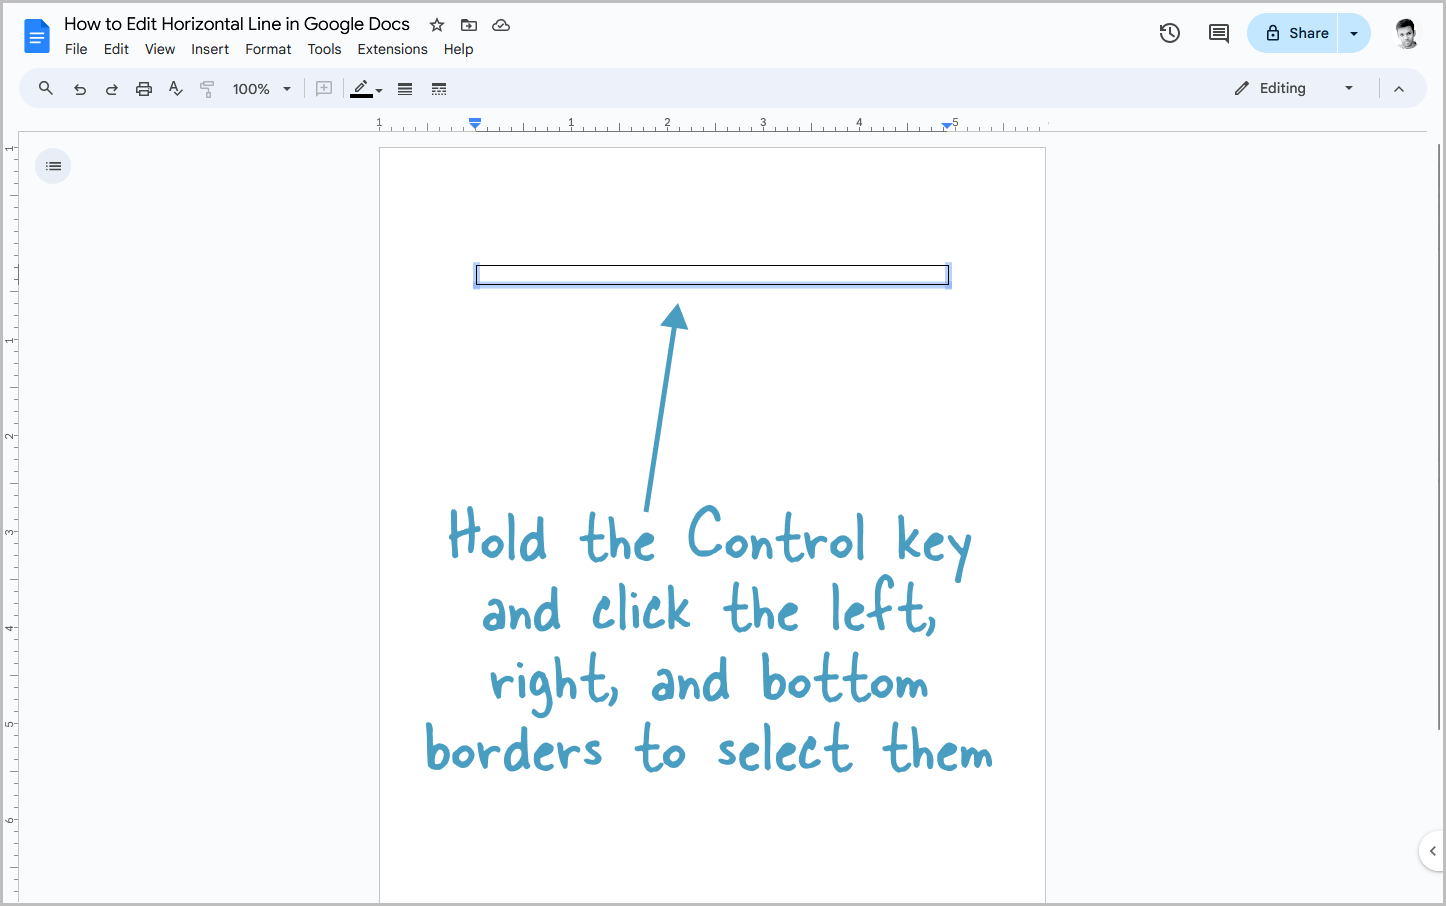
We will now remove the unwanted borders—the left, right, and bottom.
To begin, hold the Control key on your keyboard and select the left, right, and bottom borders of the table.
Once the borders are selected, proceed to the next step.
Step 7: Set the border width to “0pt” (to hide those borders)
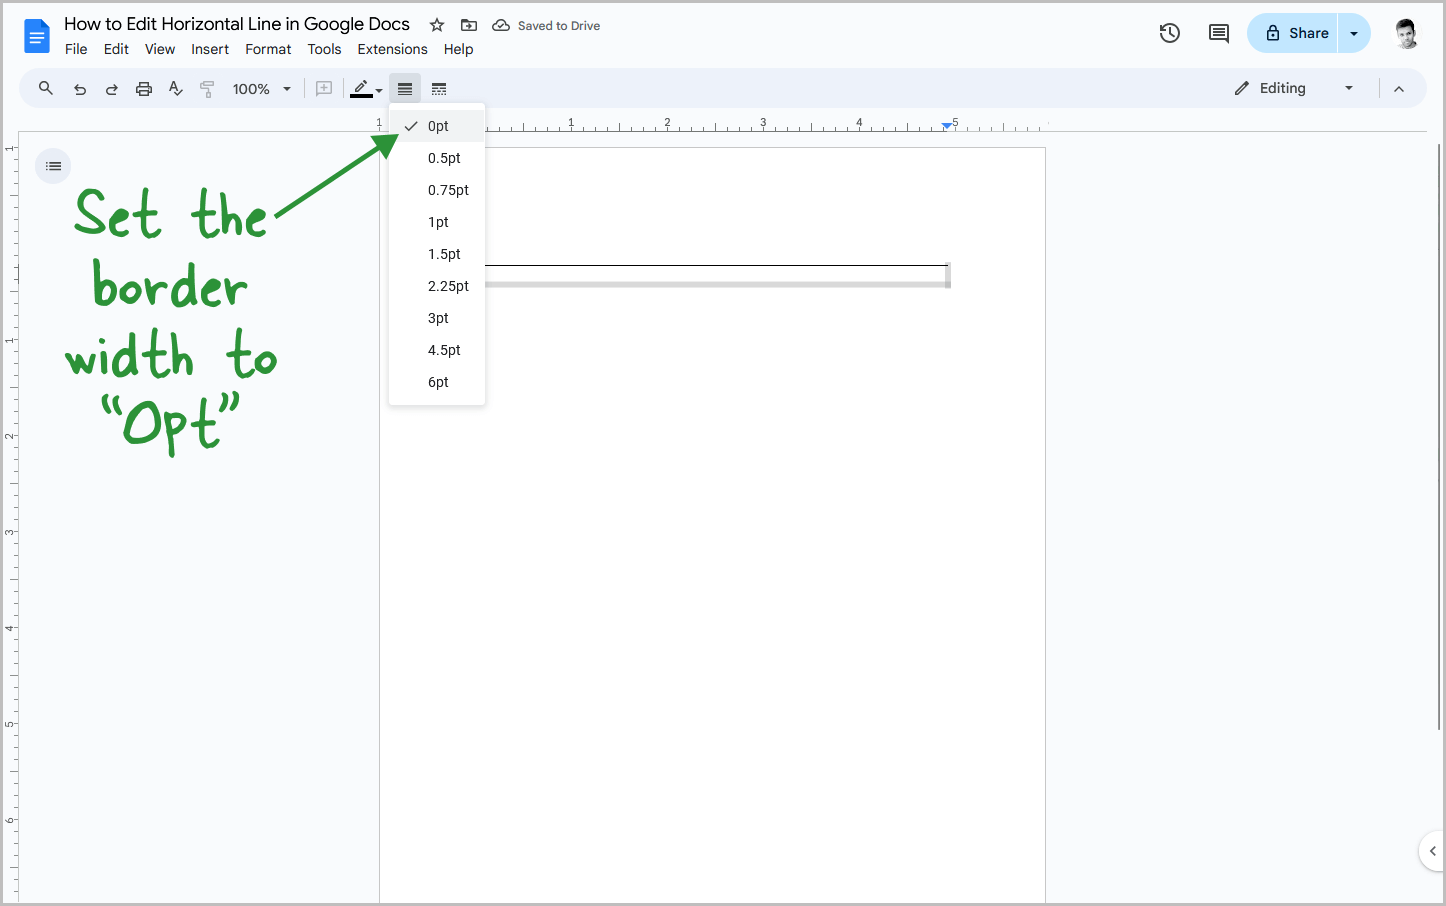
Now, click on the “Border width” option from the toolbar and select “0pt.”
This will hide the borders completely.
You can also click on the “Border color” option and choose the “White” color to achieve the same result; however, I personally prefer the border width option.
Step 8: Click inside the cell and set the font size to “1pt”
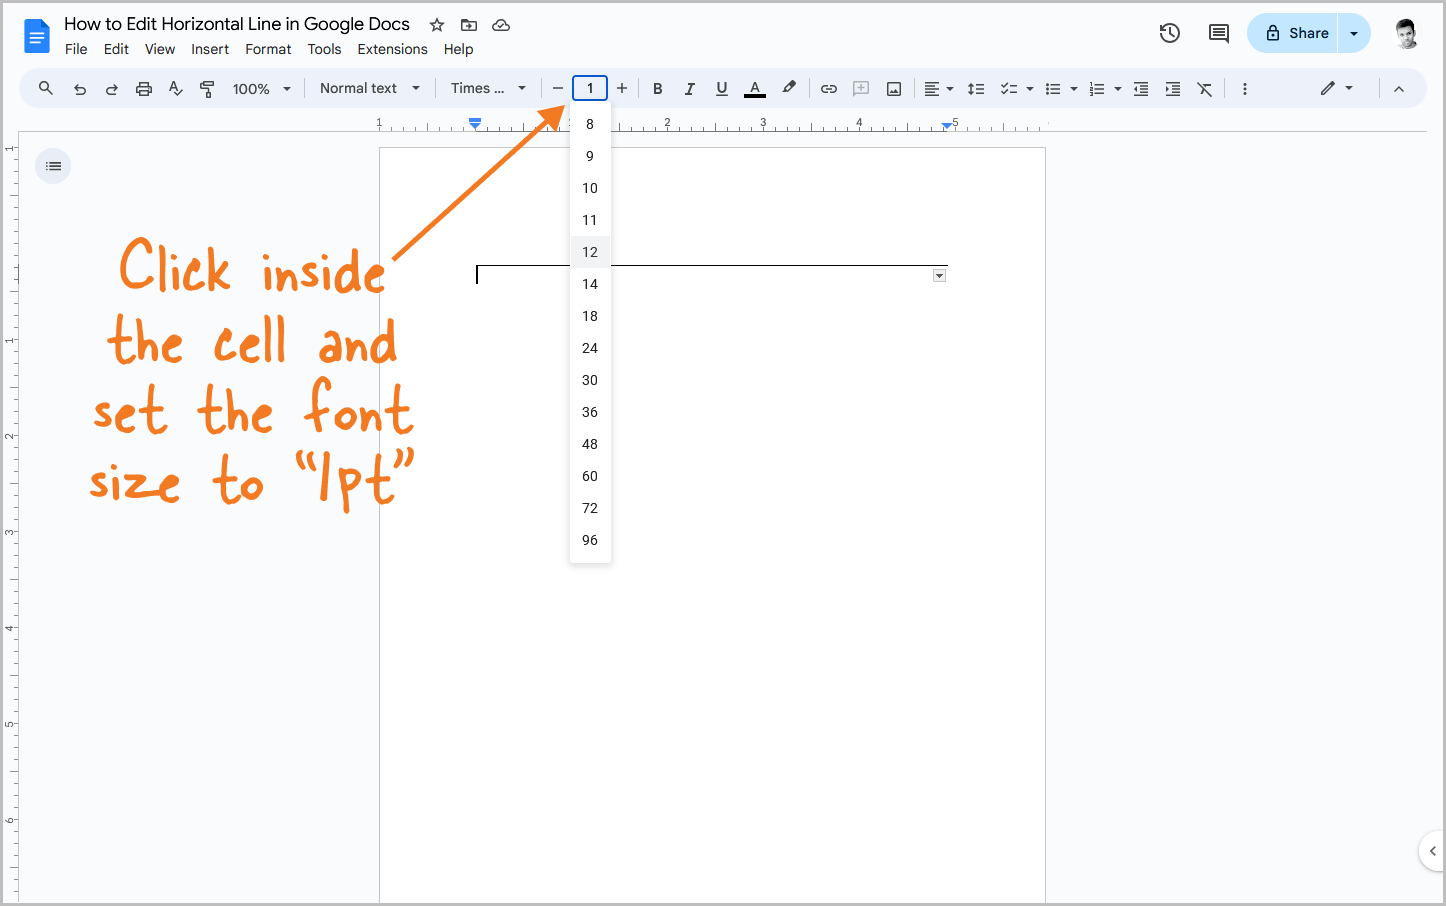
Now, click inside the cell, then click in the “Font size” box and enter “1” before pressing the Enter key on your keyboard.
You will now see that the height of the table has been reduced.
It is now time to finally edit the horizontal line.
Step 9: Adjust the top border to customize the line as needed
There are many options to edit the horizontal line; for example, you can change the thickness, color, and dash type. Below, I will explain all the possible options.
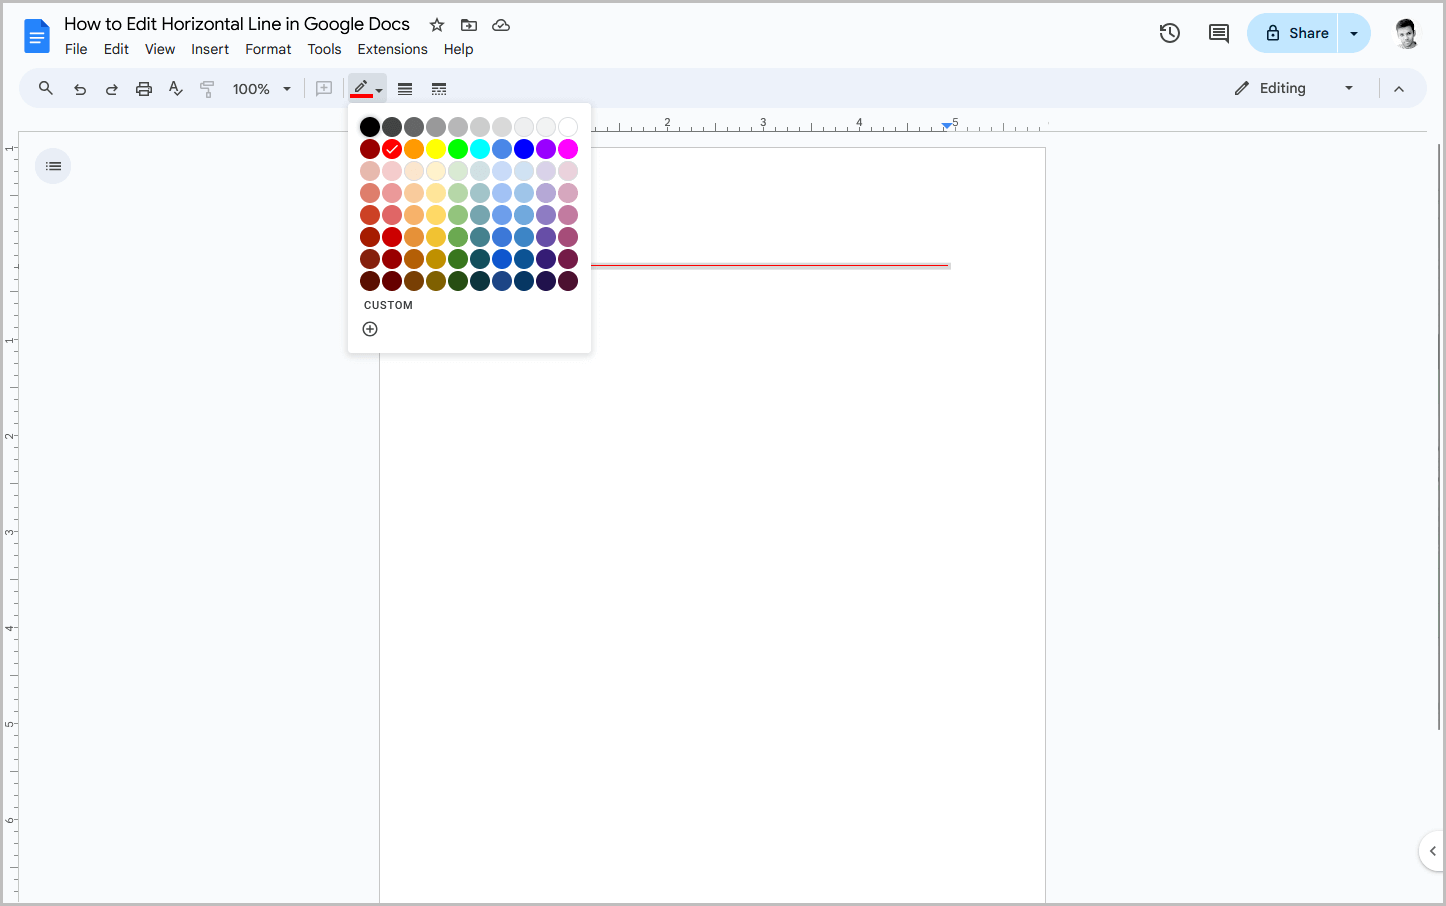
First, click on the line to select it, then click on the “Border color” option and select your desired color. You can also choose a custom color.
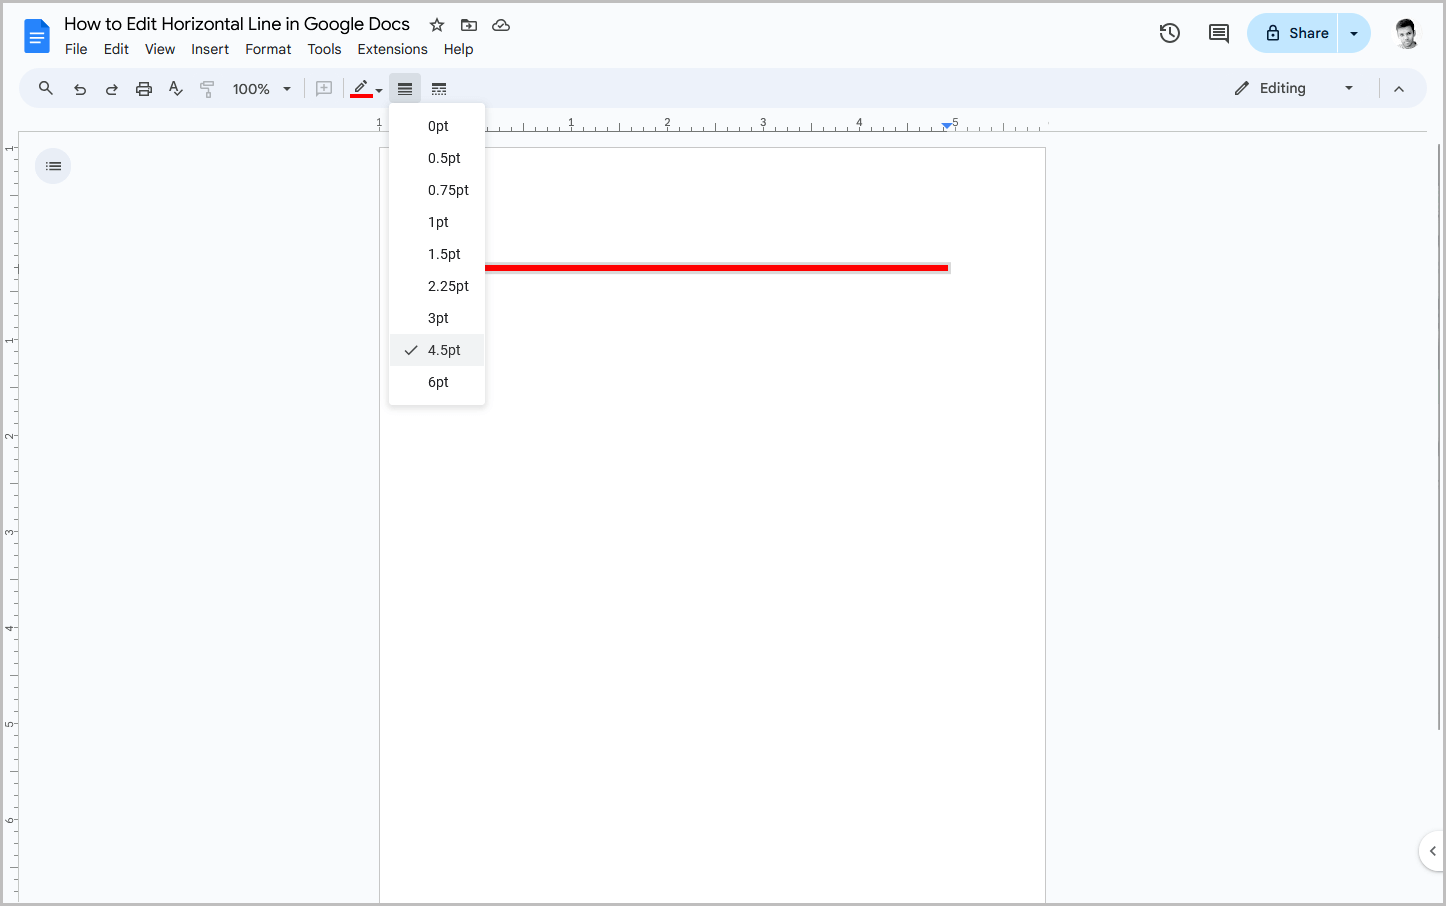
To adjust the thickness, click on the horizontal line, then click on the “Border width” option from the toolbar and choose one of the available widths.
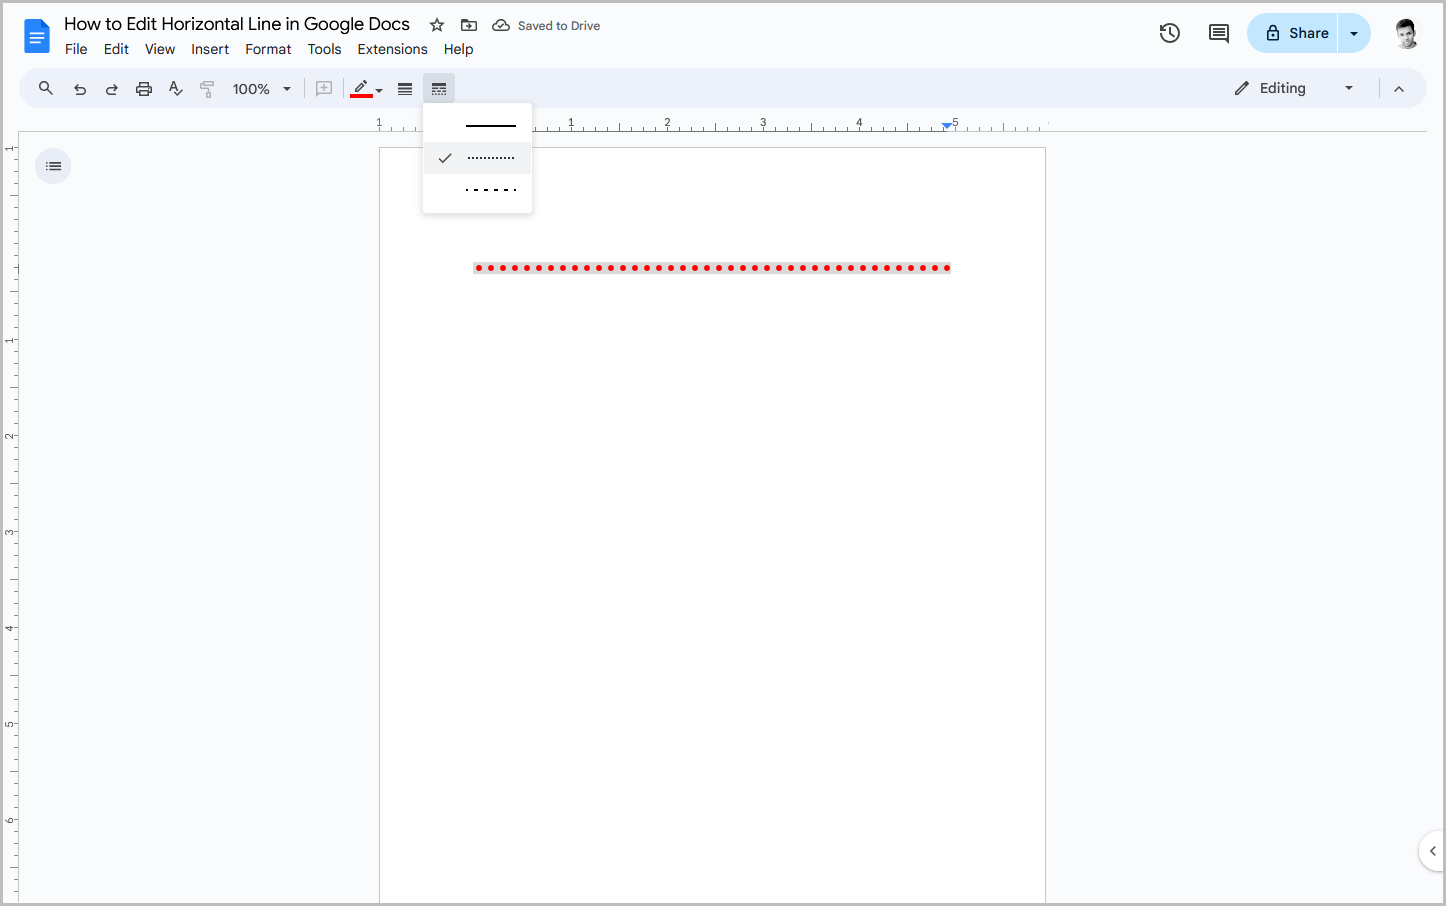
You can also change the line type: simply select the horizontal line, click on the “Border dash” option, and choose any of the dash types from the list of options.
Conclusion
Inserting a horizontal line is super easy in Google Docs, as there is a built-in function for that.
However, editing the horizontal line can be a challenge because there are no built-in features for that.
Fortunately, there is an easy way to insert and edit a horizontal line in Google Docs.
Follow these steps to edit the horizontal line in Google Docs:
- Go to Insert > Table > 1×1.
- Resize the table to adjust the length of the line.
- Right-click inside the table and select “Table properties.”
- Under “Table,” set the alignment to Center.
- Under “Cell,” set cell padding to 0.
- Hold the Control key and click the left, right, and bottom borders to select them.
- Set the border width to 0pt (to hide those borders).
- Click inside the cell and set the font size to 1pt.
- Adjust the top border to customize the line as needed.


