Recently I was working on the SIOP lesson plan template for Google Docs, and I had to make a bullet point list and a checklist inside one of the tables in the template.
Also, you can also try directly inserting the checkbox symbol if you want more customization options.
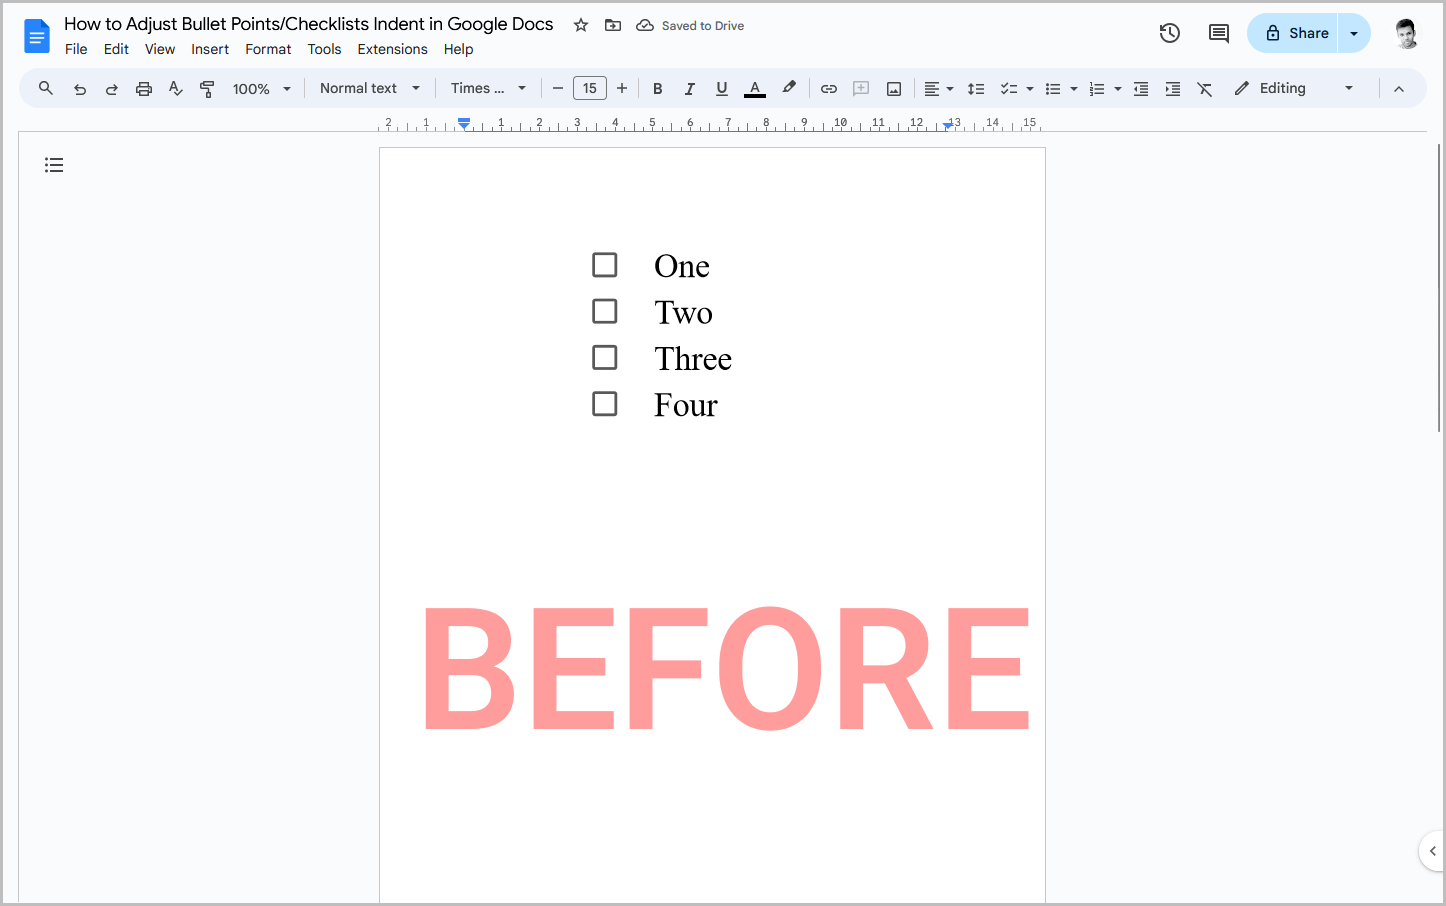
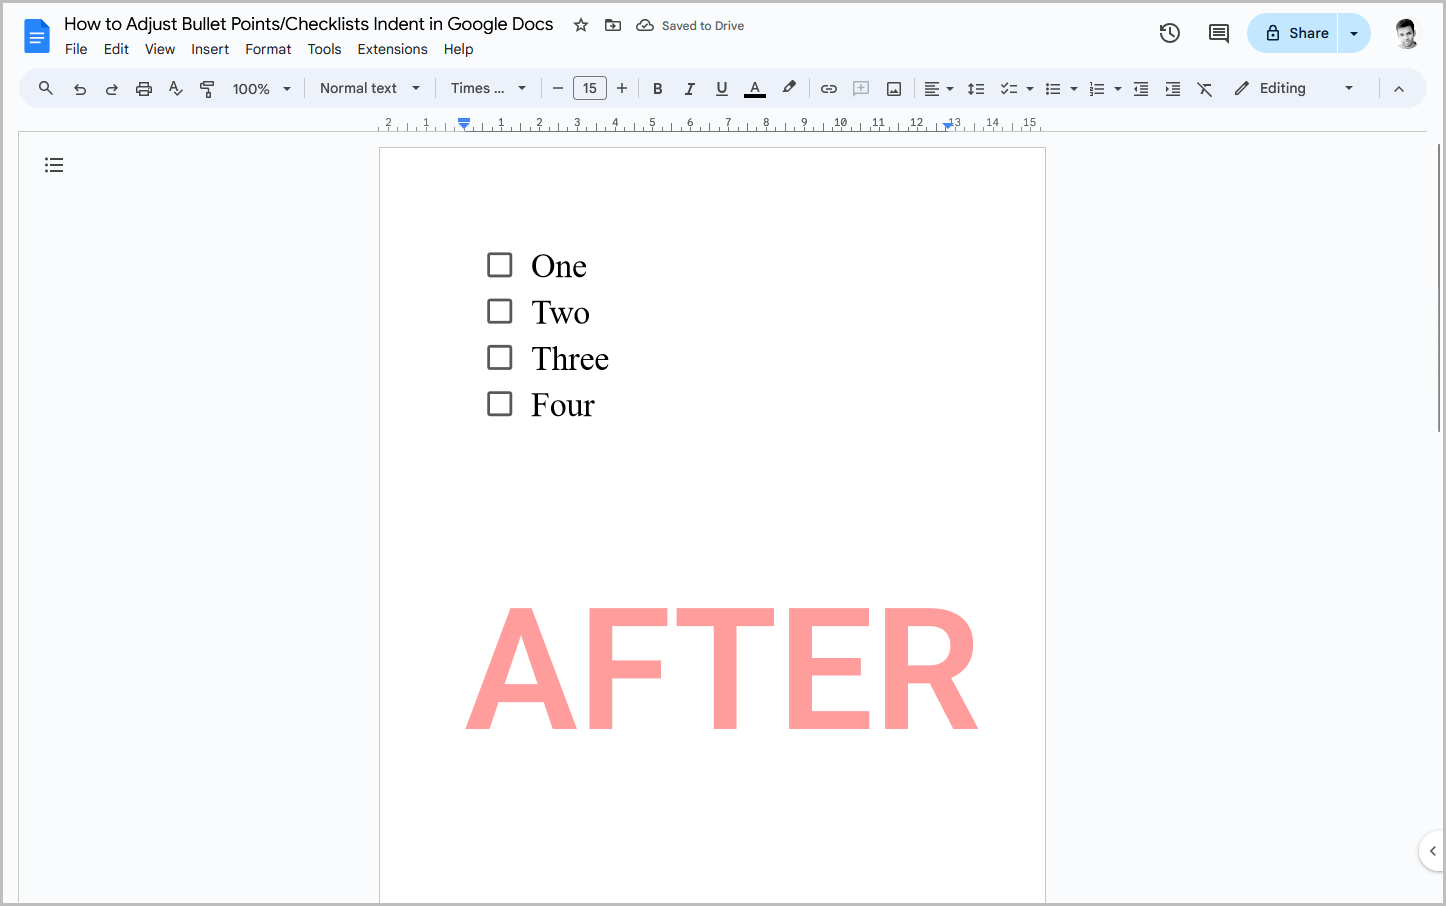
But whenever I inserted them in my document, they would automatically indent, spoiling the entire look of the template.
I looked for this on the internet to find a solution.
And I found two easy solutions. In this tutorial, I will be sharing these two easy methods that can allow you to easily adjust the indents both in a bullet list or checklist.
Using Indentation Options
This is a quick and easy method to change the indent in a bullet list or a checklist. If you are looking for a method with more customization, I would suggest you follow the second method given below.
Step 1: Select the checklist or bullet list
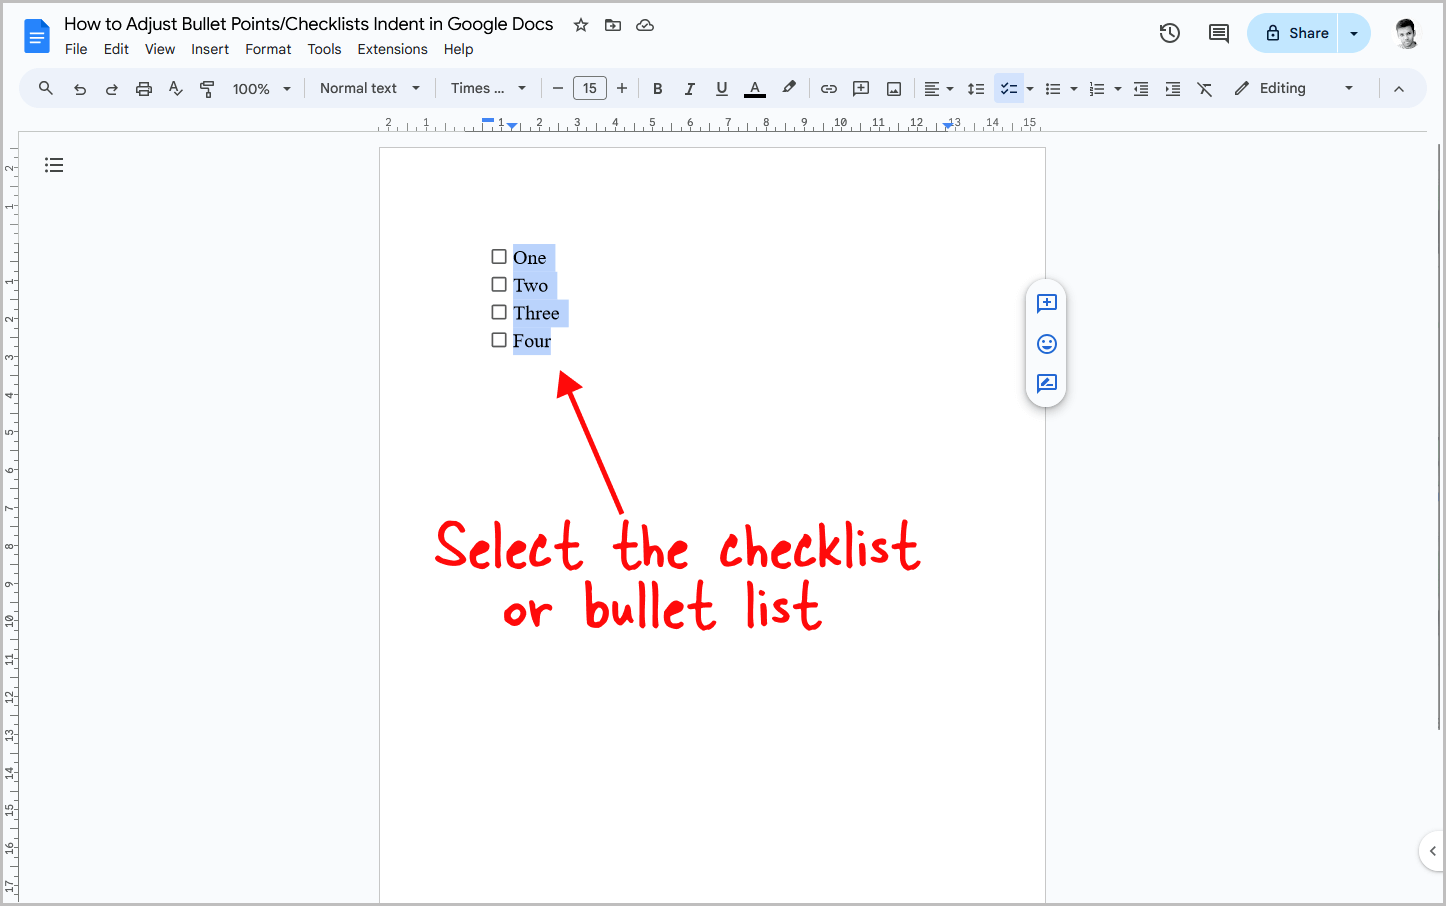
The first step is to select the entire checklist or bullet list.
If you select just the first point in the list, the indent will be adjusted for just that particular point and not the entire list.
So make sure you select the entire checklist.
If you haven’t inserted a list yet, simply go to the toolbar and click on the checklist or bullet list option to insert a list, and then you can proceed to the next step.
Step 2: Go to Format > Align and indent > Indentation options
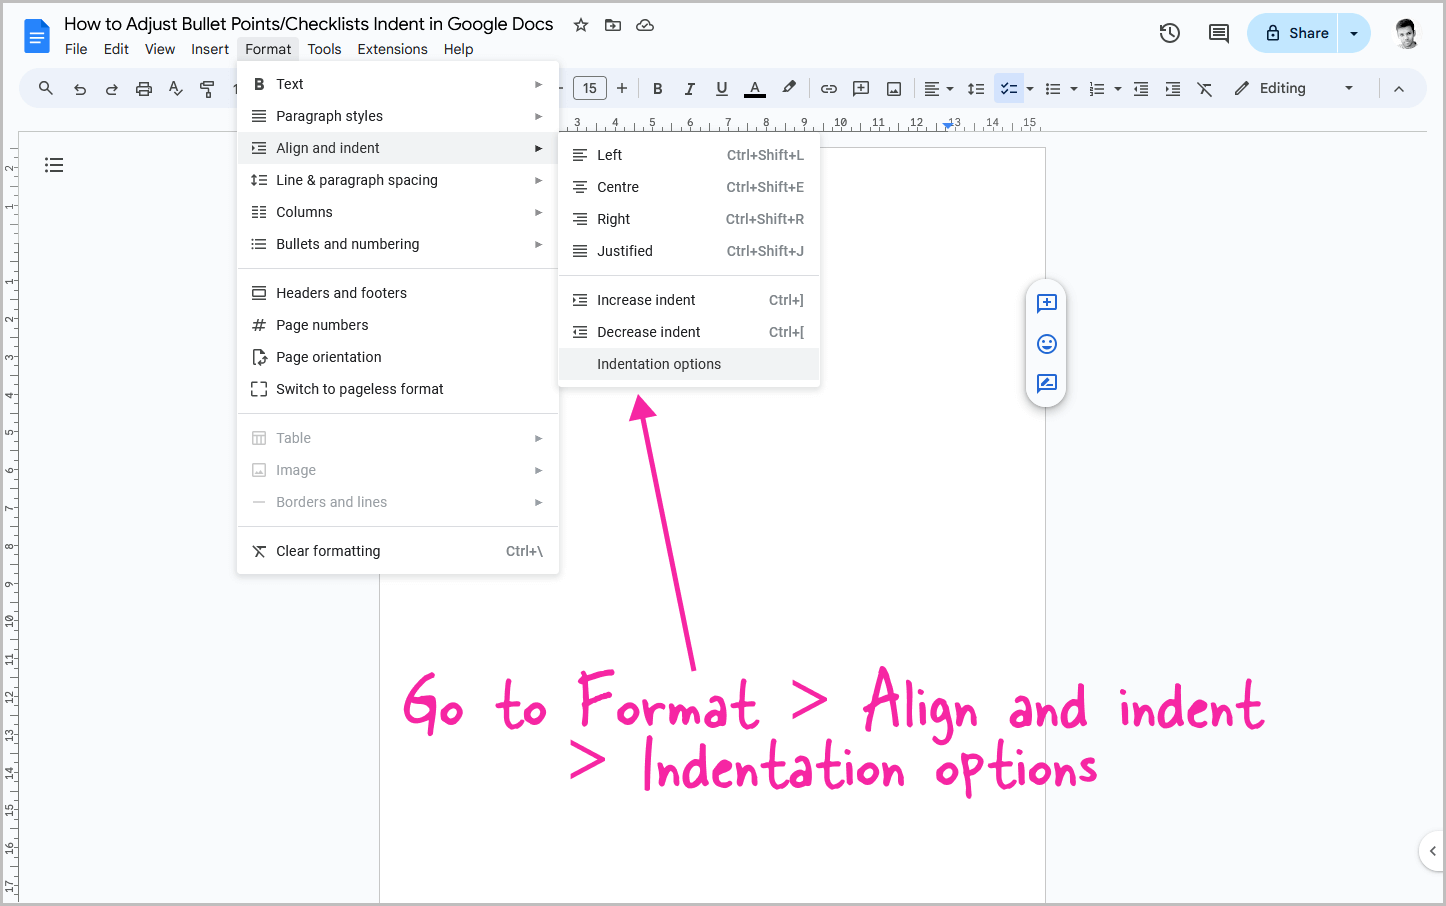
After you select the list, simply click on the “Format” option on the top menu.
You will now see a drop-down menu with a list of options.
Hover the cursor over the “Align and indent” option to see the secondary menu options.
Finally, click on “Indentations options” to open the Indentation pop-up window.
Step 3: Click inside the “Left” box
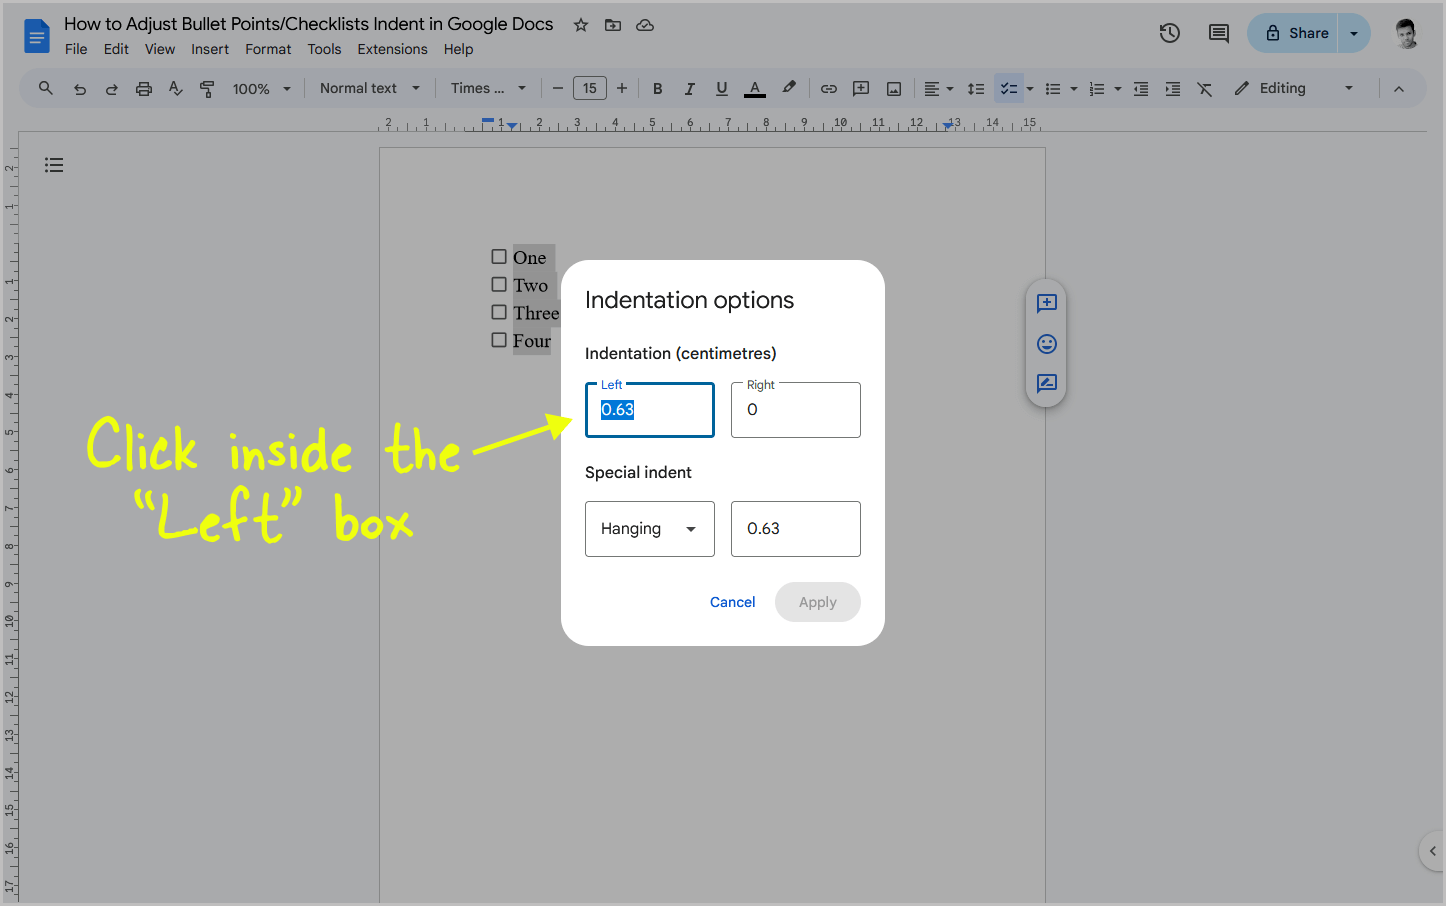
Here you will see two sections: Indentation and Special indent.
Click inside the left box in “Indentation section”. You will see a number inside it. For me, it was 0.63 cm.
You may have some different number or maybe a different metric like inches.
This is basically the size of the indent which is on the left side of the document.
You can easily adjust the left indent using this box. Similarly, you can adjust the right indent by adjusting the changing the number of the right box.
Step 4: Enter “0” and then click “Apply”
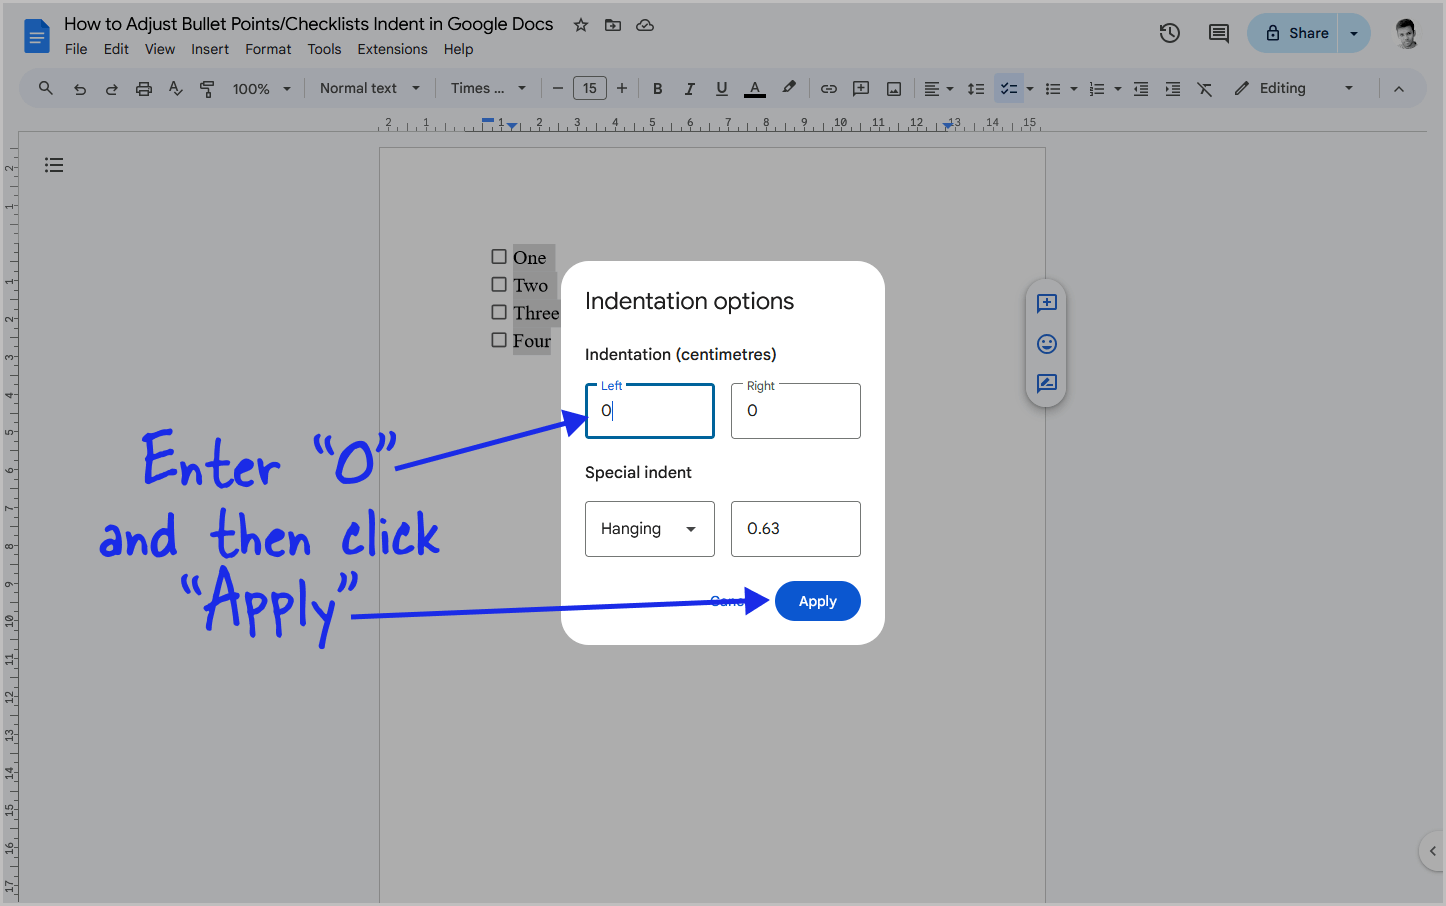
Delete the current indent size in the left box and enter “0” to make the indent zero.
You can also enter a different indent size.
But I would suggest you enter the number “0” and then click “Apply”.
The pop-up window will now be closed. You can see that the indent size is reduced.
If you find that the indent is too small, you can follow the step again and re-adjust the size.
You can also enter a negative number (-1, -2, -3…) to reduce the indent further.
Using the Ruler
This is a better method as it offers more customization.
You can also adjust the space between the checkbox symbol/bullet symbol and the text in a list.
However, this method can be a bit complicated for some.
Hence, I have explained the “Indentation Options” method first and this method second.
Step 1: Insert a checklist or a bullet list
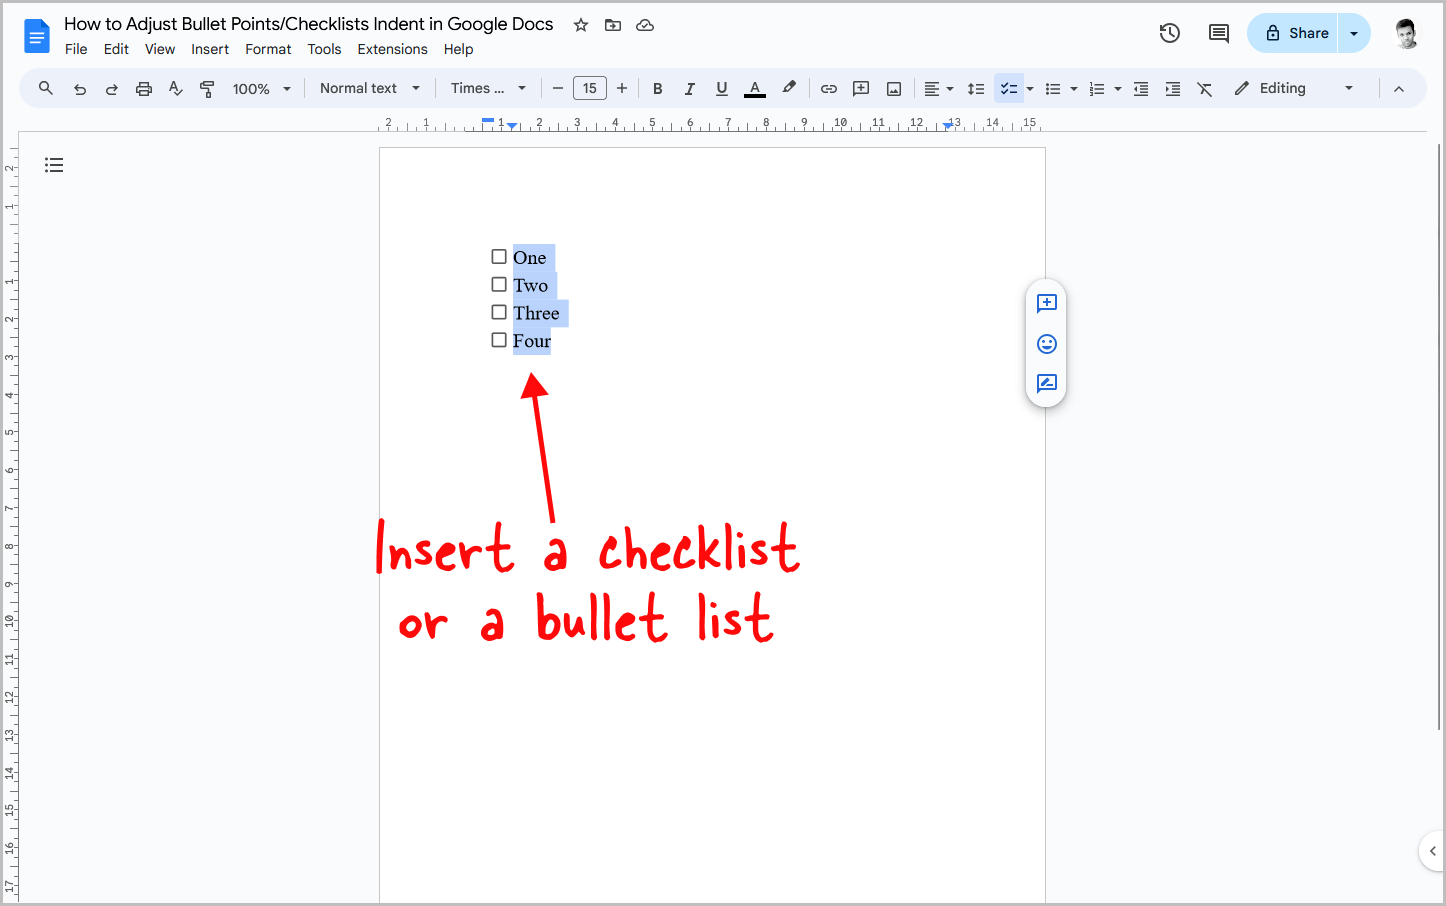
To begin, insert a checklist or a bullet list. If you have already inserted the list you can select the entire list and then jump to the next step.
Step 2: Click and hold the triangle on the ruler
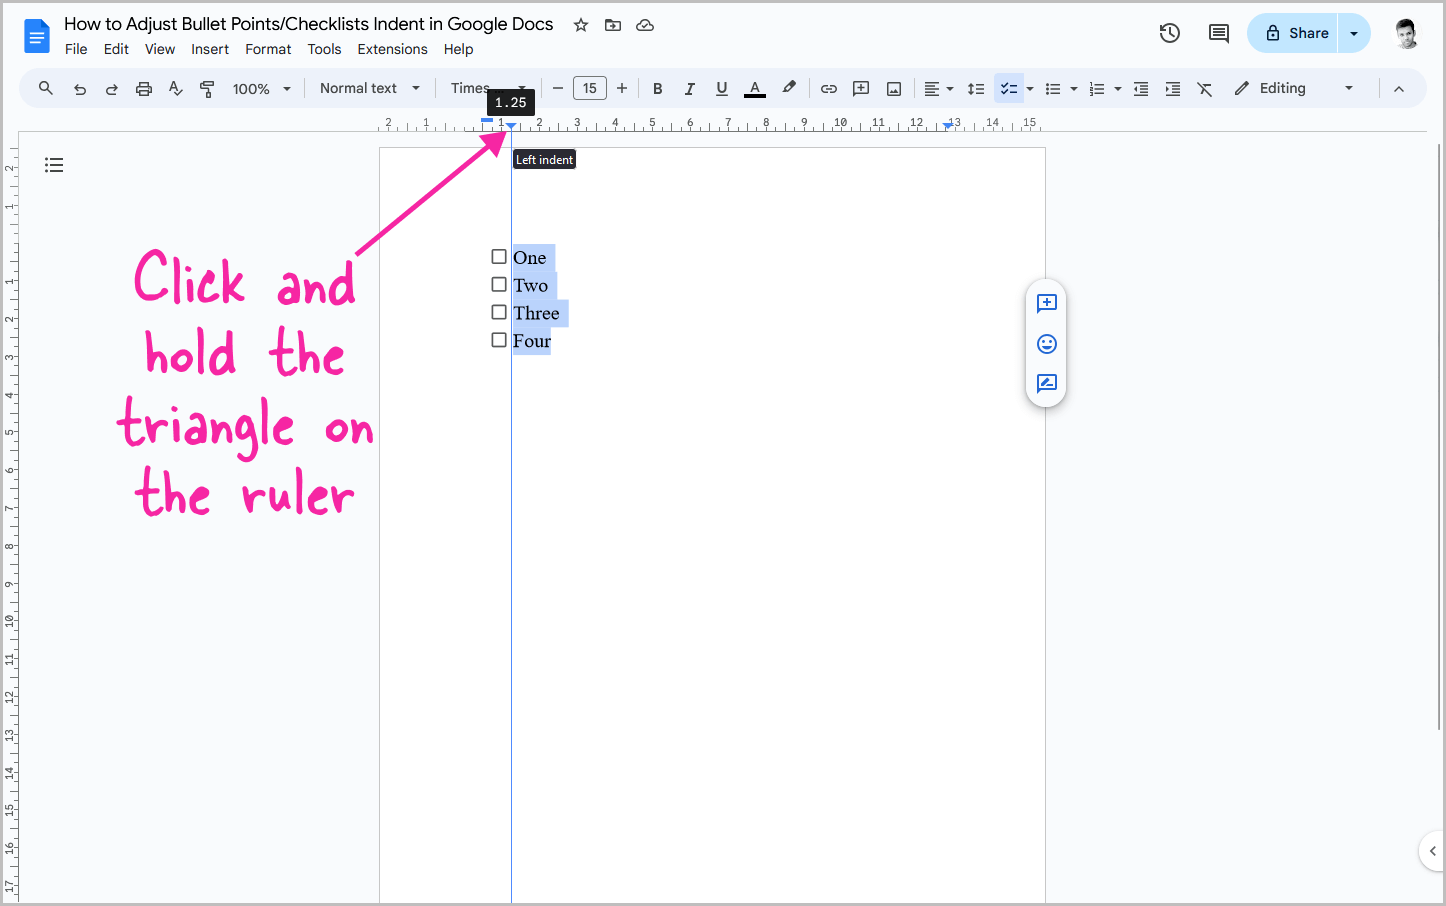
After you insert the list, pay attention to the ruler bar located just below the toolbar.
On the left side of the ruler, you will spot a rectangle and a triangle.

Using the rectangle, you can adjust the space between the checkbox or bullet symbol and the text. And using the triangle, you can adjust the indent.
Now, click and hold the triangle on the ruler and then proceed to the next step.
Step 3: Drag it to the left or right to adjust the indent
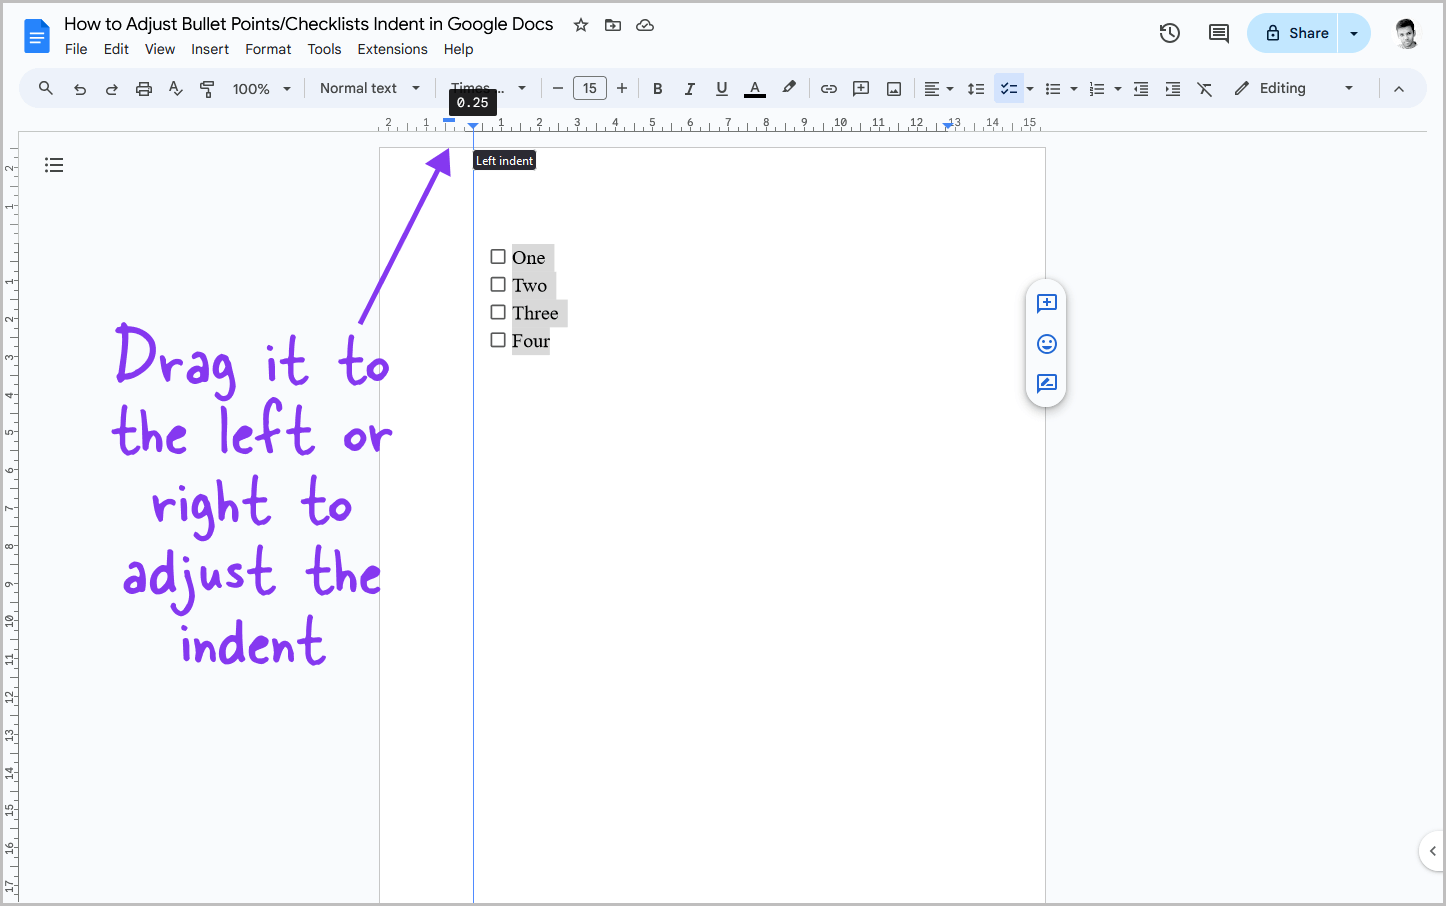
Drag the triangle to the left to reduce the indent. Similarly you can also drag it to the right to increase the indent.
Step 4: Drag the rectangle to adjust the space between the checkbox and the text
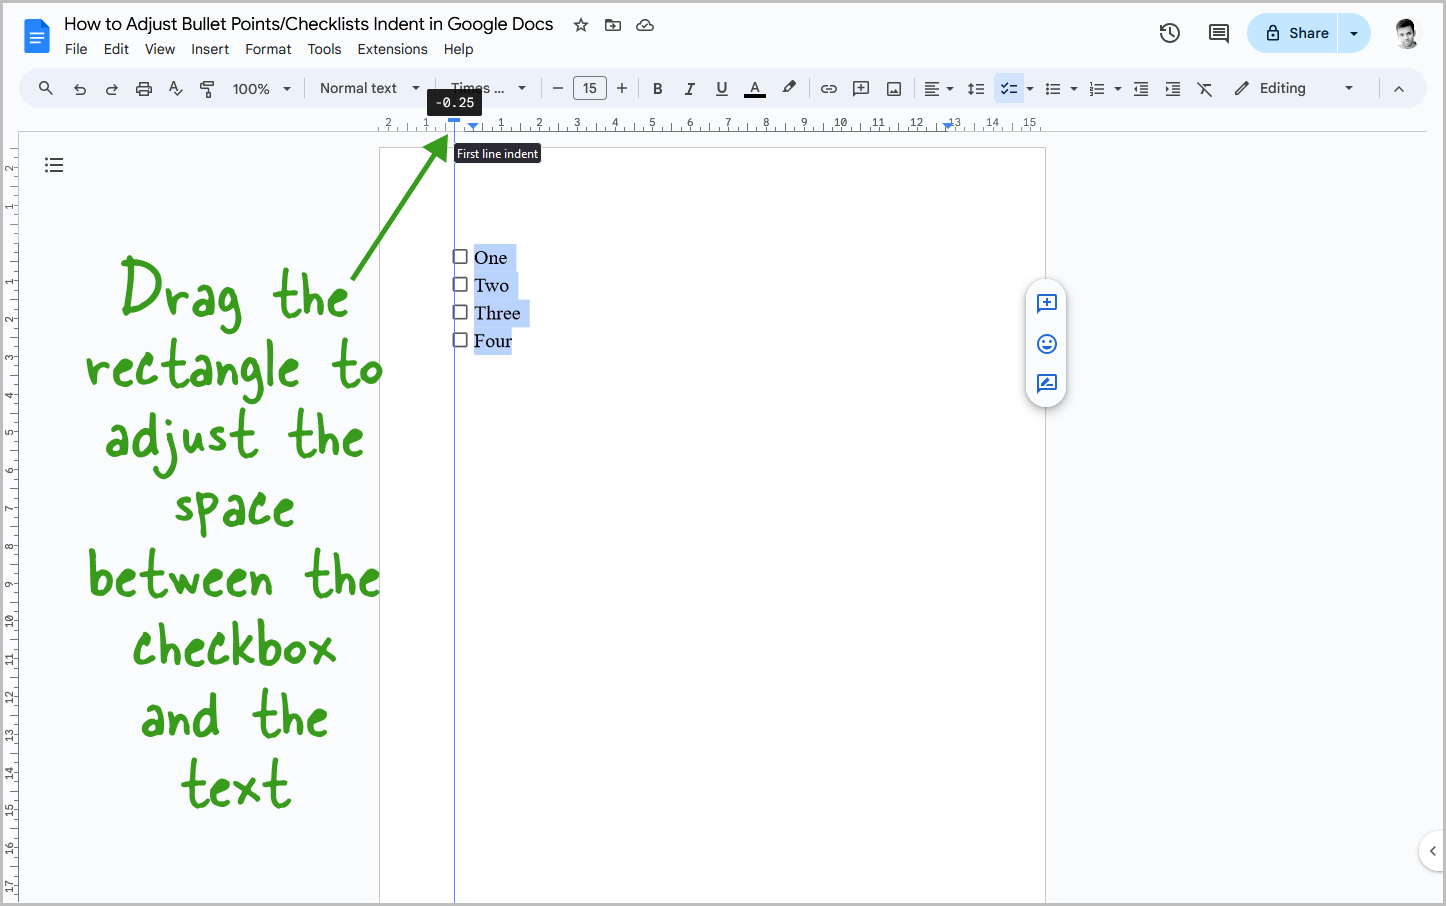
This step is totally optional and you can skip it.
You can also fine-tune the space between the symbol and the text.
For this, simply click and hold the small rectangle on the ruler and drag it to the left to move the symbol far away from the text, or you can drag it to the right to bring it closer to the text.
FAQs
Simply go to the Format > Align and indent > Indentation options. Make the left indent “0” and press Apply.
In Google Docs, you can drag the small triangle on the ruler to the left to decrease the indent on the bullet points.
In Google Docs, you can drag the small triangle on the ruler to the left to decrease the indent on the checklist.
You can either make the left indent “0” by going into the indentation options or use the triangle on the ruler to get rid of the extra indentation in Google Docs.


