While designing the New Employee Onboarding Checklist Template for Google Docs, I encountered a hurdle: adding a signature line.
Signature lines are essential for official documents.
Many online tutorials suggest using the drawing tool, but this can result in a pixelated, unprofessional-looking line when printed.
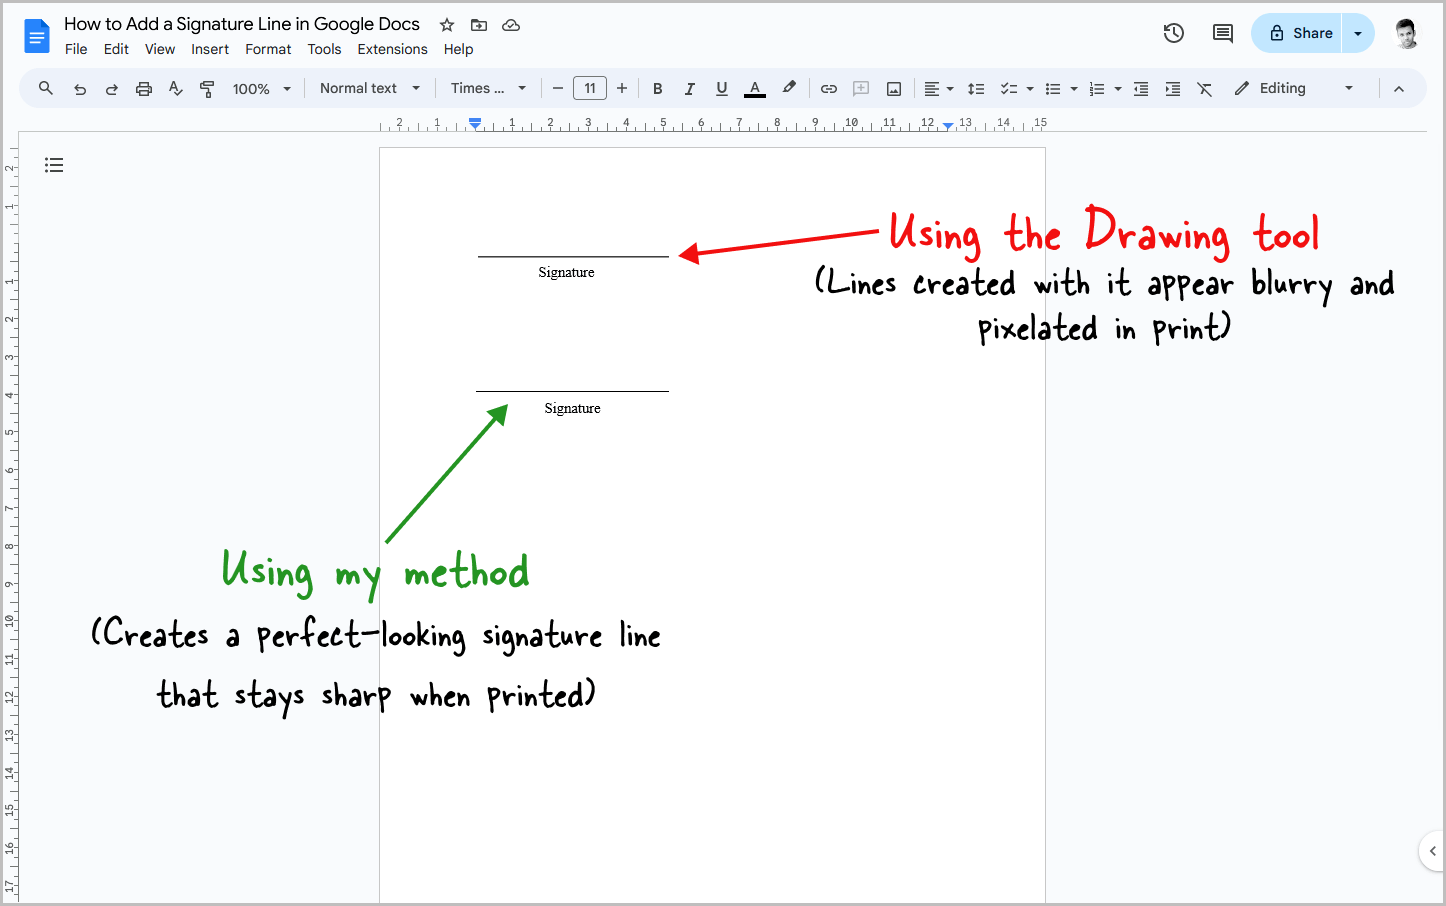
Fortunately, there’s a much simpler and cleaner method to insert a perfect signature line with accompanying “Signature” text.
This is my preferred method, and it ensures a crisp, professional look for printed documents.
Let’s dive in!
Here’s How to Add a Signature Line in Google Docs:
Step 1 | Step 2 | Step 3 | Step 4 | Step 5 | Step 6 | Step 7
Step 1: Position your cursor where you want the signature line
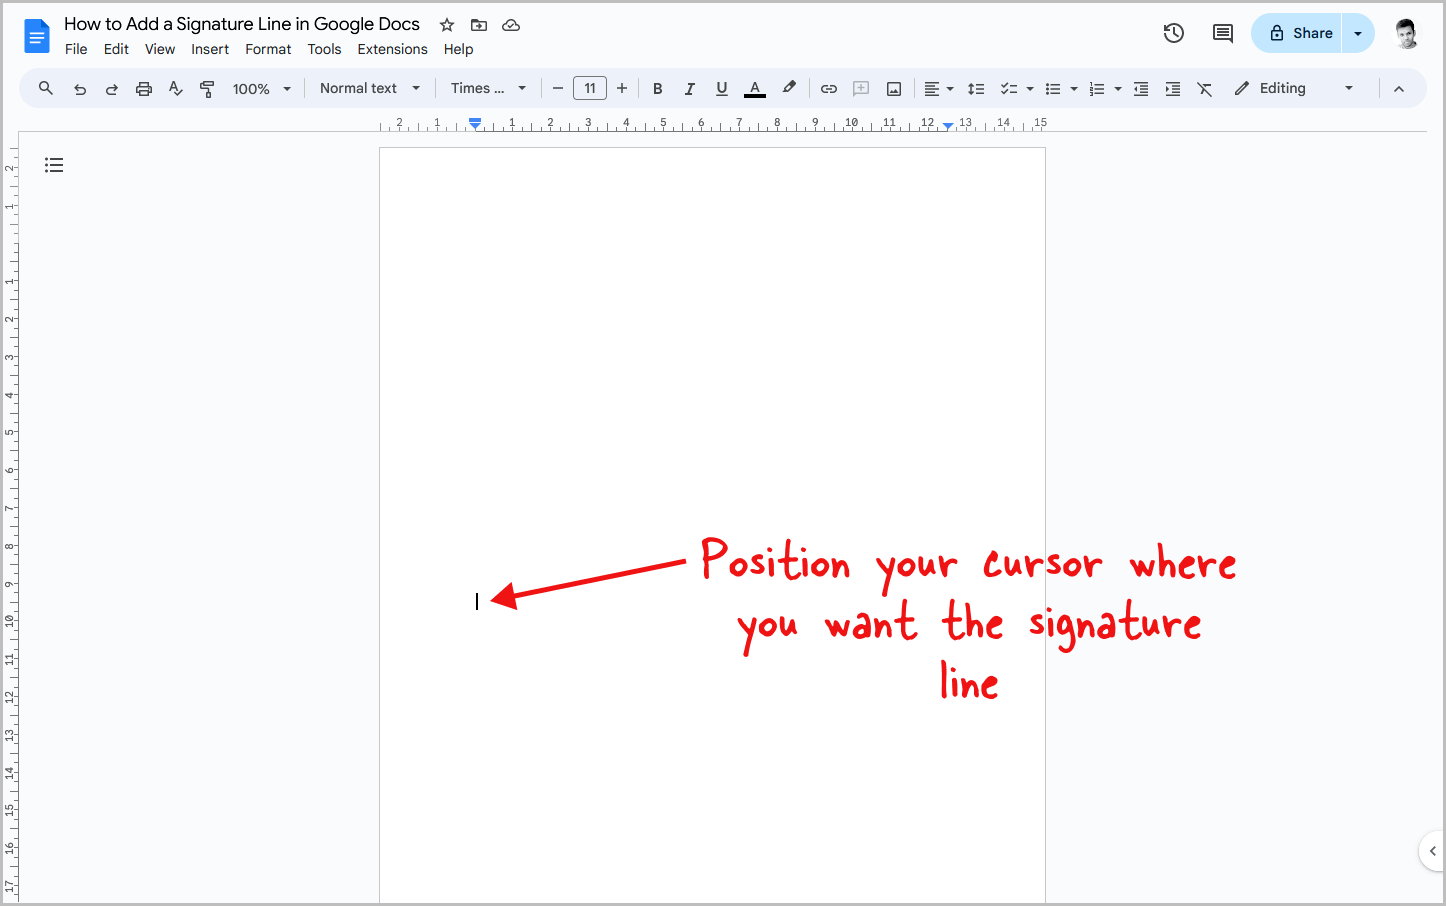
First, place your cursor where you want the signature line to appear.
Use the up and down arrow keys to navigate to the desired line.
Don’t worry about the exact horizontal position yet – we’ll address that later.
Also read: How to Convert Google Doc to HTML
Just focus on getting the cursor on the correct line for now, then move on to the next step.
Step 2: Go to Insert > Table > 1 x 2 table
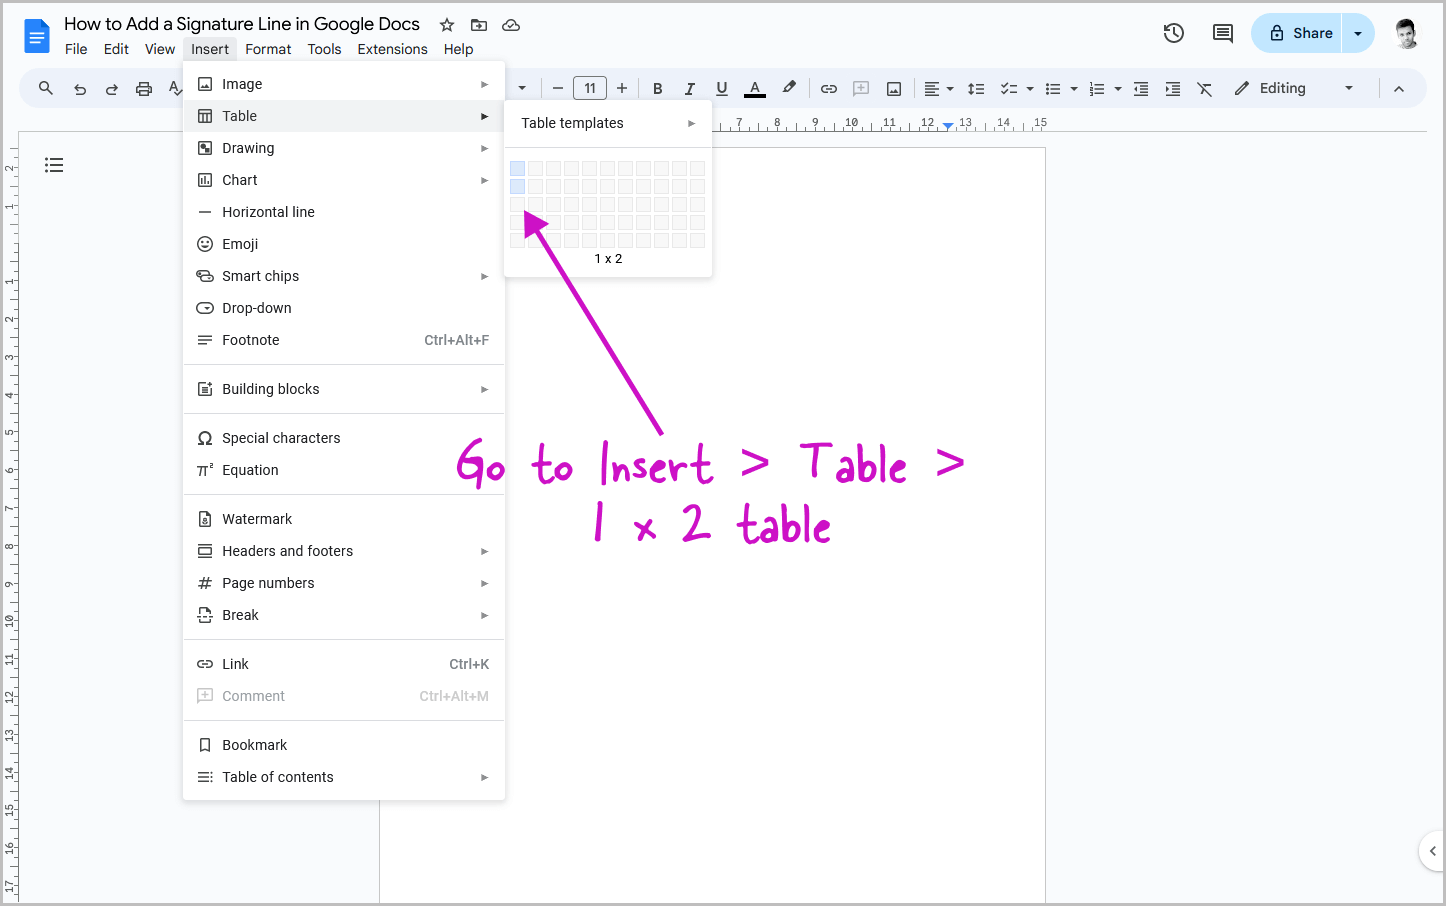
With your cursor in place, navigate to the “Insert” tab and choose “Table.”
Select a 1×2 table for the signature line and “Signature” text.
In this guide, we’ll use a 1×2 table to create a signature line with the text “Signature” below it.
If you want the text signature and the line next to each other, simply select a “2 x 1” table.
Step 3: Click inside the second cell and insert your desired text
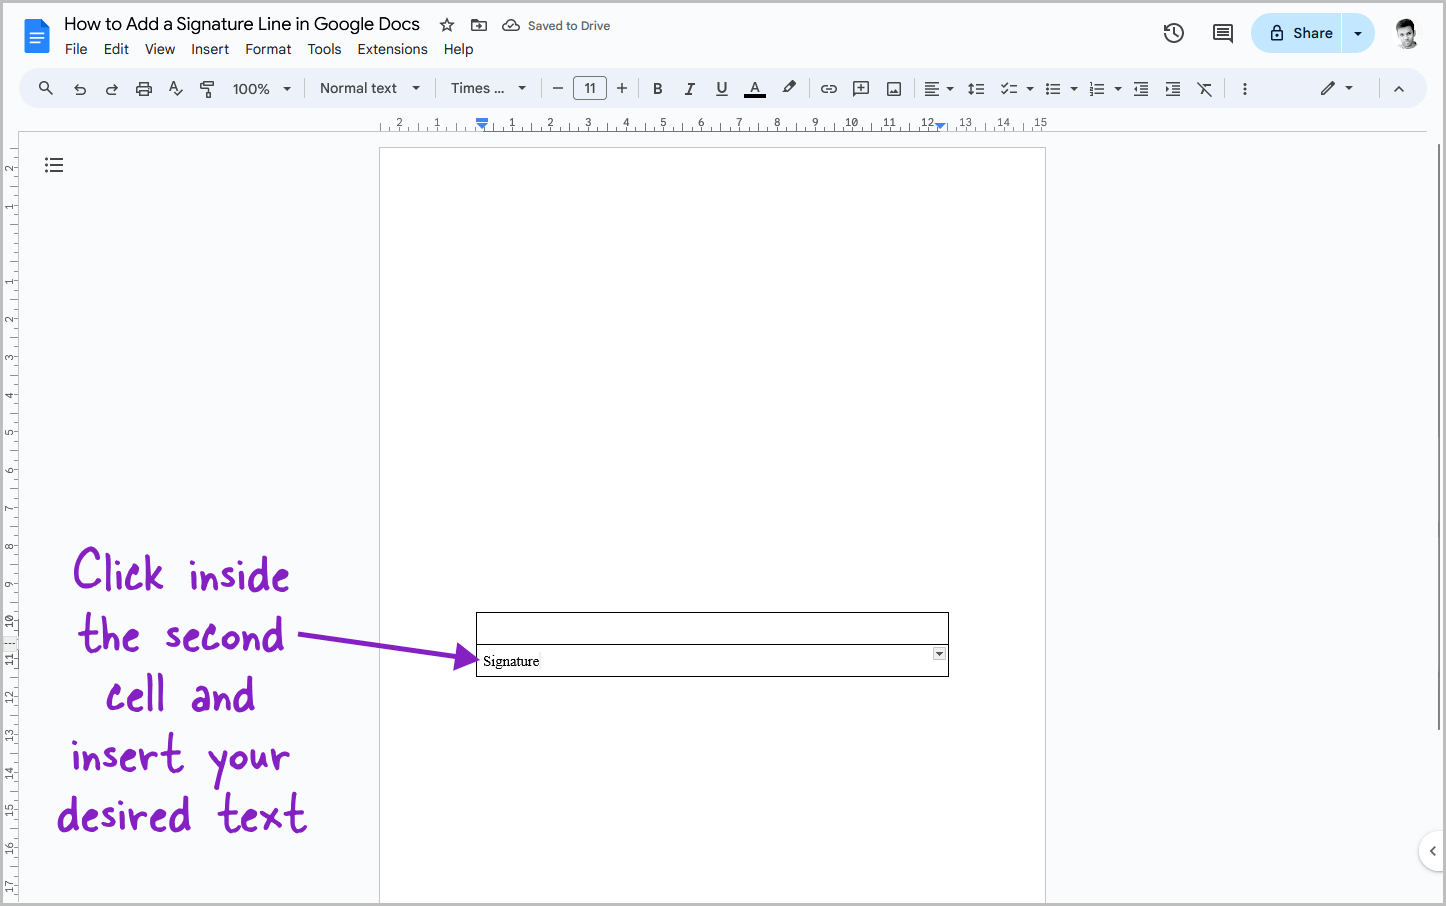
Now, click inside the cell where you want to insert the text and start typing it.
Here, you’ll type the text that clarifies the purpose of the line.
In this case, we’ll type “Signature” to indicate where the signatory should sign.
Step 4: Center-align the text in the signature cell for a polished look
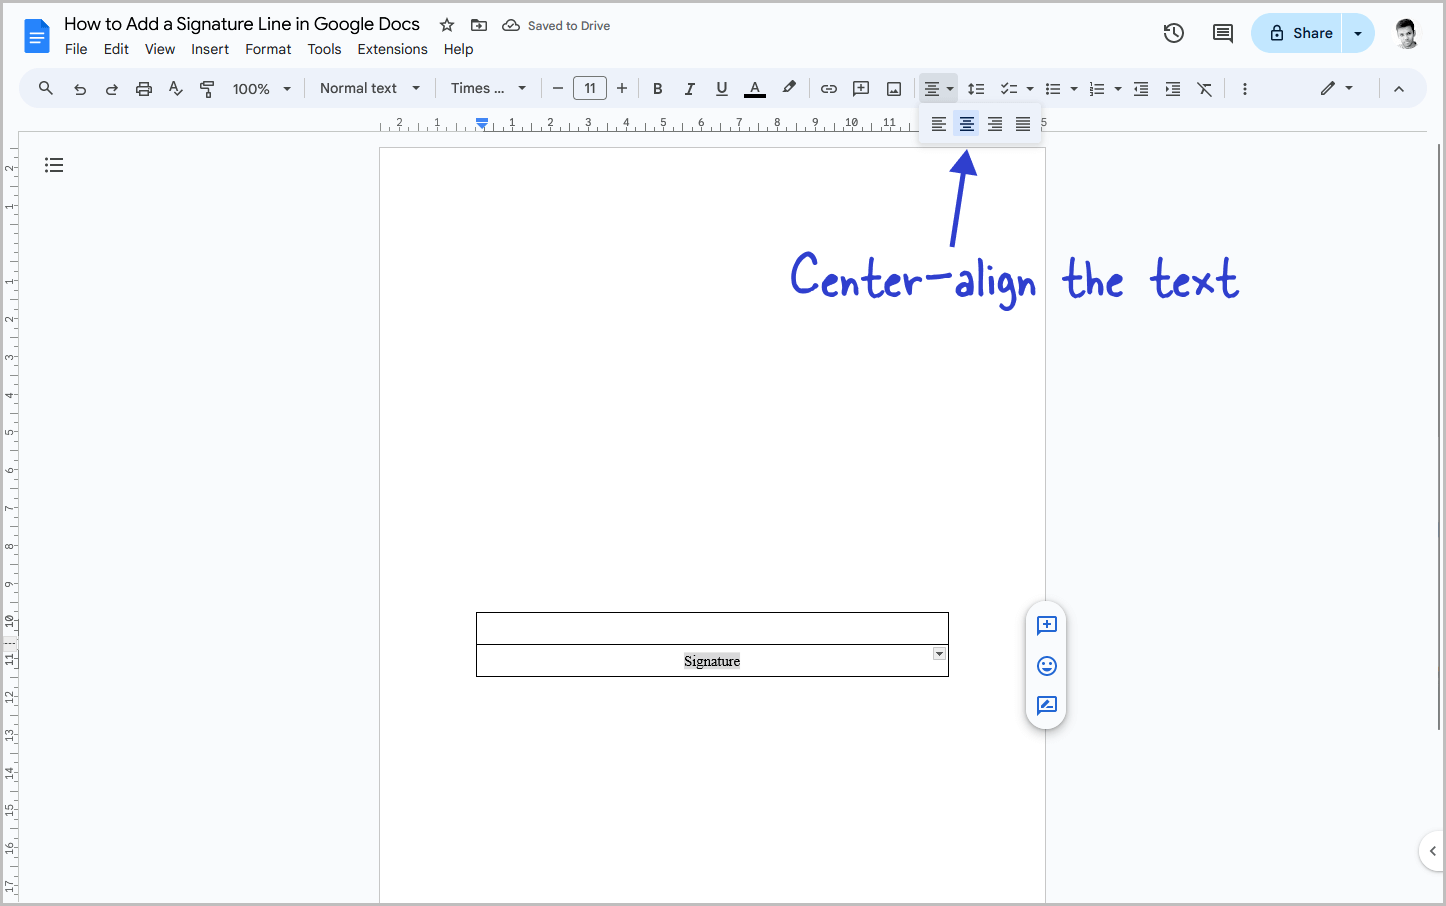
For a polished look, you can center-align the text (“Signature”) within the cell.
Simply highlight the text and click the “Center align” option in the toolbar.
Google Docs also allows further customization: adjust font size, style, or color to match your document’s formatting.
Step 5: Adjust the table size
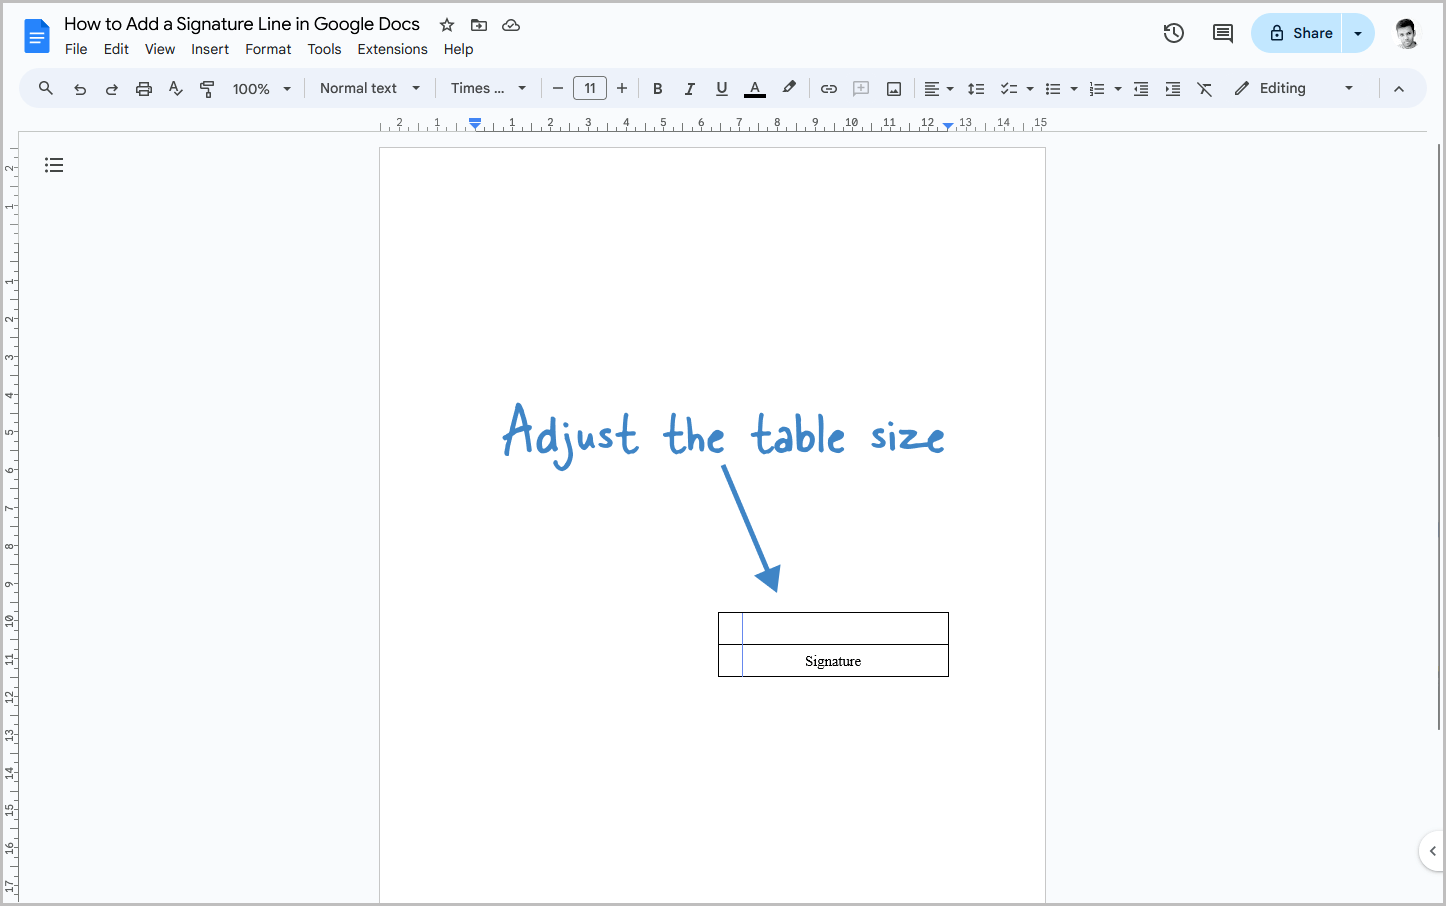
Fine-tune the table’s position and size.
This step ensures the signature line sits perfectly on your page.
You can either:
- Drag the borders: Hover your cursor over the table’s right or left border and drag it to resize the table.
- Adjust table alignment: Right-click inside the table and choose “Table properties.” Under “Alignment” in the sidebar menu, select left, right, or center.
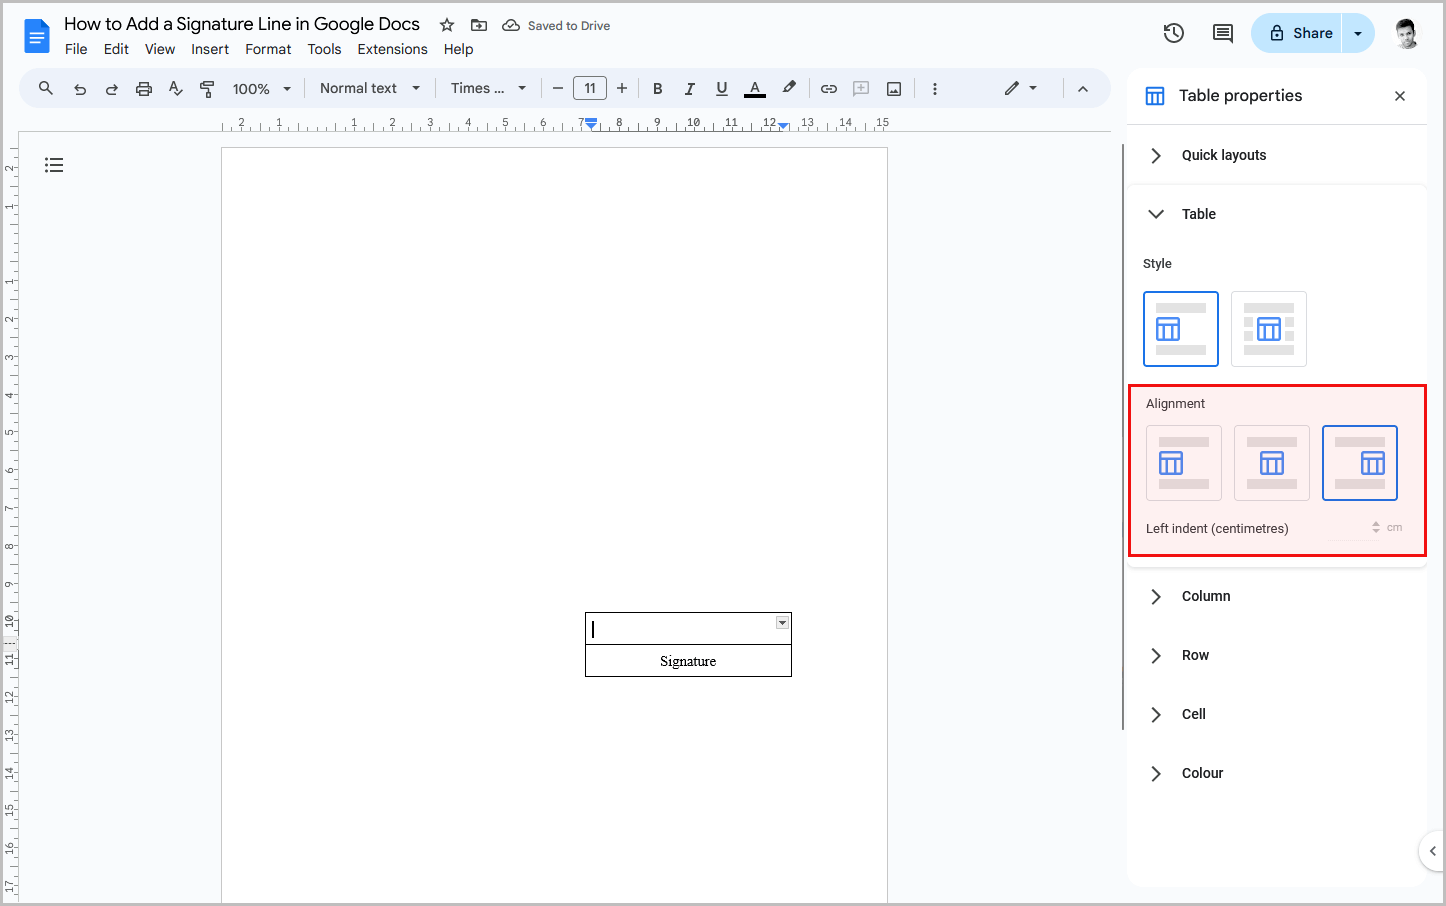
Once satisfied, close the sidebar and proceed.
Step 6: Hold the “Ctrl” key and select all the unwanted borders
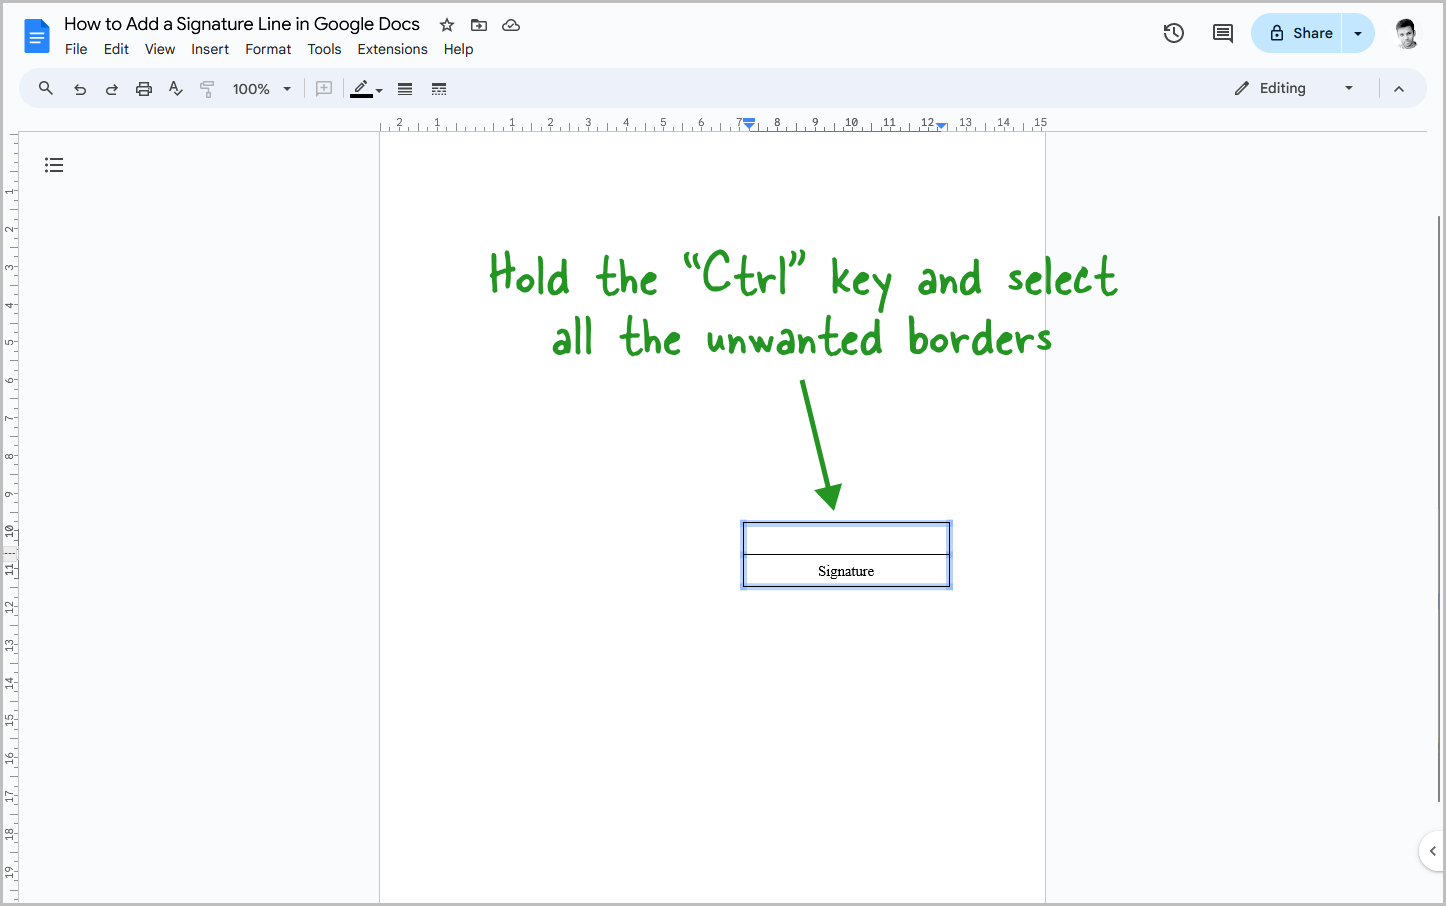
In this step we will remove the unnecessary table borders, leaving just the signature line.
Hold down the Ctrl key and click on each of the borders you want to hide (all except the one above “Signature”).
Step 7: Click on the “Border width” option and select “0pt”
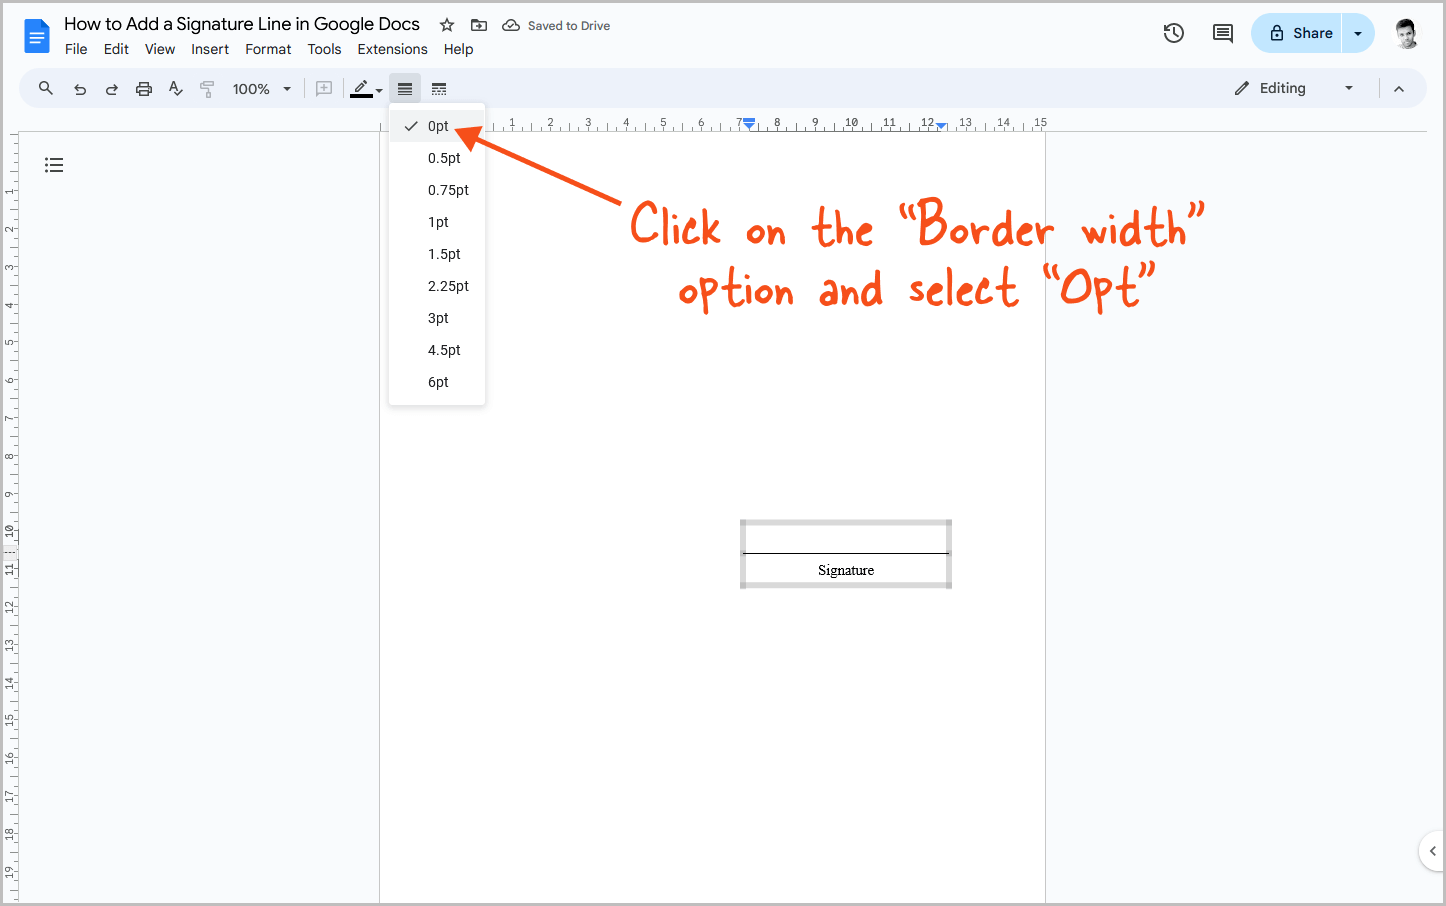
With all the unnecessary borders clicked (hold Ctrl and click each one), head over to the “Border width” option and choose “0 pt.”
This hides the unwanted borders, leaving a clean signature line that won’t pixelate when printed.

Now you have a professional-looking document ready for signatures!
Check out our collection of free, high-quality Google Docs templates to elevate your documents even further.


