“How to insert a checkbox in Google Docs?” is one of the most common questions I get from my users.
A lot of the templates that are on my website are basically form-like documents that have checkmarks in them that are required for some types of documents.
It usually has a checkbox without a check. I keep it without the check because some users might want to print the document as it is and then fill it manually with a pen.
However, some users also fill out the form completely online, and they might be wondering how to insert a check mark into the box.
This tutorial is for them.
I’ll also explain how you can create a checklist on Google Docs in case you need to add it to your documents.
To insert a checkbox in Google Docs:
- Navigate to Insert > Special Characters.
- In the search box, type ballot box with check.
- Click on the Checkbox symbol.
- Close the Insert special characters window.
- Edit the checkbox as you would edit text.
Note: Follow these steps if you want to insert a checkbox in Google Docs. If you are looking to make a checklist in Google Docs, I suggest the steps in the next section.
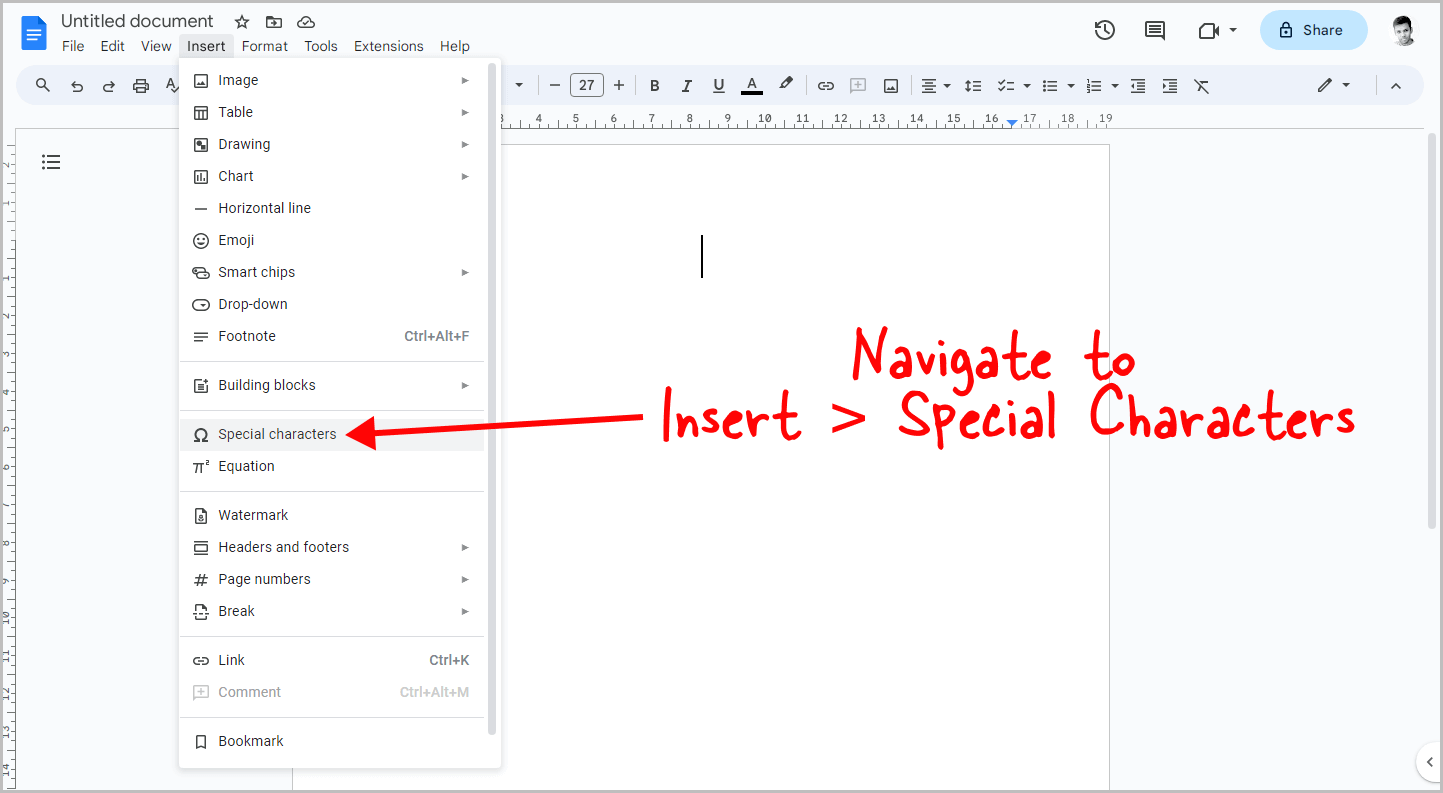
To begin, open the document where you want to insert the checkbox. Now, click on the “Insert” option from the top menu. You will now see a drop-down list; select the “Special characters” option. Google Docs has a cool feature that allows you to insert special characters in your document.
After selecting the “Special characters” option, you will see the “Insert special characters” window. This window is divided into two sections. On the left, you will see the characters, symbols, or icons nicely arranged in the grid. On the right, you’ll see a search box that allows you to search for a specific symbol.
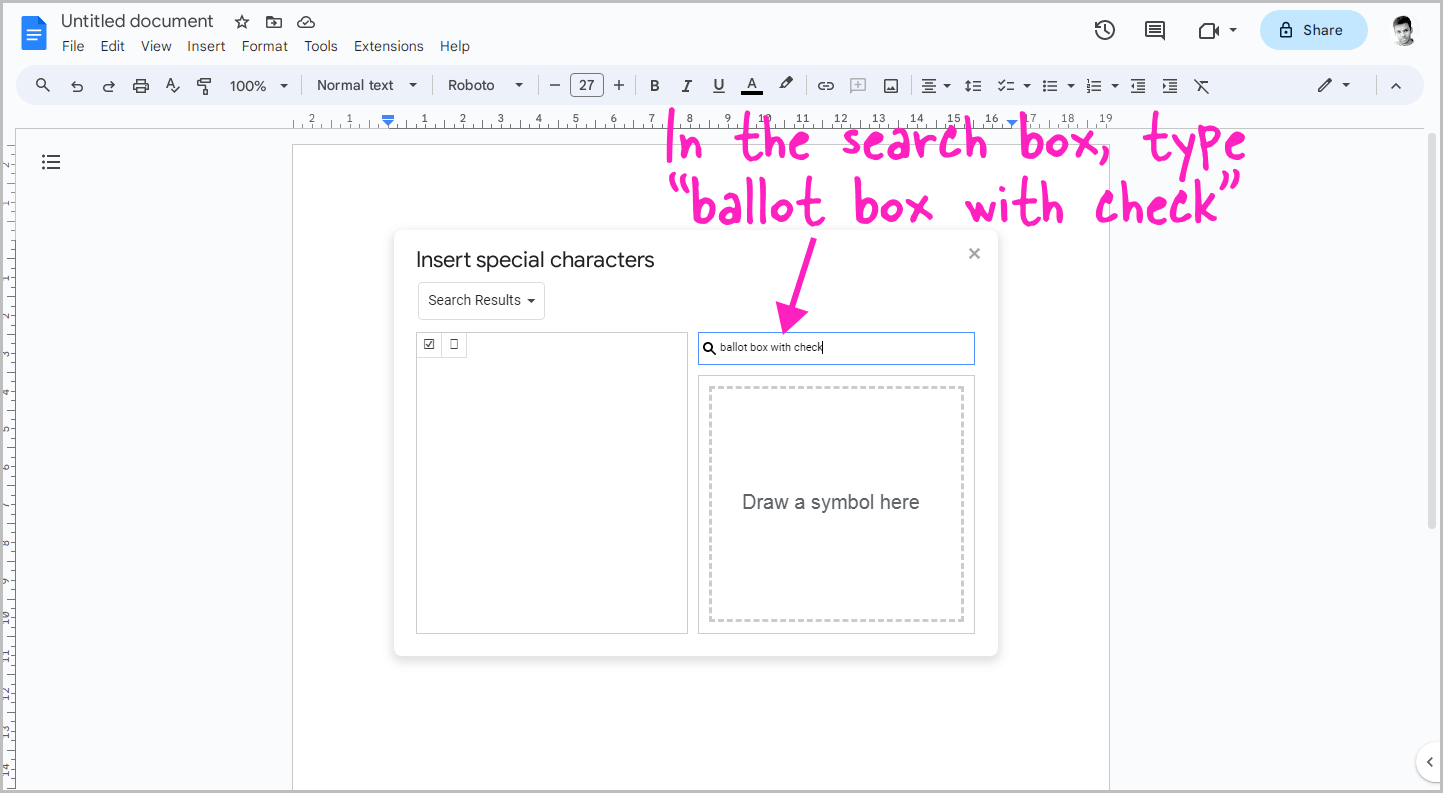
Below the search box, you’ll see a small drawing canvas. You can draw your desired symbol on the drawing canvas. The results will be shown on the left side of the window. Since we want to insert a checkbox, we will type “Ballot box with check” in the search box.
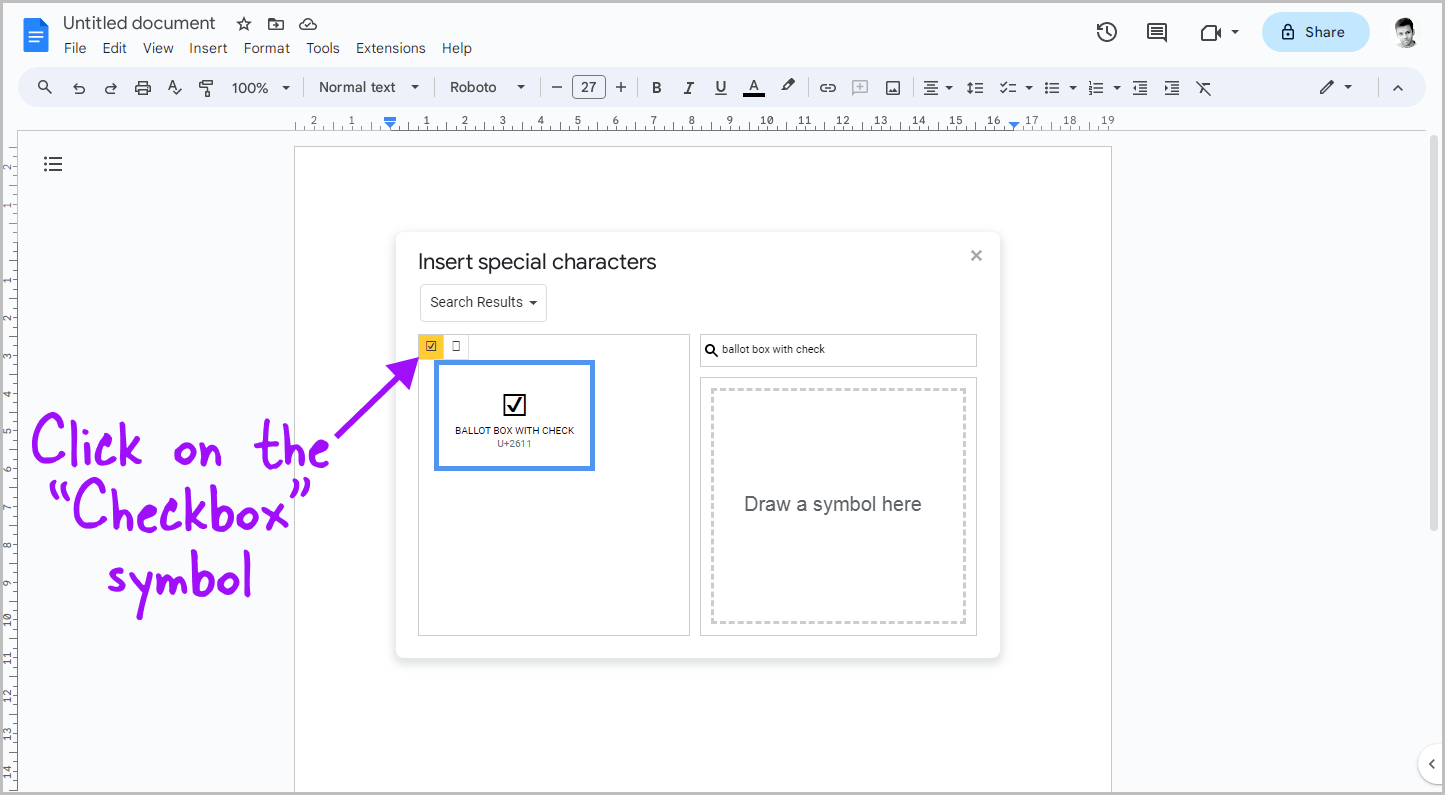
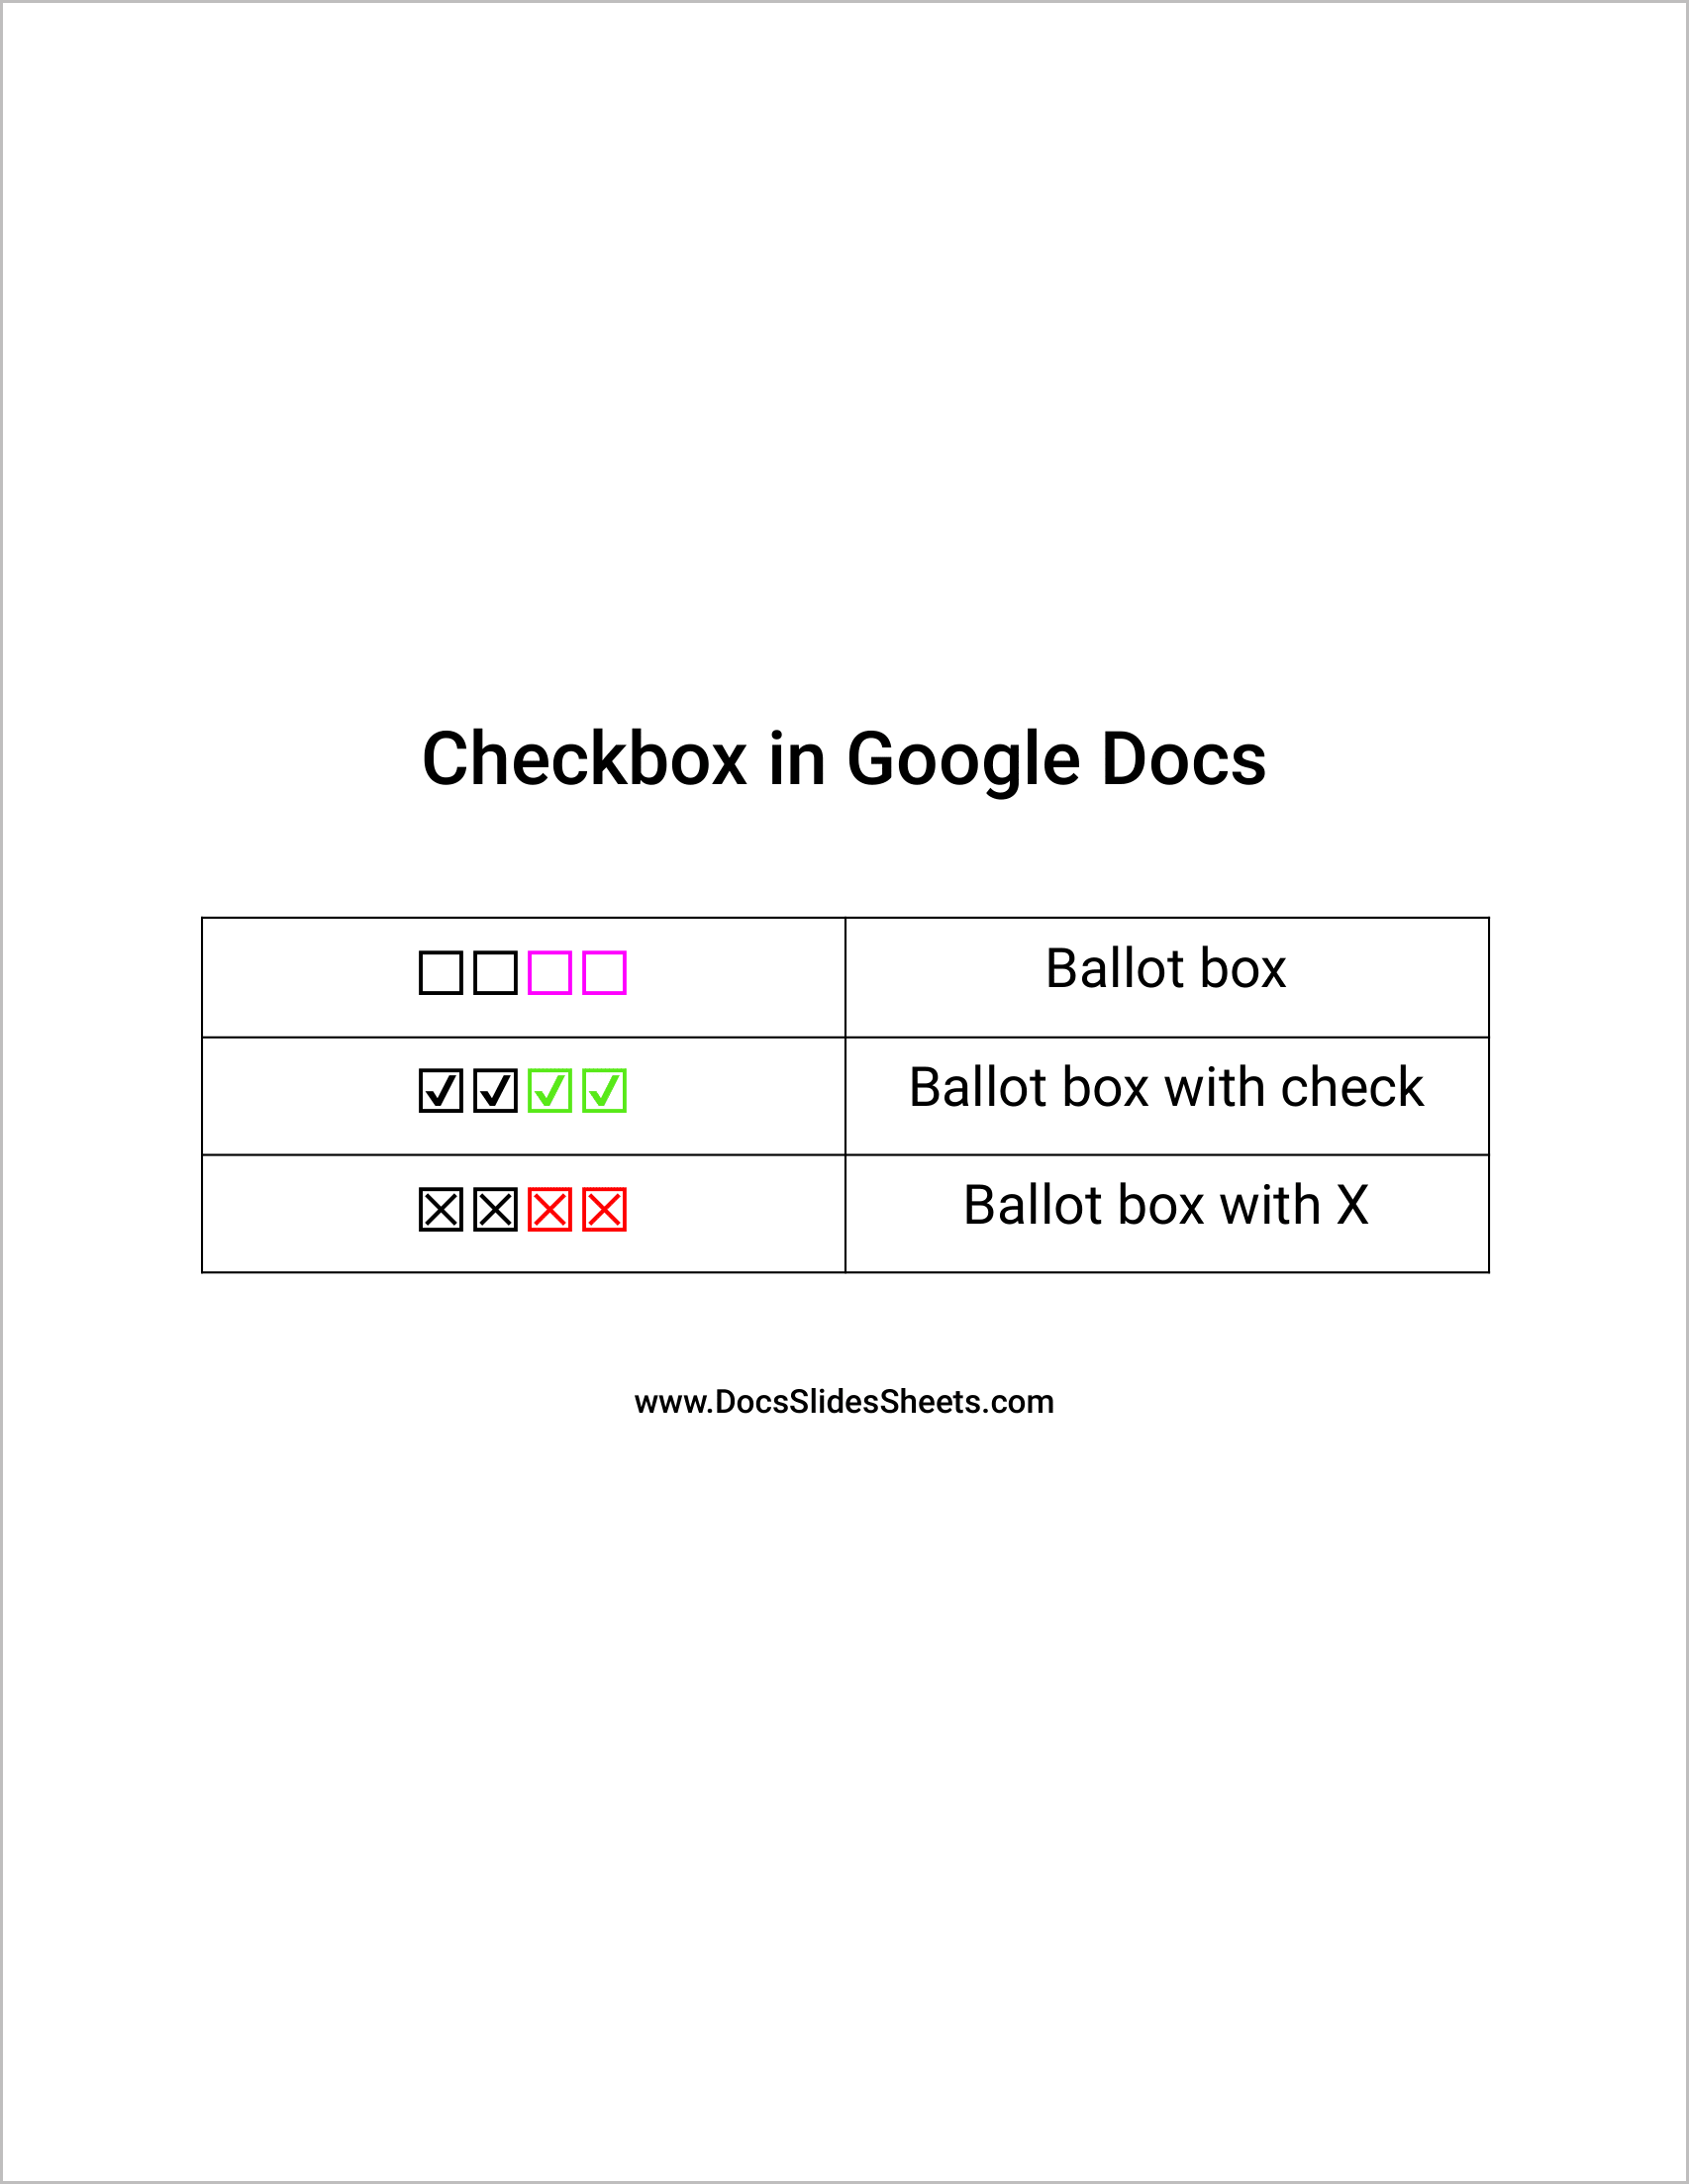
You’ll now see the checkbox symbol on the left side of the window. Simply click on the “checkbox” symbol to insert it in your document. You can also insert an unchecked checkbox; search for “Ballot box,” or if you want to insert a box with an “X” in it, search for “Ballot box with X”.
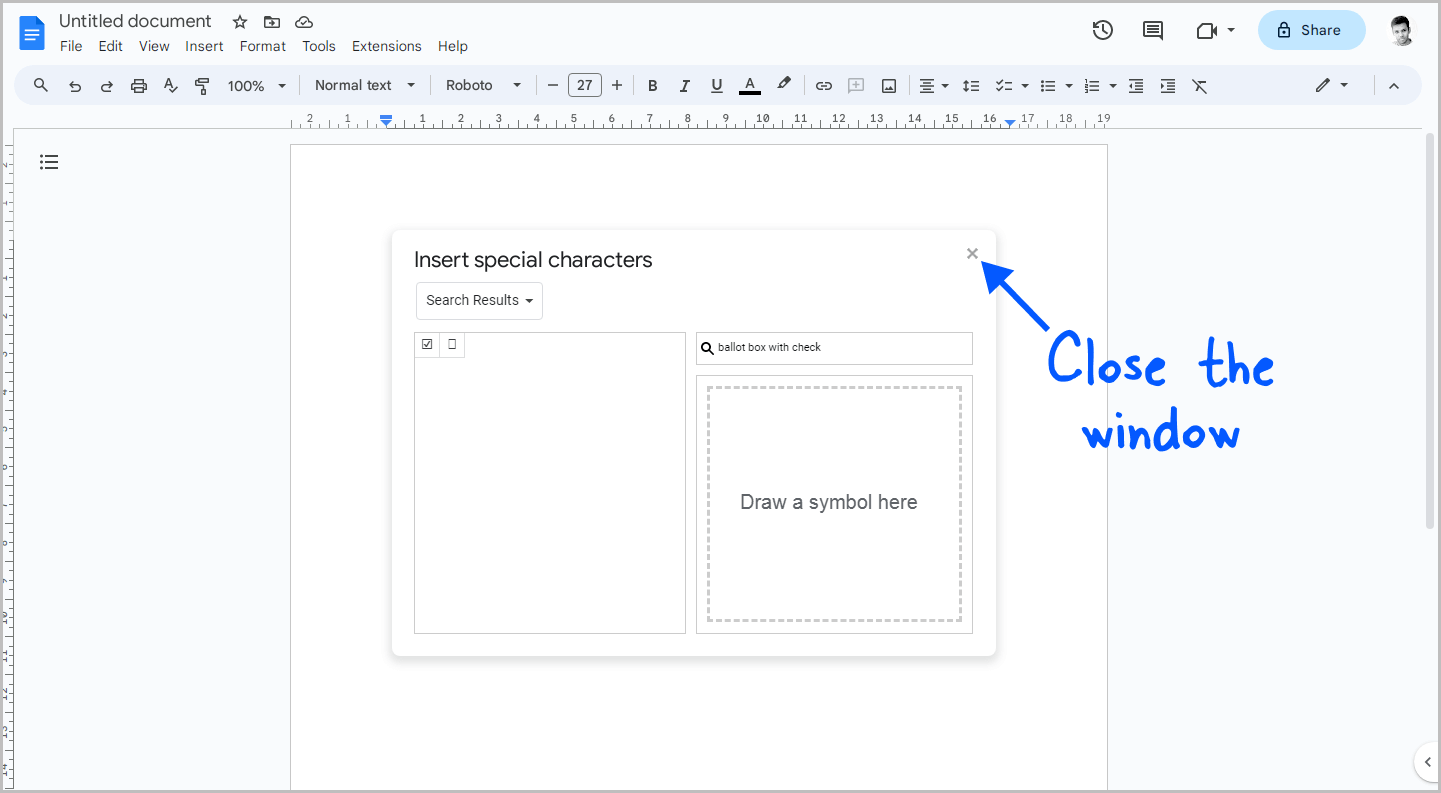
After inserting the checkbox symbol close the “Insert special characters” window.
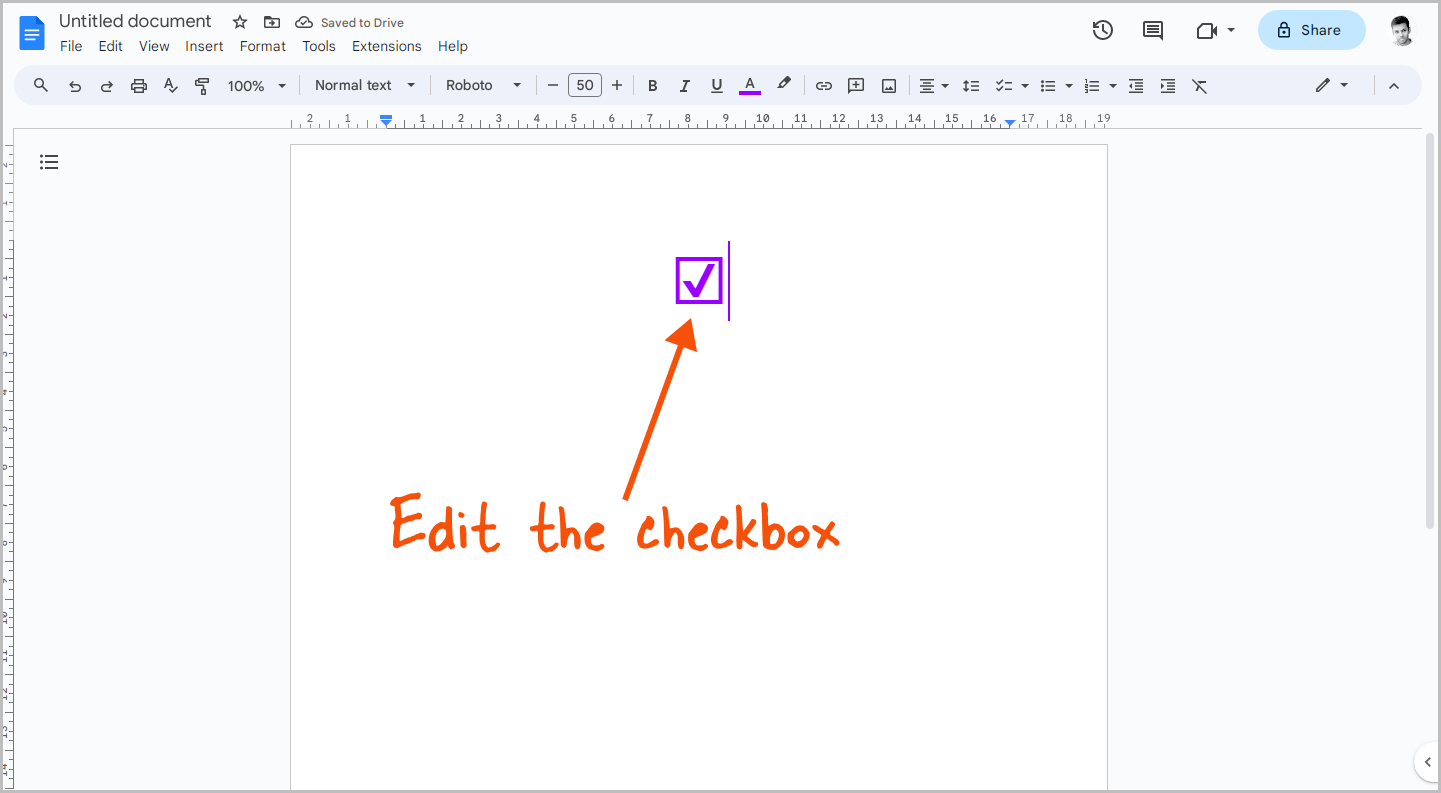
You can edit the checkbox like text.
For example, you can change the color, size, make it bold or italic, or even change the font. If you need to add more checkboxes, you don’t have to follow the steps all over again; simply copy the previously inserted checkbox and paste it.
To make a checklist in Google Docs:
- Click on the down arrow next to the Checklist option.
- Choose your preferred checklist style.
- Type your first task or item next to the initial checkbox.
- Press the Enter key to add more tasks.
- Double-press the Enter key to exit the checklist.
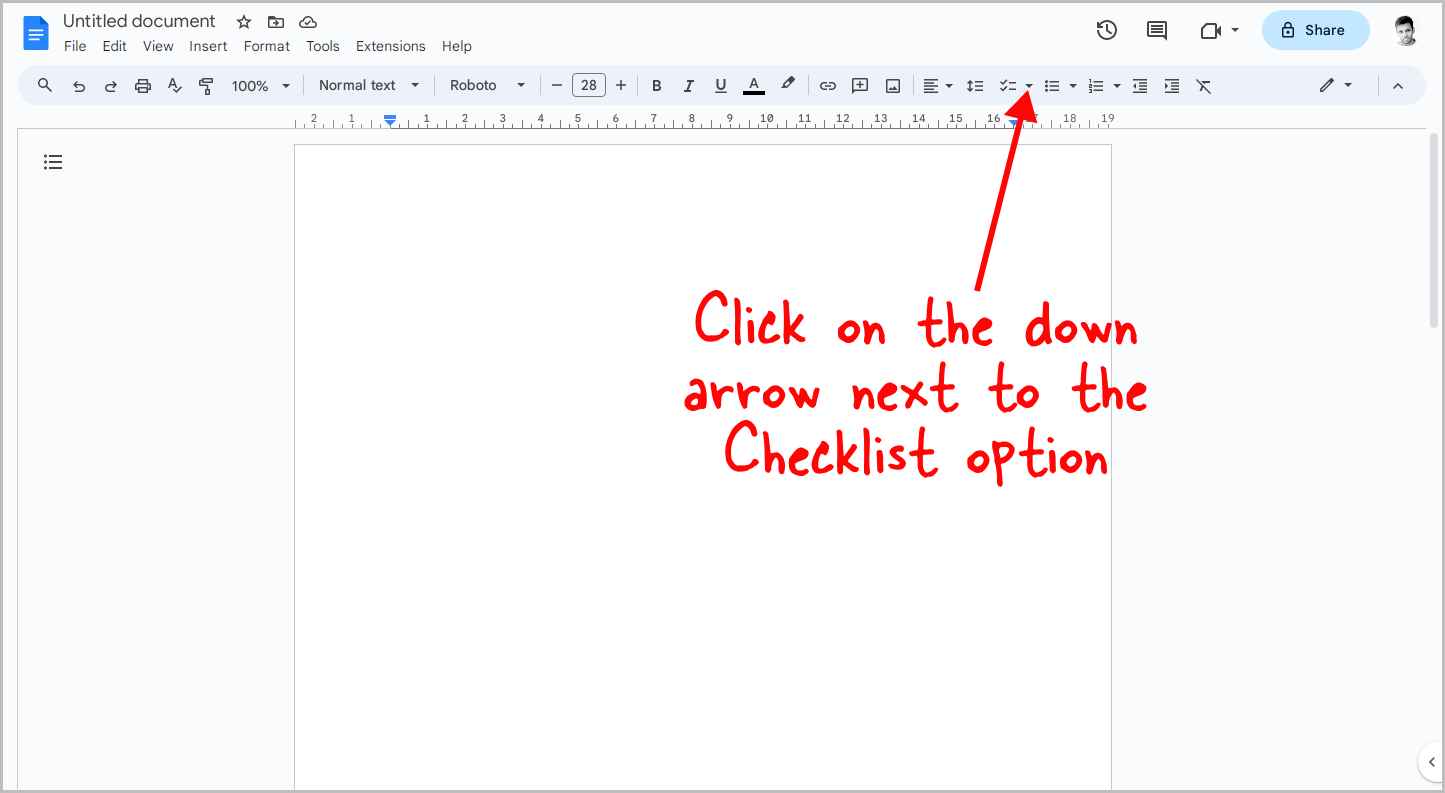
Checklists are easy to create in Google Docs. To begin, click on the down arrow next to the “Checklist” option on the toolbar.
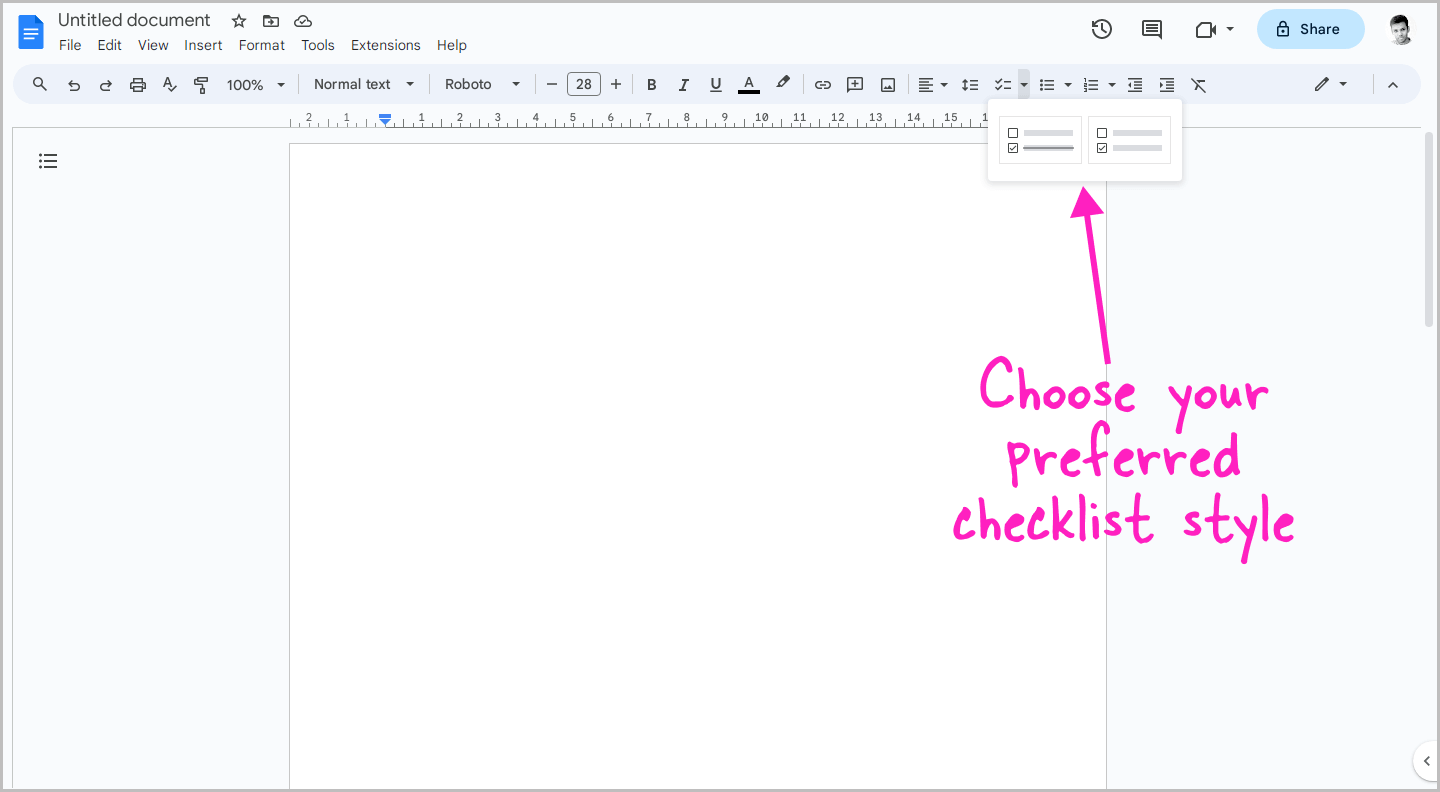
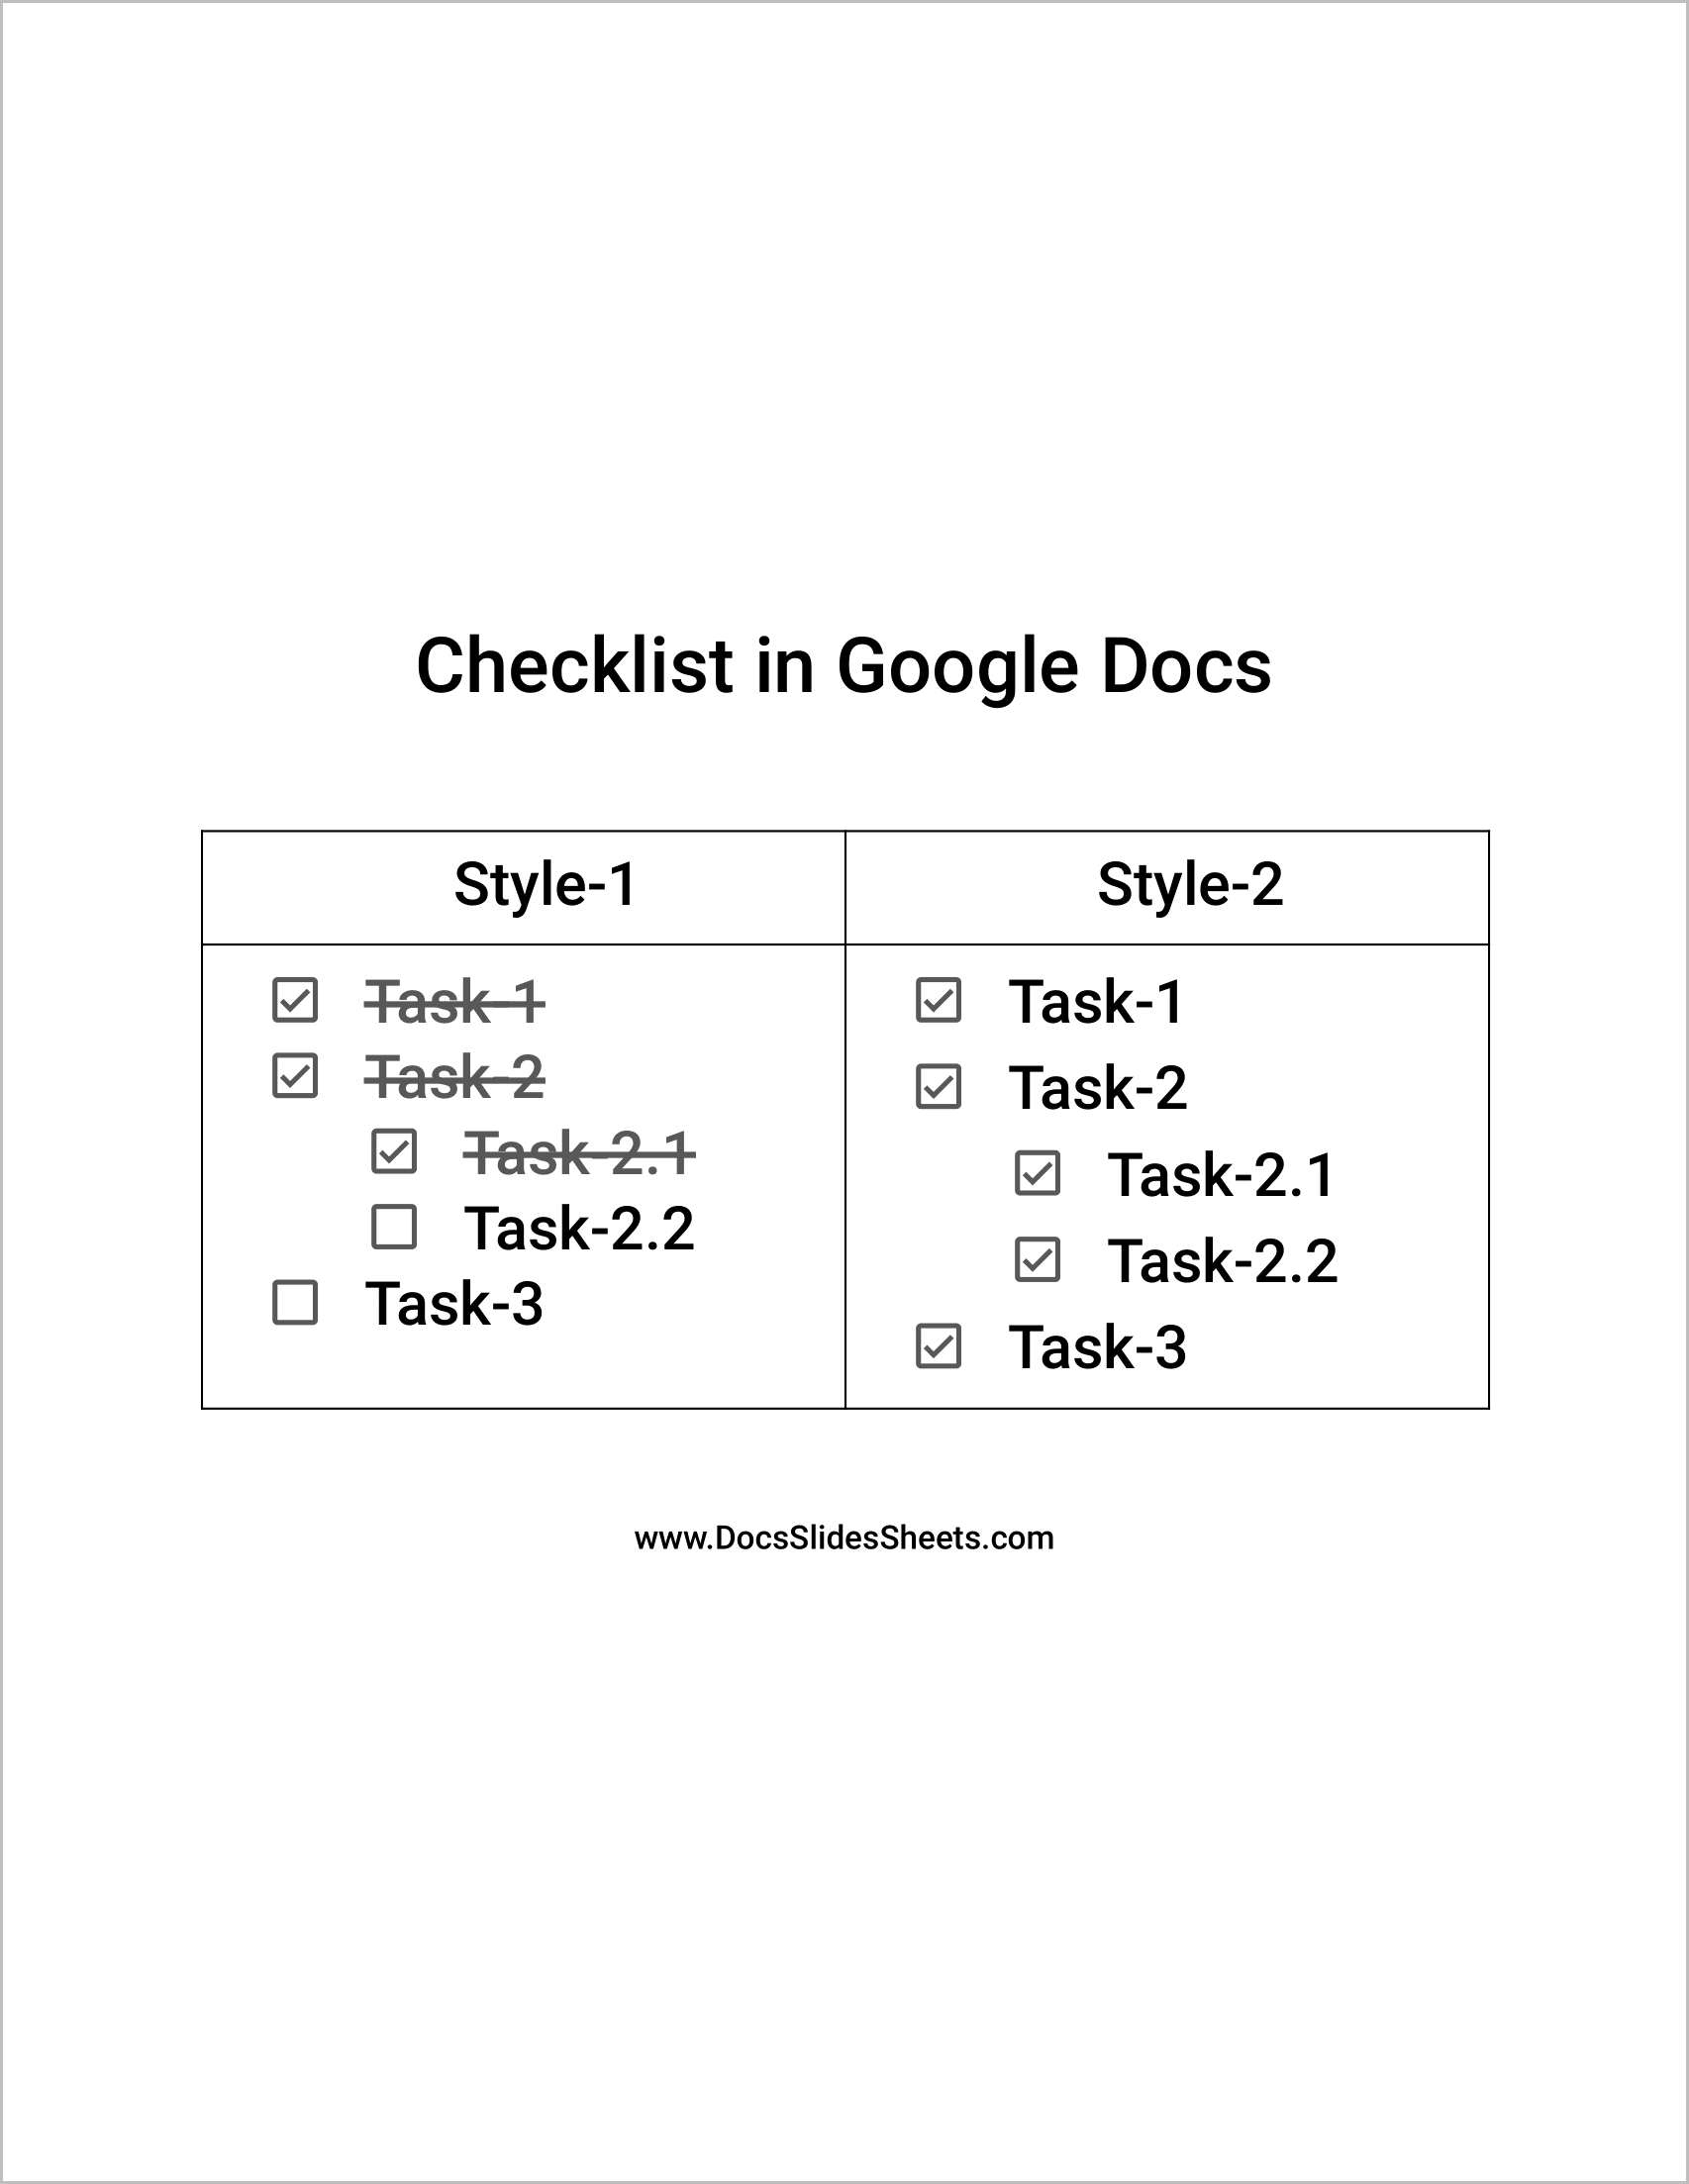
You’ll see two checklist styles: the first one strikes out the task name and puts a check mark in the box, and the second one simply puts the check mark into the box. So select the one you like. I would suggest that if you want to create a task list, go for the strikethrough one.
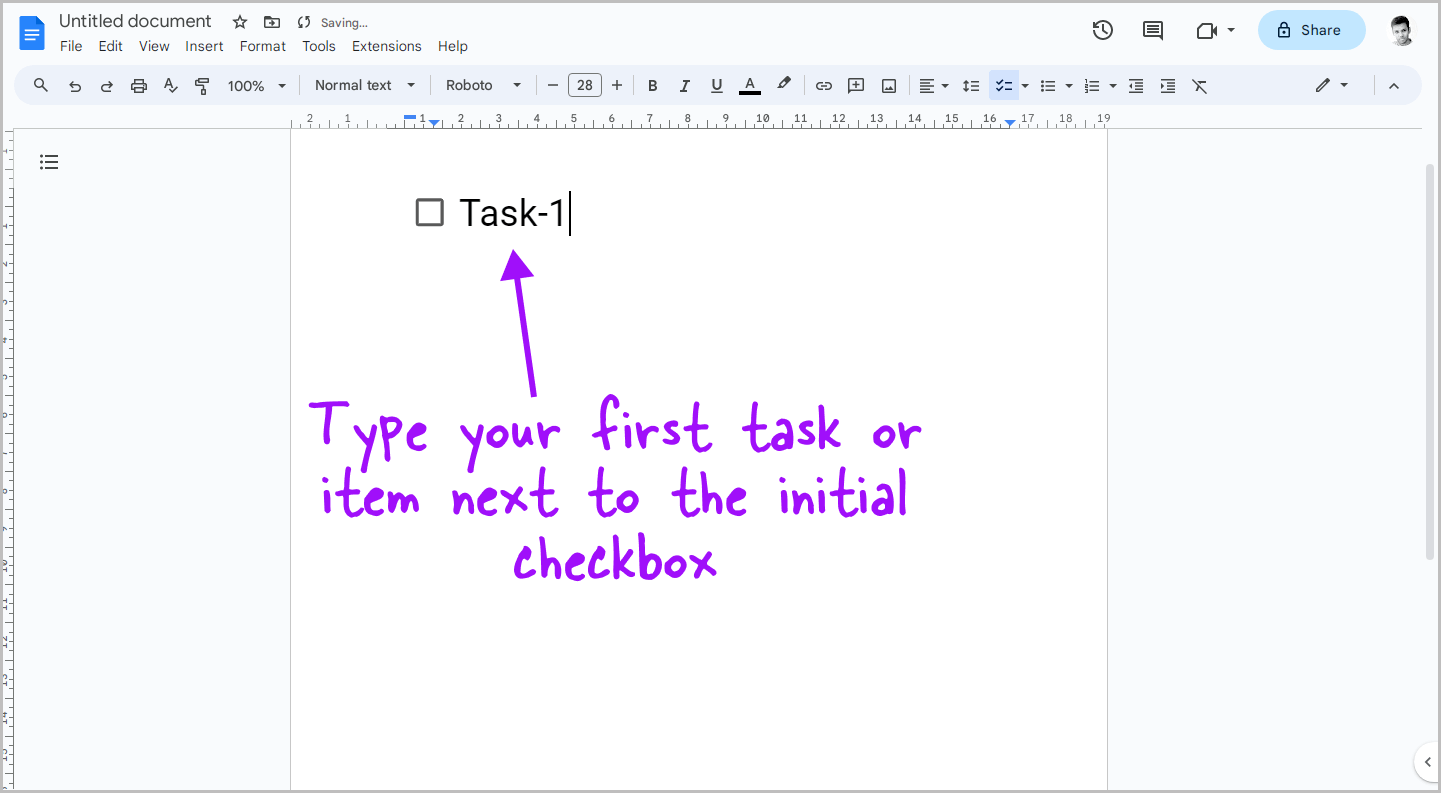
After selecting the checklist, you’ll see a box inserted into the document. Now, add your first task or item to the list.
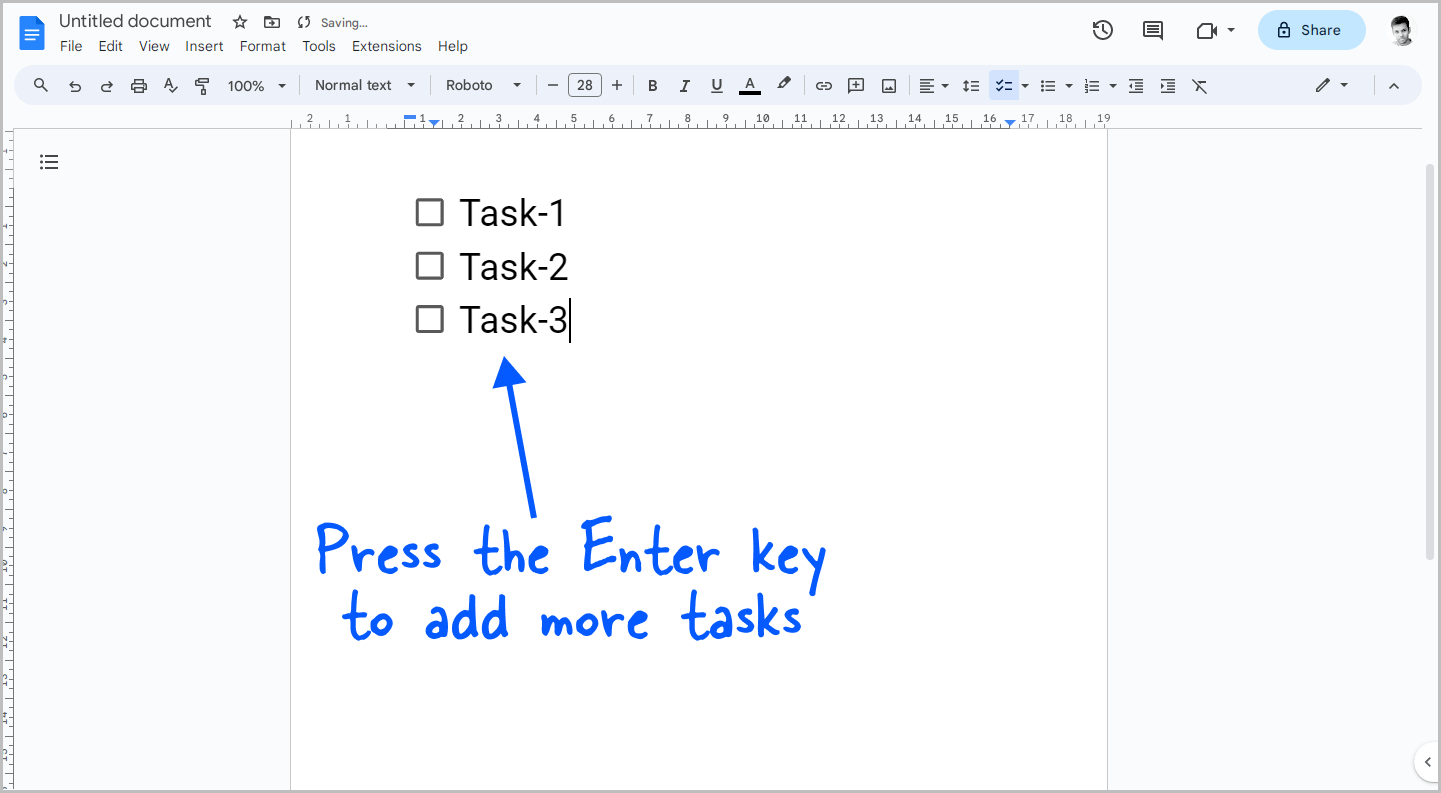
Press Enter to add another task(s).
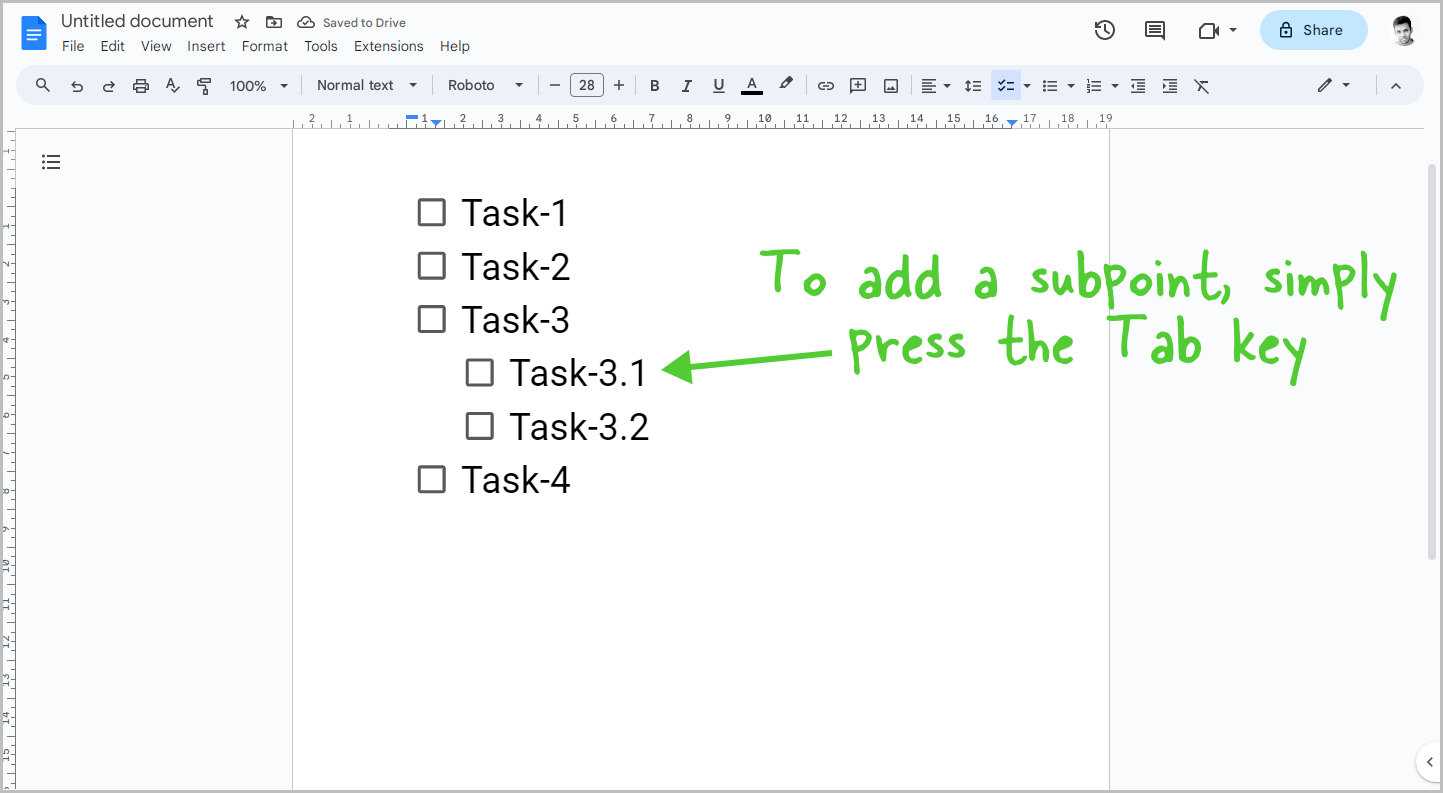
To add a subpoint, simply press the Tab key. Double-press the enter key to exit the sublist and jump to the main checklist.
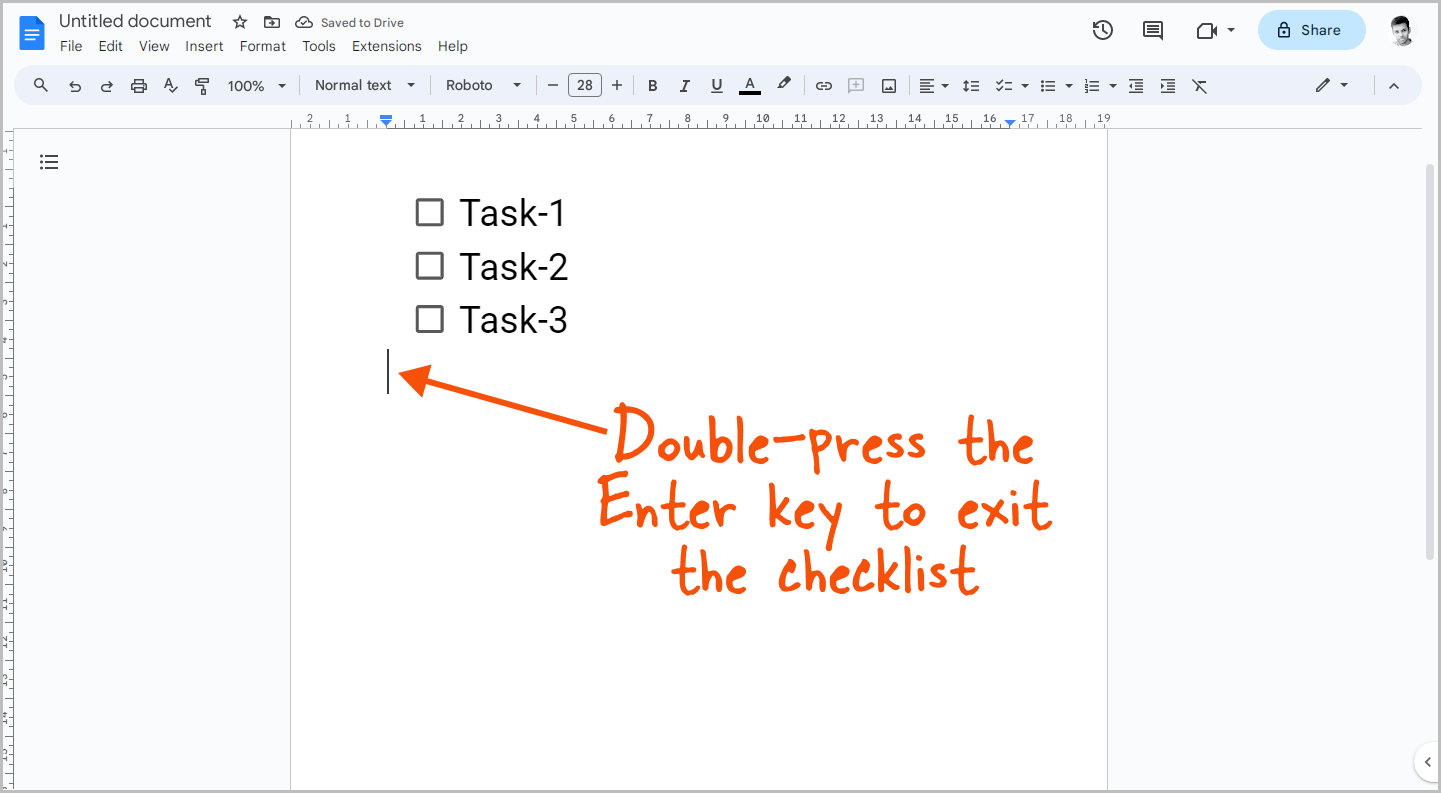
To exit the checklist, simply double-press the Enter key on your keyboard.
You can also convert a bulleted list into a checklist by selecting the bullet list and then clicking on the “Checklist” option from the toolbar.


